Writing A Simple Directory Bruteforcing Tool with 25 Lines of Python
Security researcher Rohan Chavan got bored one day and wrote a simple directory brute force tool using just 25 lines of Python.


The Need to Write This Code
It was a boring friday noon, I was in my college having DSP (Digital Signal Processing) practicals, it was actally a free practical (we get a free practical when the lecturer is not able to attend the lecture). All other mates were chatting and gossiping, some were playing CS on lan, some were just sleeping.

(shhh ..we have installed cs on lot of PCs in our clg)
All were bored because there is no internet in the labs , we aren't given connectivity in the labs until the faculty asks the sysadmin to enable it. Yeah thats rude but we students can't do much about it.
"Can't do much about it? Really?" I asked myself, and started thinking about it. I remembered that different labs have differnet proxy settings, the pc's in library use "something.pac" some other labs use "xyz.pac" but our labs were just set to 'No-Proxy settings'. I changed the proxy to the one with some other proxy, then when I tried to google search, I was prompted by the authentication popup box.
Something like this ...(got this image from gimages, this isnt the actual screenshot)
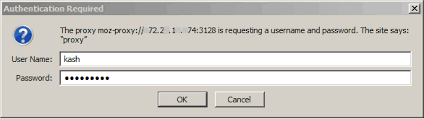
If you see the popup box there is an IP in the popup box, same was in my case. I tried to search the IP in the browser, and it opened up a webpage, the url was something like, "portal.collegename.lan", then I just tried some fuzzing manually. After some time I tried to see whether the proxy configuration files could be downloaded, so I tried "http://portal.collegename.lan/xyz.pac" and I was able to download the proxy configuration (.pac) file. I felt that its prety obvious that if there is one proxy sitting here, there may be more. This is where I thought that I should run a directory bruteforing attack.
I was on ubuntu, there was no internet connectivity, but all the computers and the server hosting the site was on lan, I had an attack surface, so I started writing the code.
Initially I wrote a fuzzer which generated two random alphabets, and I tested it, but it wasn't reliable at all. Then I realized that I could use a dictionary attack, as I had a common.txt wordlist in my owncloud (owncloud was whitelisted in all proxies) I downloaded it first and started again....this is the code.
The Code
For those who don't know python, don't worry it's not that tough and you will understand it easily. I was a skid before, but then I started watching ippsec's youtube videos and DrapsTv (have a look after you read this blog) they helped me understood how to write my own tools, and trust me it helps. Then I started going deep in python, practiced and got proficient in it.
Importing the modules
For this we need two modules, requests and sys.
We need requests to send get requests to the url, and sys to send arguments from the commandline. If you want to take arguments using input() then you dont need this.
import requests
import sys
Taking user input
We need three inputs:
- Url of the target
- The path of wordlist
- Extension of the file (this supports only one extension)
url = sys.argv[1]
wordlist = sys.argv[2]
ext = sys.argv[3]
Using the wordlist
First we need to open the worslist file and extract the words from it, for that.
fo = open(wordlist,"r+")
This opens the file but note that I have used r+ mode here.
HEART of the code
This is the most important part of the code, it is a simple for loop
which does the following things :
1. It starts at index 0 and runs till the given range (1000), now you can calculate the lines of wordlist and give it as range. You can do it like num_lines = sum(1 for line in fo) and in range give num_lines
2. For each index (i) it will take the word from the wordlist that is at line number (i) and store it in variable **word**
3. generate a url: since we have the url, the test_word, and the extension, it will simply concatinate those three things. If you are taking input using input() make sure you convert it into a string or you might get errors later.
When you concate all the three things, you will get something like:
http://test_url/test_word_from_wordlist.extension we will store it in variable surl.
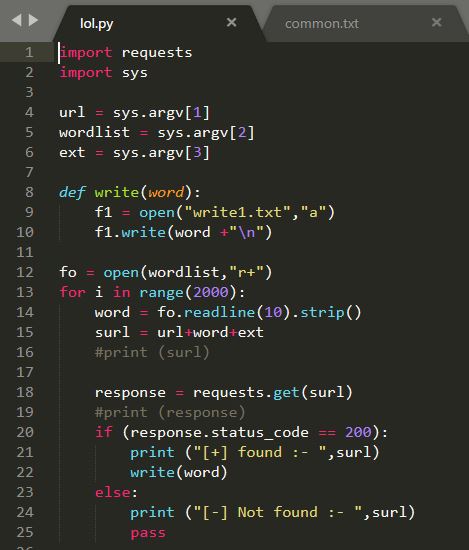
4. Test the url: This will send a get request to the url we just made, if the response code is 200, it means the page document exists, then it will call another function that will write all names in other text file
else we ignore all other response codes, as they make false positives.
the code snippet below shows it :-
for i in range(2000):
word = fo.readline(10).strip()
surl = url+word+ext
response = requests.get(surl)
if (response.status_code == 200):
print ("[+] found :- ",surl)
write(word)
else:
print ("[-] Not found :- ",surl)
pass
** Saving the results **
If you have seen the above code, in the third line of the if statement we are passing the parameter word to the function write(),
write() is a simple function which will open another text file and write all the found words. You can save the url directly, just instead of word, write surl and it will write the url of all the things found.
def write(word):
f1 = open("write1.txt","a")
f1.write(word +"\n")
Thats it!!
Feel free to copy paste the code from my Github, here.
Executing the code,
you can run the code by simply navigating to the folder and write:
python http://url/ path_of_wordlist extension
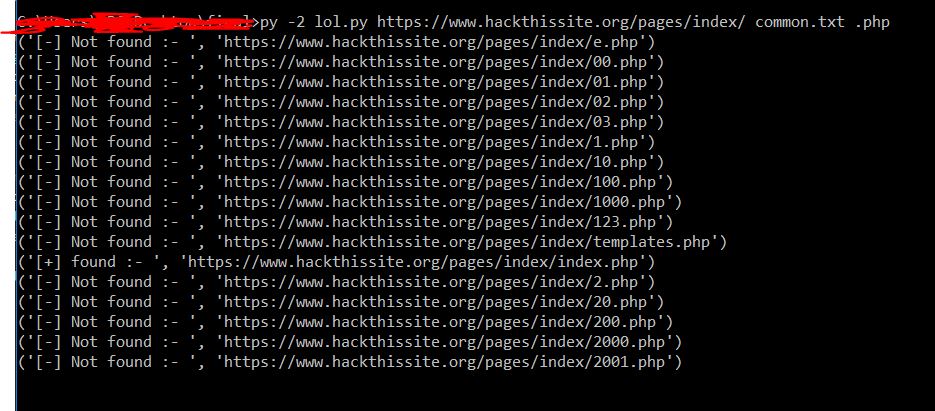
I executed the code and found the proxy settings for sysadmin himself, now I had internet access in the lab and was chilling.
About Me
My name is Rohan Chavan, I am 20 years old and currently studying Computer Engineering. Sometimes I work as a freelancer webdevloper but I spent most of my time on hackthebox.eu, finding bugs, and writing my own hacking tools in python and shell.
I am looking for a internship in any infosec company, if you are hiring I would love to speak with you.
You can get in touch with me - here on Twitter.
Thanks for reading!
Main Image Credit : The awesome piece of artwork used to head this article is called 'Python Machine Learning' and it was created by graphic designer Maggie Appleton.