How To Technically Deal With An Intrusion On A Windows System
It's late in the evening, you're getting ready to sleep when your phone rings, it's one of your relatives, "I think someone hacked into my computer, I need help". What's your next move?

It's late in the evening, you're getting ready to sleep when your phone rings, it's one of your relatives, "I think someone hacked into my computer, I need help". What's your next move? In this article we will discuss the best and most secure way to respond to an intrusion and remediate it on a Windows machine.
First of all, what should they do?
What should you tell the person on the other end of the phone?
If it is not absolutely essential for the victim to have keep this machine turned on, they must power it off. You'll want to prevent attackers from going any further and if you're lucky enough you might even not give them enough time to cover all of their tracks. They should also make sure that the machine is properly disconnected from any wired network. If someone configured Wake On Lan on this machine, an attacker might be able to turn it back on, even across the WAN. It would also be safe to remove any peripheral connected to the potentially compromised host.
What should you do?
Now that the machine is out of a potential attacker's reach, what should you do?
A) CONTAINMENT - Keep the machine's data safe
1- Make an exact image of the disk(s)
If you want to investigate the issue, you'll have to go through the compromised machine's files. But you can't turn the machine on or boot from its drive on another machine, you'd risk to alter useful evidence (logs, events, flags, timestamps, registries [...]). What you can do though is do a full clone the victim's hard-drive.
It is important to emphasize on the full aspect of the clone you're going to make. As you might now, unmapped disk or partition sectors aren't necessarily empty. This seemingly unused space might still contain files, temporary data, even full partitions that you definitely don't want to lose!
The best way to copy a drive prior to forensic investigation is to copy all of its sectors to an image file on another device. The point of cloning the drive onto a disk image instead of cloning it to another similar physical drive is that it will allow you to move, mount and verify your copy's integrity much more easily and lessen the chances of accidental data corruption.
There are many tools available for such an operation, of all of the free ones available I would recommend these ones :
OSFClone, which seems to be at that time the most easy to use, reliable Open Source and free (as in free beer) solution. It is available as a bootable ISO (which makes is easy to use even if you don't have your own machine with you), it wraps tools based on the GNU/Linux dd utility and provides a very convenient level of error logging. It also allows for creation of AFF files and includes SHA1 and MD5 hashing for integrity verification.
Dc3dd, which is a free (as in freedom) patched version of dd adding several features for a computer forensics usage. It's a command-line tool available on GNU/Linux systems, MacOS via brew and Windows via Cygwin, supporting MD5, SHA-1, SHA-256, and SHA-512 hashing and providing an enhanced log management compared to dd alone.
Dd, if you're confortable with it. It's free (as in freedom) software, probably installed on your UNIX-like system, very reliable and actively maintained. As far as I know it doesn't include integrity verification (you'll have to do it yourself) and might not log I/O errors that could be useful, but at the end of the day it's still one of the best full-disk cloning solutions.
Please note I chose not to cover software that doesn't seem actively maintained, isn't Open Source or that isn't free of charge.
Caution : Do not use CloneZilla, Macrium, Paragon and other "classic" disk utilities, you might lose useful data and void evidence. Also a piece of advice: always triple check the order of your "of" and "if" parameters when using dd!
2- Keep a strict chain of custody
As someone who's not a lawyer or has a broad legal knowledge, this is probably the trickiest part. If you want the potential evidence you're dealing with to be usable in court or by a forensic investigator you absolutely must keep an authentic chain of custody. A chain of custody is a precise record keeping track of all of the events regarding the evidence you gathered, it should describe exactly the evidence itself as well as when, where, why, how and by whom it has been collected, analyzed, transported and protected.
It can be a physical or digital documentation and should include as many photographies, precise descriptions, screenshots, hashes as you can. According to the documents I've read, it does not seem that you can include "too much" material, worst case scenario you might add irrelevant information which will be disregarded, so be exhaustive. Here is a general skeleton of the information your digital chain of custody can contain :
- Identity of the reporter (you), you may include relevant information about your relationship with the victim.
- Exhaustive description of the evidence (is it an online account, a machine, hard drive or file? What does it looks like, what are its hashes, serial numbers or unique identifiers? Does it have markings, scratches or anything visibly identifiable? Which operating system and software are installed?) which should include photographies taken from different perspectives.
- The reasons and conditions for which you came into possession of said evidence and the exact time and location you gathered it.
- If the evidence had to be transferred to another location, even if you're just moving it from a drawer to another one, you must keep tracks of what, when, why, by who, where and how the transfer was achieved.
- When, where, why and how did you analyze the evidence and what is the conclusion to each analysis.
- How did you ensure the safety of the evidence? Where was it stored? Who possibly had access to it and why?
If you have to keep a physical evidence with you, you should seal it if you won't need to work with it anymore. A hermetic anti-static or ziplock bag can be used in combination with strong tape to package evidence. You can then write the date it has been sealed on the package and sign it.
Disclaimer: I cannot empathize this enough, I am not a lawyer and if you are reading this document, chances are that you aren't either. You have to seek legal support from a professional if you are handling potential evidence and aren't trained to handle this type of computer evidence. You should also note that laws concerning digital evidence might vary regarding the state, country or city you're living in. This is a non-exhaustive and non-authoritative guide which cannot be treated as a substitute for legal guidelines.
B- IDENTIFICATION - Understand the intrusion and its scope
1- Non-digital assessment
Before you try to reconstitute the intrusion that occurred using digital means, it is important to get as much information as you can on the events from the victim and all of the people that witnessed the event.
A good rule of thumb, regarding any task related to information security, is to write everything down. You never know when it might be useful.
Here's an example checklist of the points you'll want to cover to understand and report an intrusion on a machine :
- Who first observed the issue?
- What has been observed?
- When did it occur?
- What kind of information is on the compromised machine?
- What impact might an intrusion have on the victim and its employer/company?
Another important thing to know is if there are any backups of the data contained on the machine. It might come in handy if you need to reinstall the whole operating system or change the machine's hard drive at some point.
2- Forensic Investigation
If you have the required set of skills, you can now start the forensic analysis of the data you gathered.
Forensic computer analyst is a profession in its own right and I would highly recommend you work with a qualified professional if you aren't properly trained for this task. But if it isn't an option for you, we'll go through a few things you can do to investigate a Windows host.
First of all, you'll need to mount the image you made earlier. You can use the mount utility on a UNIX-like OS :
#> mount -t vfat -o loop,ro,noexec windows.dd /mnt/
For more exhaustive mounting options and configurations, you can check the Forensics Wiki which is full of very useful helpers.
The two most important flags here are ro and noexec. Ro means Read-Only, which will prevent you from altering your image and noexec will prevent you from being able to run any executable from the mounted filesystem, so that if it contains malware it will be much less likely to spread to your own machine.
Here's a non-exhaustive list of the different places you can gather useful information from :
- Windows Events
Windows events are in my opinion a great way to start searching for intrusion traces.
They are located in %SystemRoot%/System32/winevt/Logs and are stored as evtx files.
A convenient way to read and work with an evtx file is to use parse-evtx, which is developed by Kaspersky Lab. You can use it to create CSV-compatible rows from the data contained in your Windows logfiles.
#> parse-evtx /mnt/Windows/System32/winevt/Logs/Security.evtx > Security.evtx.parsed.csv
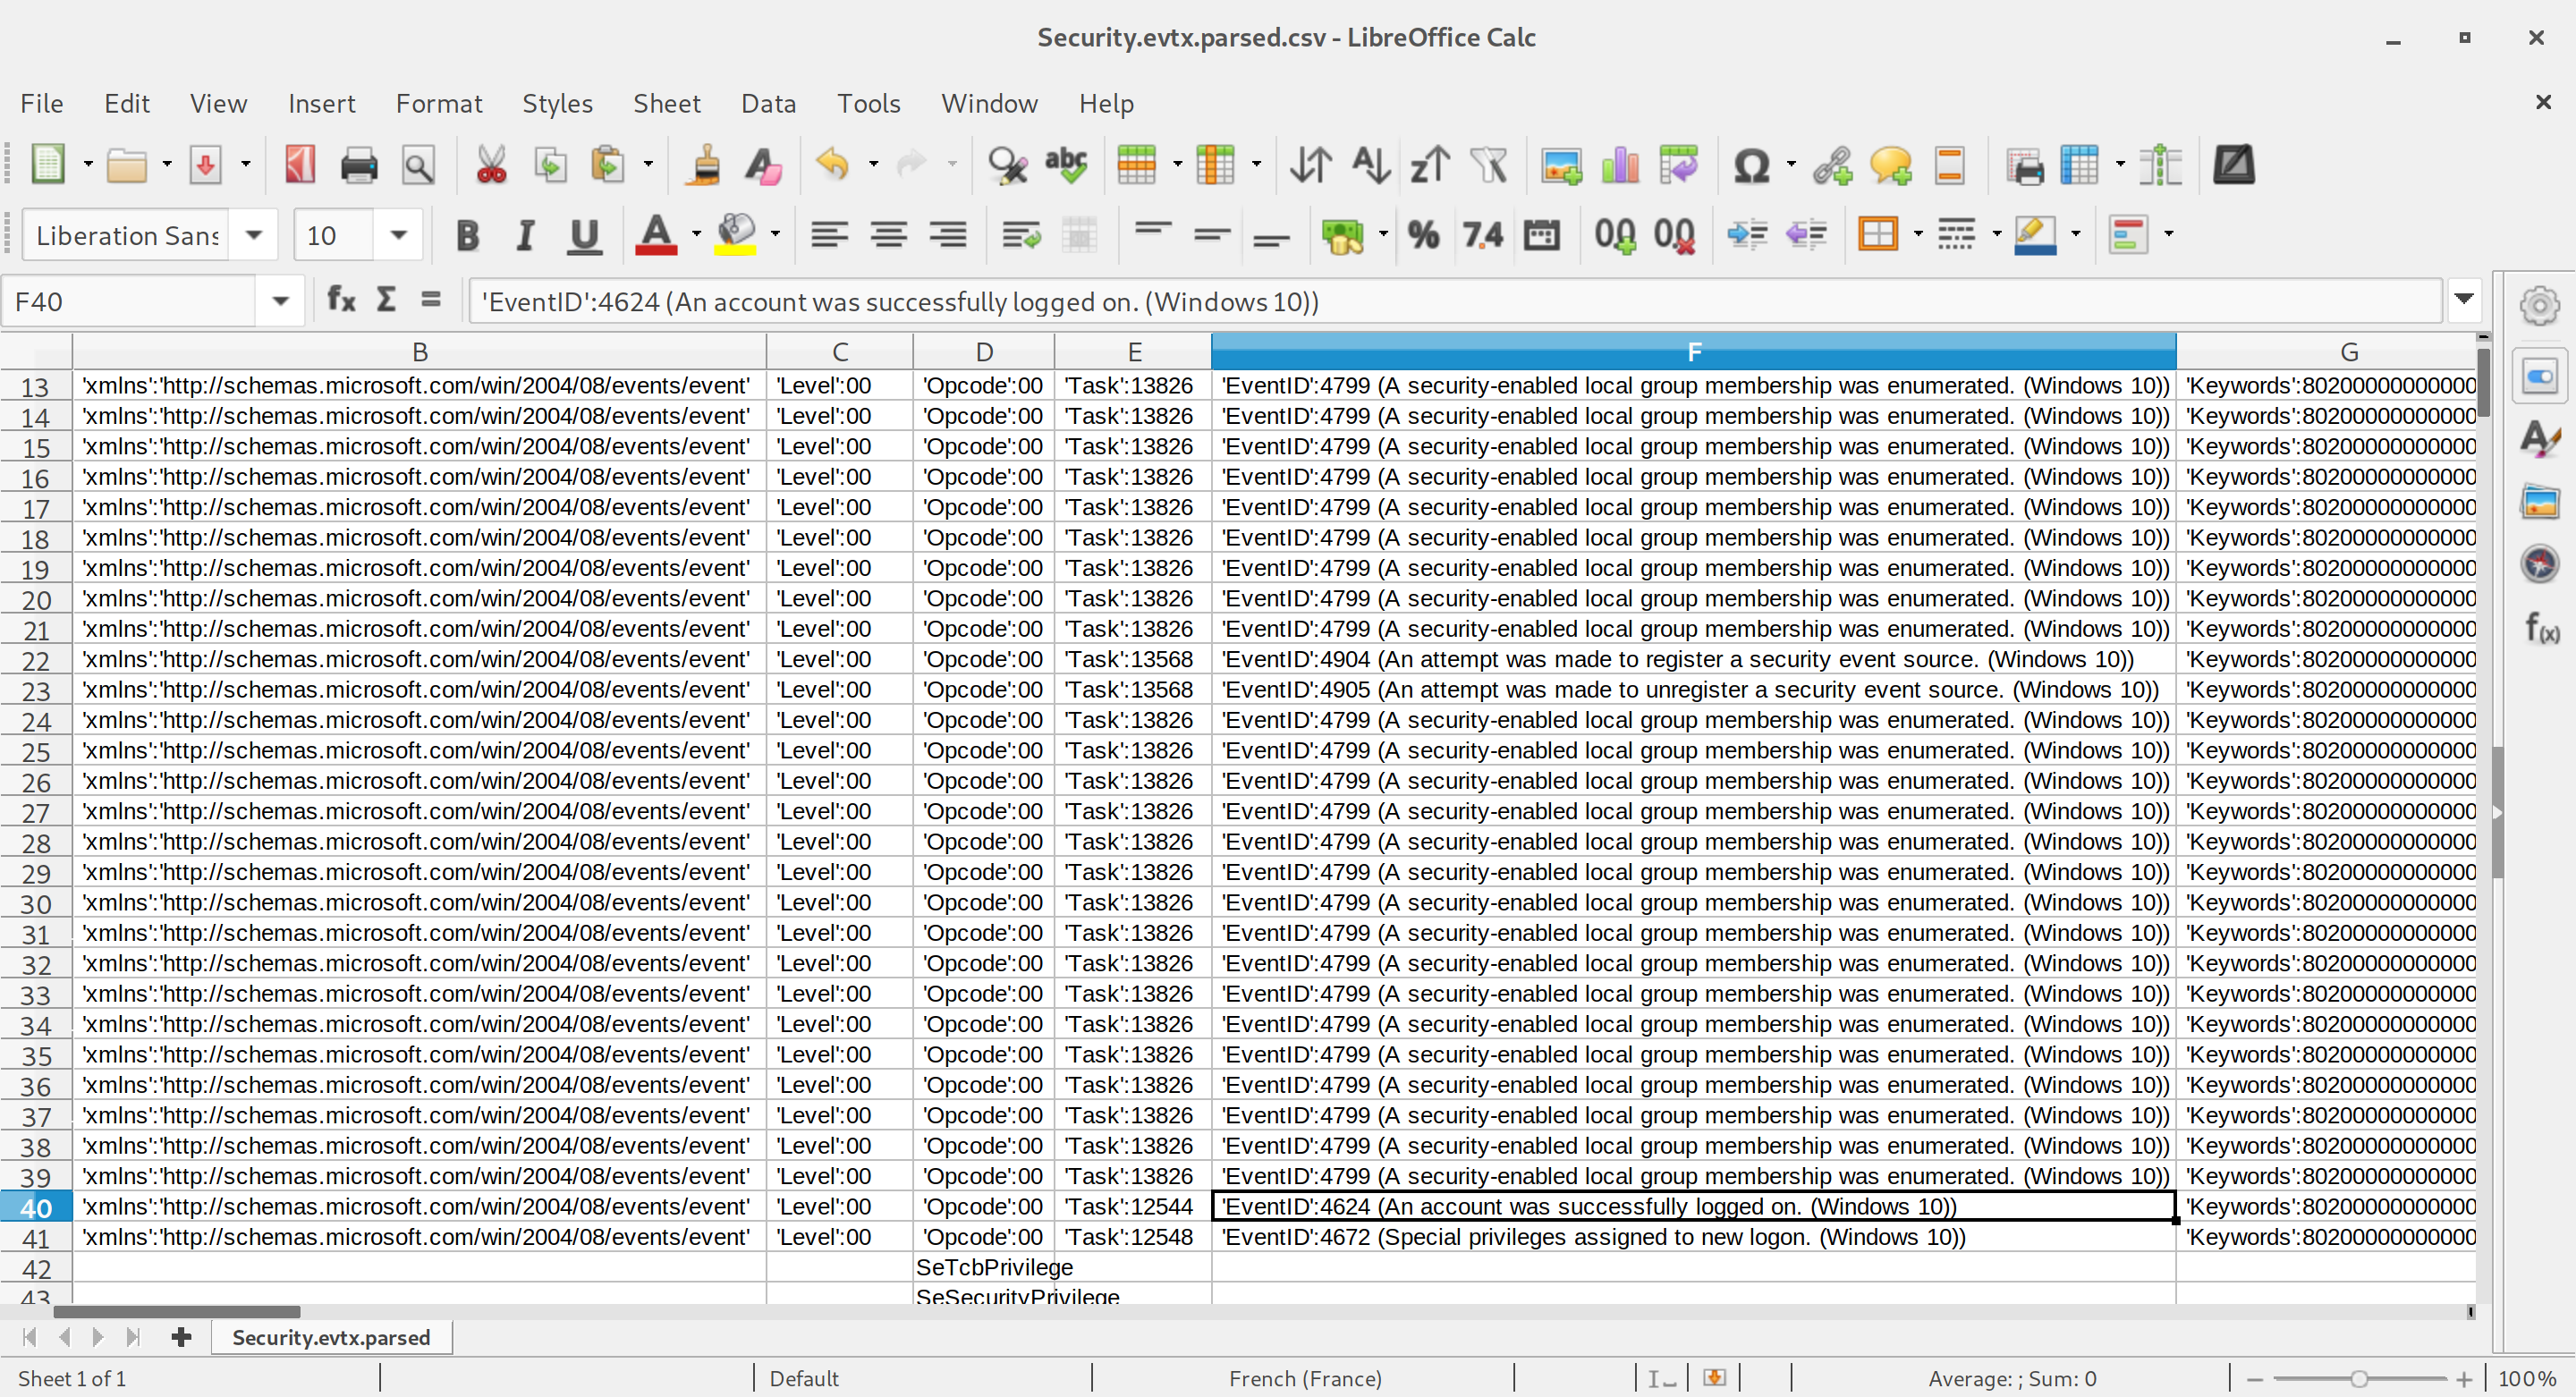
The most interesting event IDs in the Security logfile when you're looking for an intruder are 4624 (An account was successfully logged on), 528 (Successful Logon), 540 (Successful Network Logon), 672 (Authentication Ticket Granted) and 673 (Service Ticket Granted).
Depending on the Windows version you're working with, some of these eventIDs might not be available. A more exhaustive list of helpful Windows events is available on ultimatewindowssecurity.com.
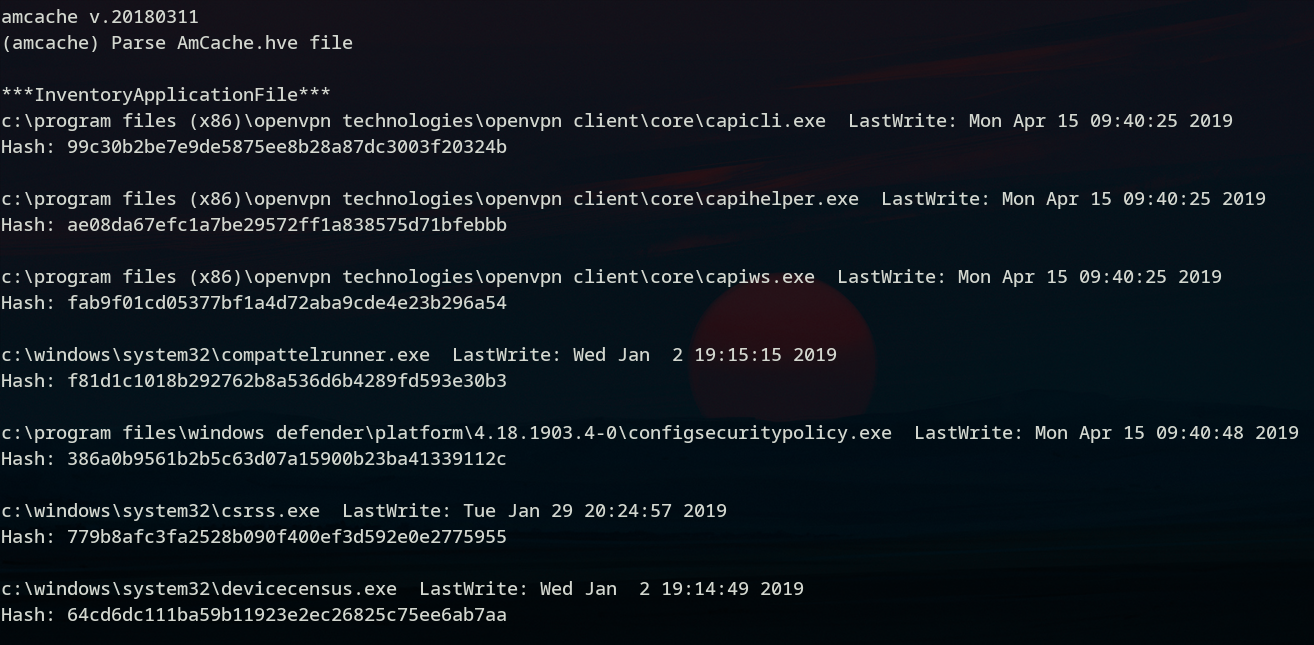
- Amcache
Since Windows 8, a registry file named Amcache.hve is keeping tracks of programs execution. It is located in C:\Windows\AppCompat\Programs\Amcache.hve on windows 8 and C:\Windows\appcompat\Programs\Amcache.hve on recent Windows 10 hosts and can be analysed either on a Windows, MacOS or GNU/Linux host using regripper's amcache module :
#> regripper -r Amcache.hve -p amcache
The output will display the latest executables run on the Windows machine with their last execution time and their SHA-1 hash (which is handy if you want to compare with known malware signatures).
- Browsers History
Most of a browser's data will reside in profile files created automatically in C:\Users\{Username}.
For instance Google Chrome's default profile data is located in C:\Users\{Username}\AppData\Google\Chrome\User Data\Default. Which is a directory containing all of the user's information as SQLite3 databases (History, Cookies, Login Data, Login Data Journal for the most useful ones).
Firefox's profiles are located in C:\Users\{Username}\Application Data\Mozilla\Firefox\Profiles. Each profile contains a places.sqlite file keeping tracks of all of the user's bookmarks, downloads and history.
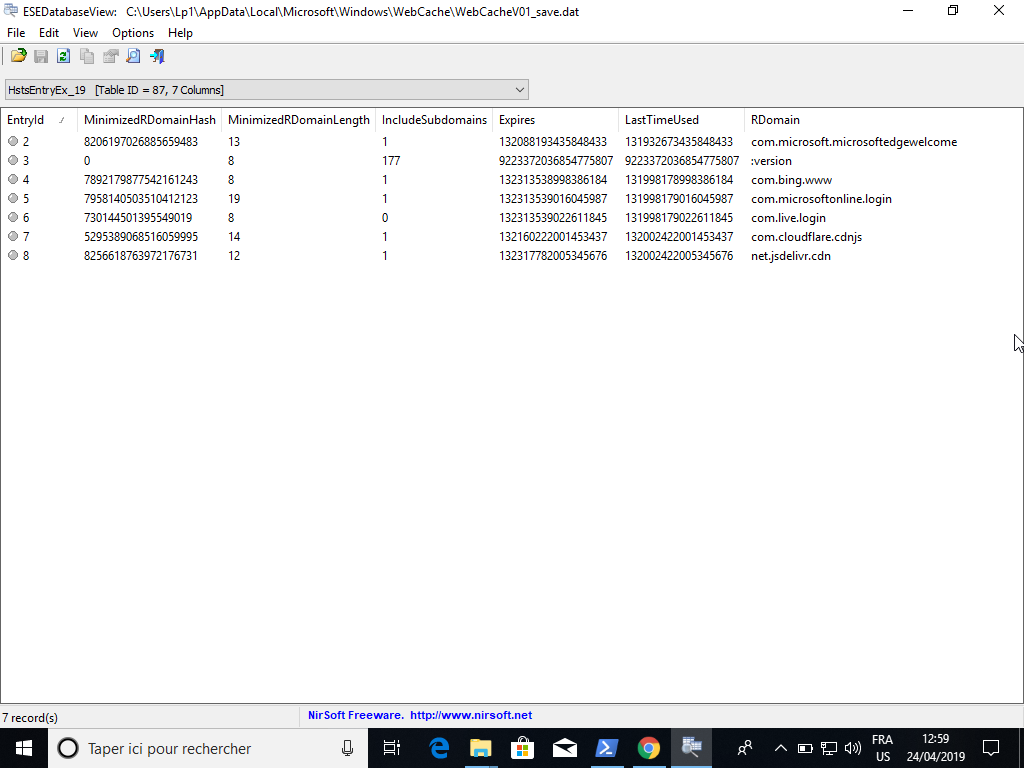
For Microsoft Edge's history, you'll have to go though C:\Users\{Username}\AppData\Microsoft\Windows\WebCache. In this directory is an Extensible Storage Engine (ESE) database file containing Internet Explorer and Edge's browsing history named WebCacheV01.dat. The only tool to open an ESE database is ESE Database View (close-source, developped by NirSoft), which is only available for Windows at the moment.
If this isn't enough information for you to be able to determine whether and how an intrusion occurred, you can check Windows's networking history, the drive's deleted files or if you're looking for something more specific, chances are that the ForensicsWiki will help you out.
C- REPORTING - Give your audience all the necessary information
Now that your analysis is done, there is an important part of the investigation left to do; the report. Depending on your report's audience, it may include:
- Your identity
- The start and end date of your analysis
- The description of the items analyzed, including their IDs, make and serial numbers if applicable
- A description of your analysis process, which may include the analysis steps and screenshots you've taken
- The results you've obtained
- Your conclusion
You can add anything that might be relevant regarding your analysis and its results and then sign your report.
Resources used for this article:
https://www.osforensics.com/tools/create-disk-images.html
https://forensicswiki.org/wiki/Dc3dd
https://www.osforensics.com/tools/create-disk-images.html
https://www.sans.org/reading-room/whitepapers/incident/overview-disk-imaging-tool-computer-forensics-643
https://forensicswiki.org/wiki/Dc3dd
Keeping a chain of custody :
https://www.researchgate.net/publication/326079761_Digital_Chain_of_Custody
https://zythom.blogspot.com/2010/04/chain-of-custody.html
https://www.symantec.com/connect/fr/articles/field-guide-part-one
Evidence Collection
https://oag.ca.gov/sites/all/files/agweb/pdfs/cci/reference/evidence_collection.pdf
https://www.forensicmag.com/article/2013/02/properly-packaging-evidence
https://ec.europa.eu/anti-fraud/sites/antifraud/files/guidelines_en.pdf
B: Identification
http://blog.cipher.com/5-helpful-incident-response-checklists
Search a machine
https://www.sans.org/security-resources/posters/windows-forensic-analysis/170/download
https://www.ssi.gouv.fr/uploads/2019/01/anssi-coriin_2019-analysis_amcache.pdf
Amcache and Shimcache in forensic analysis
https://support.mozilla.org/en-US/kb/profiles-where-firefox-stores-user-data
Google Chrome Forensic Analysis: An Ultimate Path For Evidence Collection
https://cyberforensicator.com/2017/02/07/windows-10-forensics/