Make Your Own Custom OSINT Bookmarklets (p1)
Learn how to build your own custom OSINT bookmarklet tools with this how-to guide and sample code!


Bookmarklets are small snippets of Javascript code that can be placed in the “Location” section of a traditional bookmark. When utilized, rather than navigating to a favorite website, these bits of code will execute tasks within the browser. Bookmarklets can be used in lots of useful ways, to manipulate source code, pull hidden information from a page, or automate multiple queries all at once.
While there are numerous OSINT tools out there in the form of browser extensions or add-ons, there are many reasons I prefer to employ bookmarklets instead. Primarily, such bookmarklets are quick to code and debug as they usually only contain a few lines of code. Unlike more complicated extensions and add-ons, which may only be available for a specific browser, bookmarklets tend to be compatible across multiple browsers (with some exceptions). Additionally, while browser extensions tend to be blocked by production systems I’ve used I have successfully been able to run most bookmarklets on these same machines with little issue.
Extracting Information from Source Code
I often find myself creating bookmarklets to extract “hidden” information from a social media site or webpage. In most examples the sought after information is available to view within the source code but is often not visible on the display page and while finding this information is trivial for the average programmer or cyber investigator, it might present a challenge to someone new to this type of OSINT.
Additionally, manually inspecting this information on numerous accounts would quickly become tiresome when having to inspect the source and navigate to the code for every piece of target information. Instead, we can create a bookmarklet that will take all of the source code and parse it for us to quickly display only the specific targeted information we need. We can also then share this snippet of code with others so they too can quickly put it to good use in their own OSINT investigations.
Case Example: Reddit Full Profile Photo

We will be using the /u/reddit user in order to walk through how to extract targeted information from a page’s source code. When building this type of bookmarklet, the first thing we need to do is identify what information it is we want to extract. For example, on a Reddit user’s profile, investigators are only shown a small, compressed, photo of the user’s profile photo by default. While this might be enough for some photos, chances are you will want to check out the largest size photo possible in order to inspect some of the smaller details.
Once we’ve established what information we want to try and extract, in our case the full-size profile photo, we need to verify that it exists somewhere in the page source. This can be done by right-clicking on the webpage and clicking “View Source”, “View Page Source” or other similar option depending on your browser of choice.
Searching through many lines of code to find what you’re looking for is an art in and of itself. Try keywords that might be used to describe what you are looking for. I used “Profile”, “photo”, and eventually “avatar” to find the below lines of code which appears to show the URL to the full-size profile photo.

Once you find what information you want to extract, you will need to find the text that immediately appears before and after the target text and write it down. Using this information we will take the below template to craft our bookmarklet.
javascript:
var html = document.documentElement.innerHTML;
var subhtml = html.split('$leftlimittext’)[1];
var output = subhtml.split('$rightlimittext’)[0];
alert(output)
javascript:
This line should always be first in every bookmarklet. It will tell the browser to execute the Javascript code that follows and will not work if it is missing. You will not change this line.
var html = document.documentElement.innerHTML;
This line is responsible for obtaining the page source of the current window and then assigning that source code to a variable called “html”. You will not change this line.
var subhtml = html.split('$leftlimittext’)[1];
This line is responsible for taking our source code (saved in the html variable) and parsing it for us using the text that appears immediately before our target code as a marker. After splitting the source code stored in the html variable it saves everything AFTER, but not including, our left limit text to a new variable called “subhtml”. The 1 in brackets is what is used to determine that we want everything after the left limit text.
var output = subhtml.split('$rightlimittext’)[0];
This line is responsible for taking our remaining source code, which now only contains everything after our left limit text, and parsing it for us once again using our right limit text. This time it splits our remaining source code up to, but not including, our right limit text so that all that remains is our target text. It then saves the remaining target text into the variable “output” The 0 in brackets is what is used to determine that we want everything before our right limit text.
alert(output)
This line creates an alert pop-up and displays the target text which we have saved in the output variable.
Now that we understand what each line does, let’s create our new bookmarklet using the template. Using our above code I have marked what our left limit text, targeted text, and right limit texts are.

Next, we will plug the left and right limit text information into our template to get the following code (changes in bold):
javascript:
var html = document.documentElement.innerHTML;
var subhtml = html.split('og:image" content=")[1];
var output = subhtml.split('”’)[0];
alert(output);
Now we take the above code and create a new bookmark in our browser.
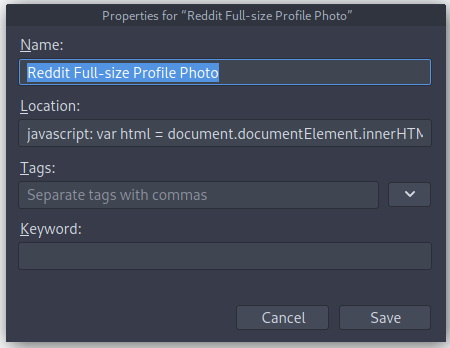
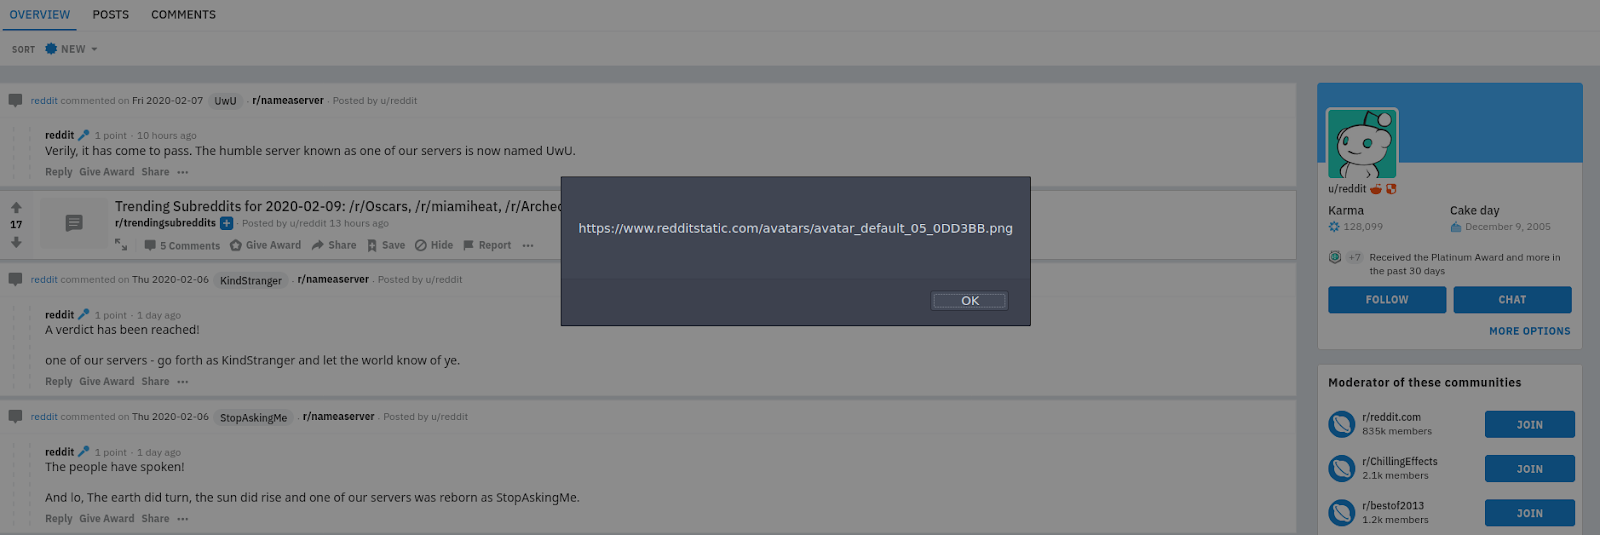
Name will be what you decide to call the bookmarklet tool. This is the text that will appear in your bookmark bar. Location is usually where your URL to your favorite pages go, instead we are going to paste the entirety of our above code into this box. Click save and the new bookmarklet tool is ready to go! Now, once we navigate back to the /u/reddit profile and click our newly created bookmark the following alert will appear.
Now if we were only extracting text then we could end this bookmarklet tool here. However with an image URL we will want to view the image itself rather than just the URL to it. (Although we could simply copy and paste the URL, we want to automate as many steps as possible.) So let’s modify our bookmarklet to automatically open the image URL in the same tab rather than display the URL in an alert. We can do so by replacing the final line of code (alert(output);) with the following:
window.open(output,"_self");
This line takes the full-size profile photo URL saved in the output variable and opens it in the same browser tab you are currently on. Now when we activate our bookmarklet tool we no longer get the alert, instead we are shown the below full-size photo in the same tab.

Conclusion
The above code example can be modified to pull numerous other types of information from source code, such as the direct video download link, Youtube video thumbnails, or uncropped photos or metadata that are not shown on the webpage by default. Now that you have some of the basics down, you should have little issue in building your very first bookmarklet tools for OSINT gathering. For ideas, be sure to take a look at some of the sample bookmarklet tools on my Github, which also contains the template bookmarklet code we used in this article.
Keep an eye out for part II of this guide which will walk you through the creation of another common bookmarklet tool: running multiple queries. As always, should you have any questions please feel free to reach out to me on Twitter.