Running Kali Linux On Windows Without A Hypervisor Using WSL2
How to set up Kali Linux on Windows 10 without a Hypervisor.


Welcome to my quick guide for setting up Kali Linux on Windows 10 without using a Hypervisor. Yes, you heard it right, Windows got a new feature known as WSL (Windows subsystem For Linux) which allows you to run Linux distributions alongside your windows Desktop. In this instance, we are going to use WSL2 to achieve our goal. We are using WSL2 because it leverages virtualization technology.
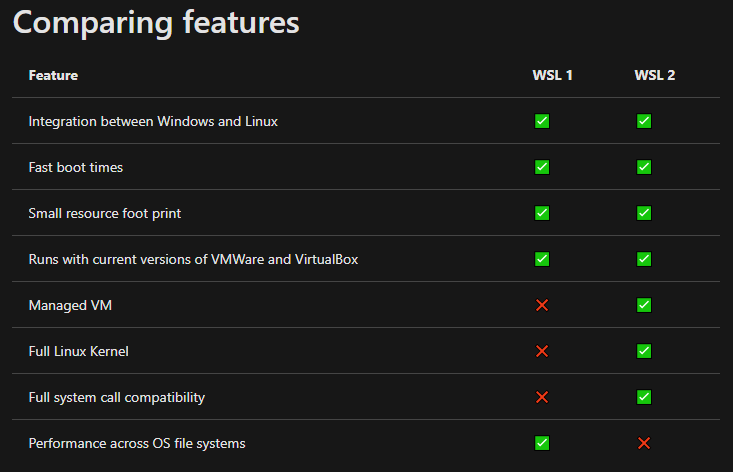
Some of the features can be compared as seen below:
Enough of the talk, let’s dive right into setting up our Kali Linux Distribution on our Windows 10 machine. There are some prerequisites to qualify for the smooth running and installation of WSL2. Type winver in your start menu to know your Windows version and build. It must match the version as seen below
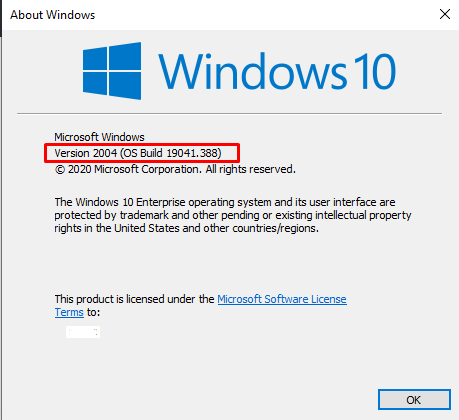
If you don’t have the above version update Windows.
Getting Started
Let’s get started with the installation. Follow the commands below to start the process:
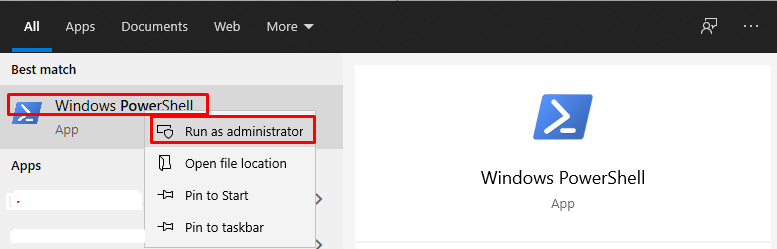
- Navigate to Start menu and run Windows PowerShell as an administrator.
2. Type the following command in the PowerShell. After the command executes you will be prompted for a system restart, go ahead and perform a restart.
Enable-WindowsOptionalFeature -Online -FeatureName Microsoft-Windows-Subsystem-Linux

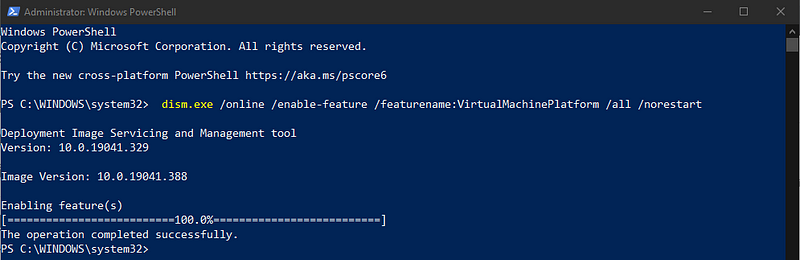
3. After the restart, run the Windows PowerShell as an administrator again and execute the following command. This will enable the virtual machine feature.
dism.exe /online /enable-feature /featurename:VirtualMachinePlatform /all /norestart
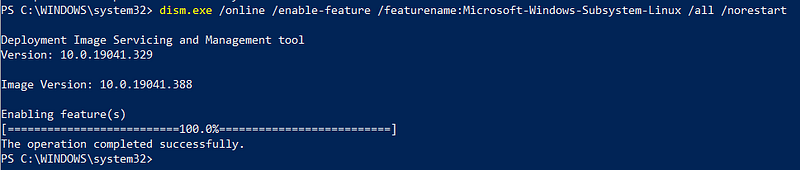
After the above command successfully executes run the below command and restart your system.
dism.exe /online /enable-feature /featurename:Microsoft-Windows-Subsystem-Linux /all /norestart
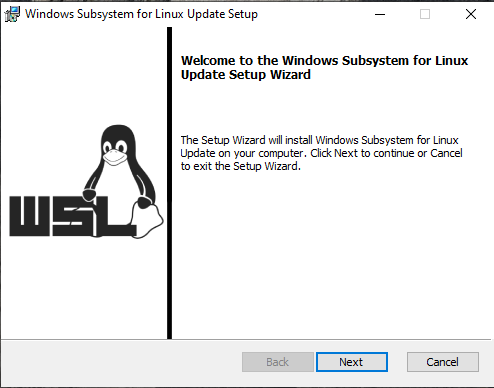
4. Now after the computer restarts, we need to update the kernel package for our WSL2. Navigate here to download and install the package.

5. After the package is installed run the Powershell again and run the following command to make sure the WSL is set to the default version 2.
wsl — set-default-version 2

Kali Linux Installation
Now we need to go to the Mircosoft store and Download kali Linux application

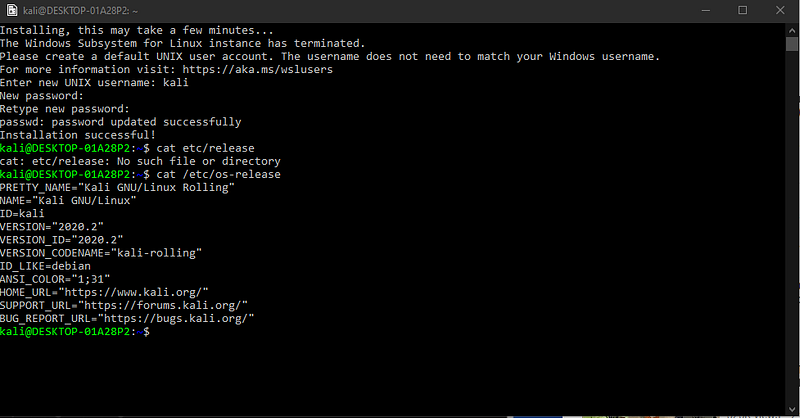
Navigate to the start menu and launch Kali Linux. As soon as you launch Kali Linux the installation process will start. You will be prompted for a username and password as seen below. For checking that you have installed the Kali Linux distribution use the command cat /etc/os-release.
Now we need to update the kali distro by using the following command
sudo apt update && sudo apt upgrade -y

Now run the command to proceed with the installation of the GUI
sudo apt install kali-desktop-xfce -y

This might take a while, so meanwhile let’s confirm if we are running kali Linux version 2 of the WSL. For this, you need to run the following command on the Powershell
wsl — list — verbose

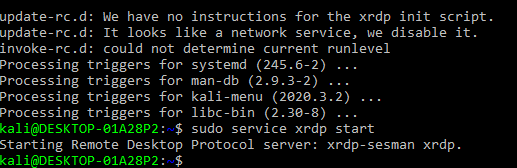
We need to run the following commands. These commands are required to enable the remote desktop. xrdp is an open-source remote desktop tool that enables the functionality of remote desktop for non-windows operating systems such as Linux.
sudo apt install xrdp -y
sudo service xrdp start
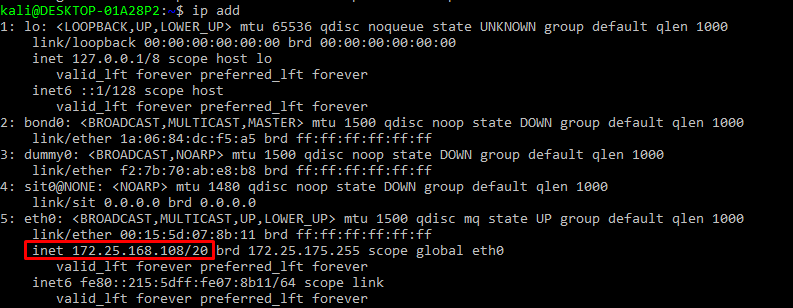
After enabling the remote desktop. Let’s check out the IP as seen below
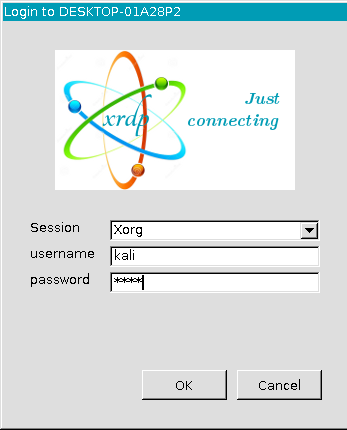
Now navigate to Windows remote desktop from the start menu and enter the IP address and connect:

You will be prompted to for a user name and password which you set at the beginning of the installation:
As soon as we hit ok, we are presented with Kali Linux as shown below.
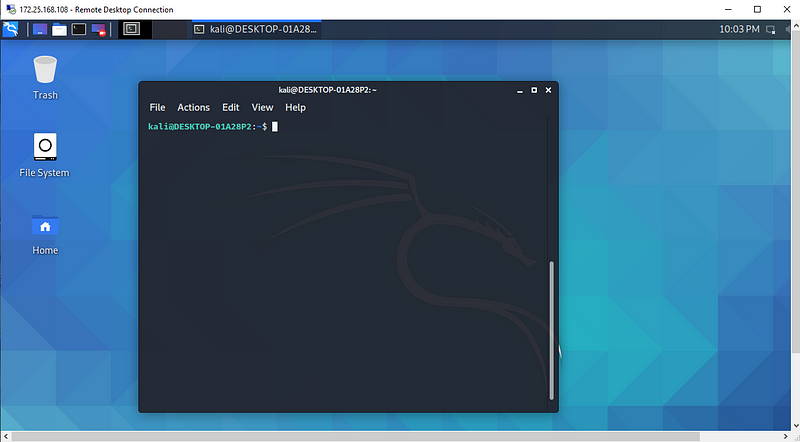
Kali Linux now runs smoothly on our windows machine. It’s very nice to have the same look and functionality on your Windows machine without installing Vmware or Virtual Box. You can also install Ubuntu or other Linux distribution the same way as we installed for Kali Linux. I hope this guide was informative for you folks.
About Me
I am a cybersecurity enthusiast pursuing my Master’s Degree in Information Security and trying to get into a full-time cybersecurity career.