Pokémon GO OSINT Techniques: Part II
In part two of Sinwindie's Pokemon OSINT series we move beyond screenshots to gather intelligence from users that you have befriended.


Pokémon Go is a very social game and regular interaction with other users is the fastest and most effective way of increasing your trainer level and catching ‘em all. User interaction can provide a host of benefits, including addition experience points (XP), the ability to find rare Pokémon outside your local area, receive invites to EX-Raids and intelligence that can only be gathered in game from 'friends'.
While Part I focused solely on screenshots, Part II will concentrate more on intelligence that can be gathered in-game from users that an investigator has befriended. There will be references to techniques and tools used in Part I, as well as some additional discussion of screenshots where applicable. If you haven’t already read through Part 1 I highly recommend that you do, check it out here.
Adding Friends
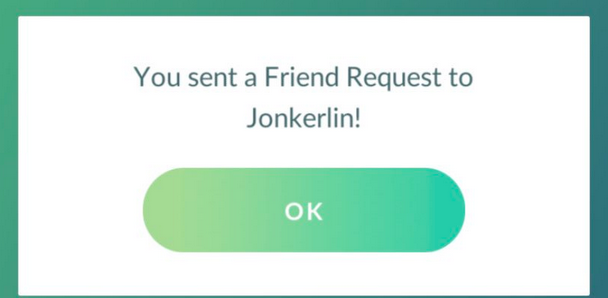
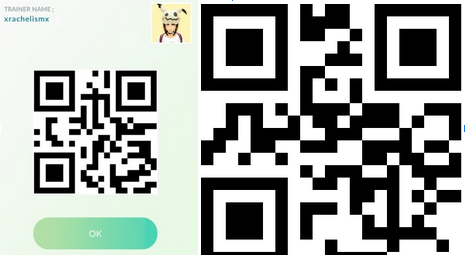
In order to interact with and view live information on a Pokémon Go trainer you must first send them a friend request in-game. This can be done by either scanning a QR code provided by the user or by manually entering their 12-digit friend code into the app. After the friend request is sent, the username of the trainer you sent the request to will appear on the screen. Be sure to screenshot this as it will allow you to begin exploiting the username without having to wait on the user to accept your request.
Once done, the user will have to accept it on the other side to complete the process. Although both friend and QR codes work in the same manner, the way in which they can be exploited differ. As an investigator may have access to only one or the other, it is important to see how to circle from one of the forms to the next to ensure that all avenues are explored.
Friend Codes
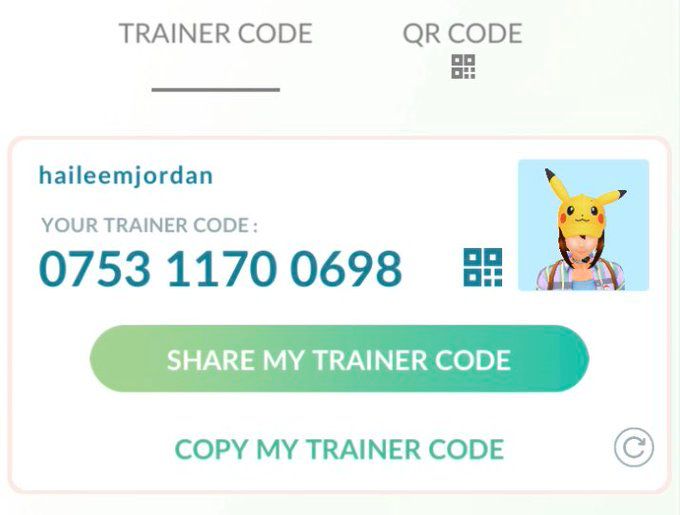
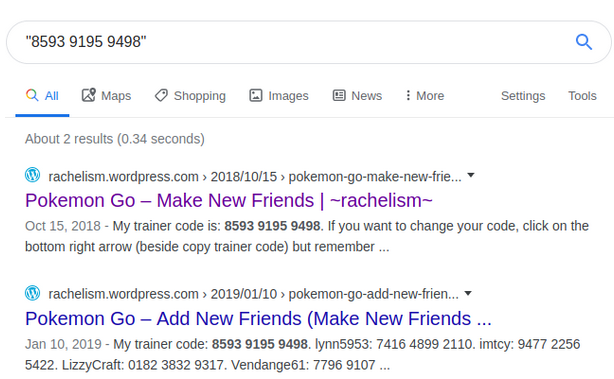
Adding a user via their friend code appears to be the most common way, as users seem to share their numerical code (either in plain text or via a screenshot) more often than their QR code. This might be due to a number of factors, including whether people are less trusting of scanning what could be a rogue QR code disguised as a friend code, or simply the fact that when retrieving your friend code in the user profile the default option is the friend code rather than the QR code. In addition to using the friend code to befriend a user, an investigator can search across the internet and social media for accounts that might have shared their friend code for others to add.
There are too many numerical trainer code databases to cover here, and the great majority of them require you to have some sort of additional info to be of much use. For example, here and here are two sites that allow you to view trainer codes, and obtain the username, but both require you to know the country or general area that the target lives in. When searching on social media and across search engines, try to note what formats are being used. Overall, I’ve had far greater luck searching for codes using the #### #### #### format over the ############ one, though this might not be the case for all databases.
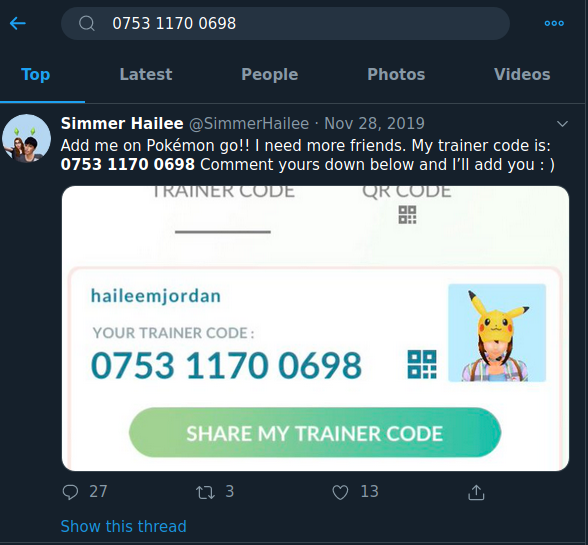
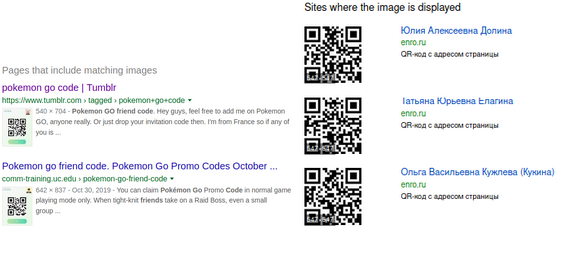
I created a quick bookmarklet tool to run the above example across Google (had little luck during testing with the other search engines), Twitter, and a subreddit for sharing Pokémon Go friend codes. These sites seemed the most consistent for finding matches. Results for Reddit were negative, however Twitter returned a post in which a Twitter user shared the trainer code in the text as well as the screenshot.
Google results for the same code returned results, and although it shows two results they are just different views of the same result (including the replies section of the tweet).
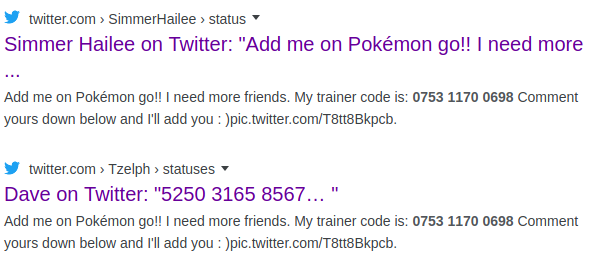
Although we did not manage to obtain a Reddit account from the trainer code, Twitter does have a great deal of additional points that could be exploited to find information on the target.
QR Codes
QR codes appear to be less common that their numerical counterparts, though they may exist in a few different flavors. Most QR codes found in the wild will appear via an in-game screenshot from the user. Some third-party websites may also generate QR codes for players to scan and quickly add a number of friends all at one time without having to search for codes. The first instance may also provide the player’s username in the screenshot, making it easier to run additional searches on the user should they not accept the friend request. QR codes from third party sites may or may not include any additional information other than the QR code, making it more difficult to know who you are adding.
QR codes are also more difficult to exploit, as although the QR code can be run through a reverse image search, the chances of it returning any matches are slim to none. This is especially true for the third-party codes that have nothing else in the image, though you should always run a reverse image search to cover all your bases. Scanning the QR code does not provide any additional information, instead the 12 digit friend code is just converted into a QR code for quick adding of friends. However, if you only have the QR code to begin with it might not be a bad idea to scan it and obtain the numeric version to search on friend code websites, search engines, or social media. There are a great number of QR readers online or via the appstore for your smartphone of choice. For Pokémon Go I am a fan of WebQR as it doesn’t require me to crop the screenshot of a user’s QR code, allowing me to upload either of the two types of commonly seen QR codes.
In an effort to gather more information on the above two examples, I ran them both through Google and Yandex reverse image search tools. Although both platforms thought they had matched the images, none of them had the same trainer as the ones uploaded.
With nothing actionable from the reverse image searches, I uploaded both of the QR codes into an online QR reader to obtain the friend codes below:

Once we have extracted the numerical friend code we can exploit it in the same manner as above by searching for the codes on websites and social media by running both codes in the #### #### #### format . The first example hit on a website that appears to be owned by the player tied to the account via the QR code. This site offers a good deal of additional information such as a username and a large amount of additional screenshots over time from their Pokémon Go account.
Our second friend code hit on only the same website we started with, and did not offer any more additional information.
Username
The username is going to be one of the most commonly utilized points of exploitation for Pokémon GO users. A player’s username might be one that they share across a number of platforms and may be exploited to find additional sites that may or may not contain additional information such as their name, general location, etc. The account’s username may appear on screenshots, however if a screenshot is old it is possible that the user has since changed their username. Therefore I highly recommend pulling the username from recent interactions or from the friends list when possible. Once you’ve added an account, you can view the friend’s username at any time in your friendslist as well as on any gifts that they send to your account.
Usernames can be searched across search engines such as Google, Yandex, Bing, or using specialized tools such as SULTAN, Namechk, etc. I also highly recommend searching usernames on Pokémon Go specific websites such as here or here. Using a combination of these tools should catch the most frequent websites. I also want to point out that a Pokémon Go player’s username in-game is in a sans-serif font which makes it difficult to distinguish an uppercase “i” from a lowercase “L”. When in doubt, try both combinations. Also be sure to look at any clues that might appear in the username in terms of names, important dates, or locations.
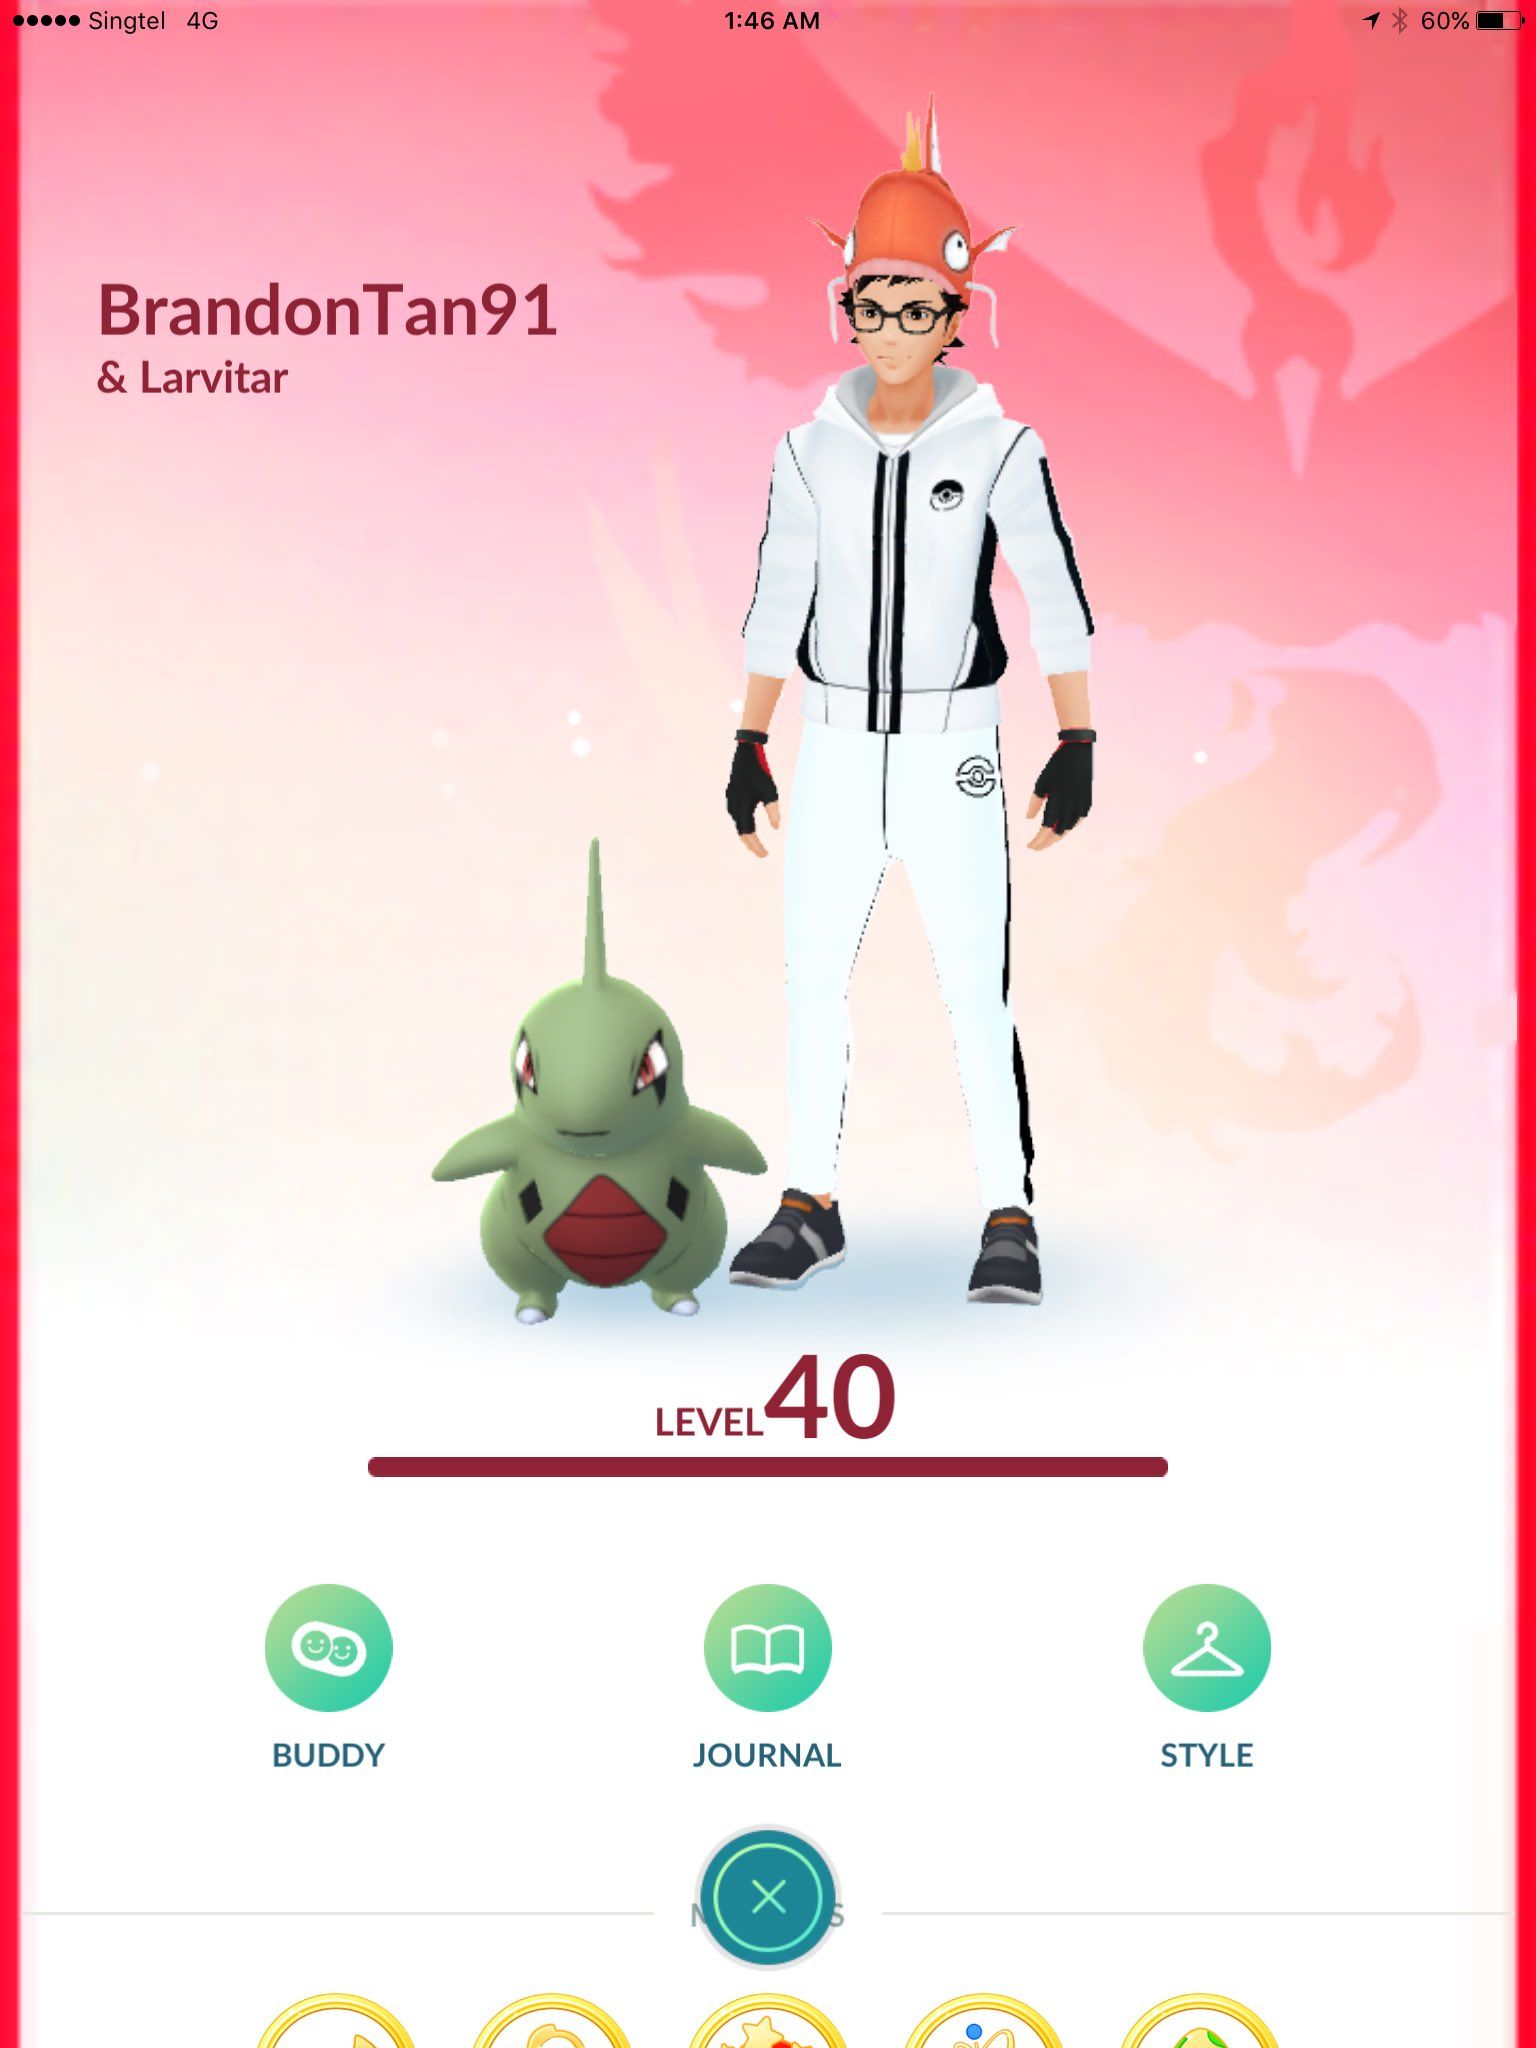
The above photo is a great example of how powerful a common username can be for finding additional accounts. The user (BrandonTan91) has the same username reserved on a number of websites. Running the username through SULTAN returns a number of social media sites, including high-value ones such as Twitter, Youtube, and Instagram, among others.
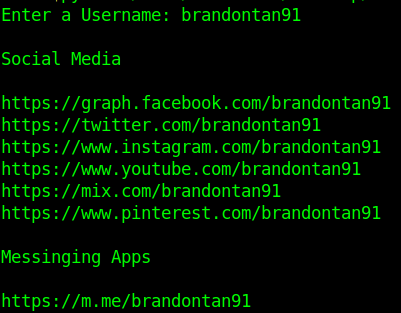
Finally, looking at the username we can also make a confident guess that the user’s real name is likely Brandon Tan, and they possibly were born in 1991.
Recent Activity

Once a player has been befriended in-game, they will appear under the friends tab of your profile. From here the user can quickly see how recently a friend was active, if they have been sent a gift from the user, or click on an individual to see their trainer profile which contains additional exploitable information. The recent activity section can be helpful for seeing how long ago a friend has captured a Pokémon (unless they disabled this feature) or approximately when they sent your account a gift. Unfortunately the times displayed for these occurrences only show the options of “Today”, “Yesterday” and “2+ days ago” making it difficult to know the exact date if they have not been viewed for awhile. Be sure to note any regional Pokémon that might give you an insight on where the user current is located (unless the user is spoofing their location). The date the user sent you a gift might also assist in mapping out their weekly routine.
The above users on the friends list show two users which sent the account a gift 2+ days ago, as well as two other users that caught Pokémon the same day as the screenshot. Although we can state that the two users with the caught Pokémon played today, the gifts do not provide us with much information. However, if the user were to open the gift, these accounts would display the last Pokémon they caught (if enabled), which might provide additional information. Noting the friendship levels of these accounts, it is likely that they are rather active, as they have managed to build up their friendship level a considerable amount by interacting with the owner of the account.
Team
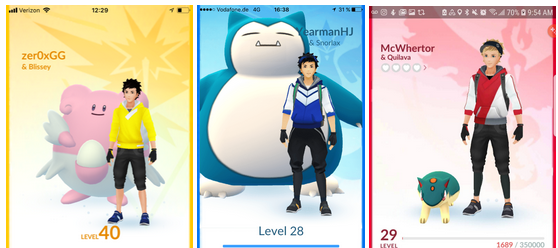
Players are able to choose one of three different in-game teams to support. Team affiliation will affect what gyms players can battle or place their own Pokémon in to defend against other teams. A user’s team affiliation can be seen in their trainer profile and include: Team Instinct (Yellow), Team Mystic (Blue) and Team Valor (Red). As team affiliation heavily affects gameplay, users may join Discord, Facebook, or other social media groups dedicated to their specific teams to coordinate with one another. Knowing a player’s team affiliation may assist in narrowing down a pool of users on a Discord group or in person. Although many users do not represent their team in such an extreme way, there are indeed users that may have apparel or other accessories with their team logo on it that they like to wear during playtime or special events. Investigators might also see a player’s team affiliation in various screenshots from a target. Although it is possible for a player to change their team affiliation, it does cost in-game currency to do so. For this reason it is suggested to pull the team affiliation information from a player’s profile after they have been befriended to ensure it is the most up-to-date.
The above examples show an example of what players from all three teams look like, from left to right: Team Instinct, Team Mystic, and Team Valor.
Buddy Name
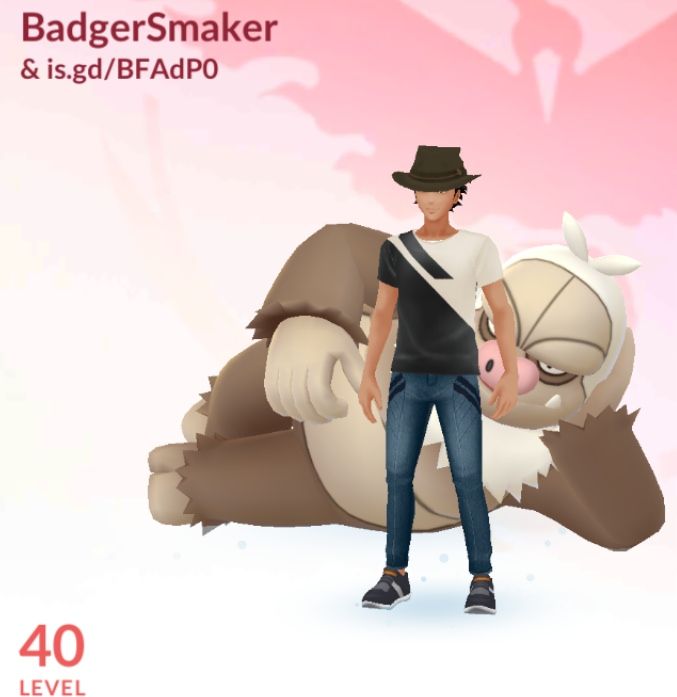
Players may choose a Pokémon they previously captured to be their buddy, which provides them with additional features with that specific Pokémon. This includes various buddy mini-games as well as the ability to see the buddy on the overworld map with the user as well as on their profile. Like all Pokémon the user may assign their buddy a nickname. However buddy Pokémon are a unique case as being present on the user’s profile means that their nicknames are visible to other players that have befriended the account. Although the buddy name is likely to contain little to no actionable data, or may just be the Pokémon’s actual name, there has been discussion on Reddit and other online communities on ways to utilize the buddy nickname for communication (as Pokémon Go currently lacks any in-game communication methods). For those interested, such discussions can be found here, here, and here.
Our above example shows what appears to be a shortened URL used for the buddy nickname. Taking this URL we can utilize one of many URL expanders to check the actual link to where the URL redirects to before entering it into our browser. Utilizing GetlinkInfo we are able to see that it appears to redirect to a Pokémon Go Facebook group page.
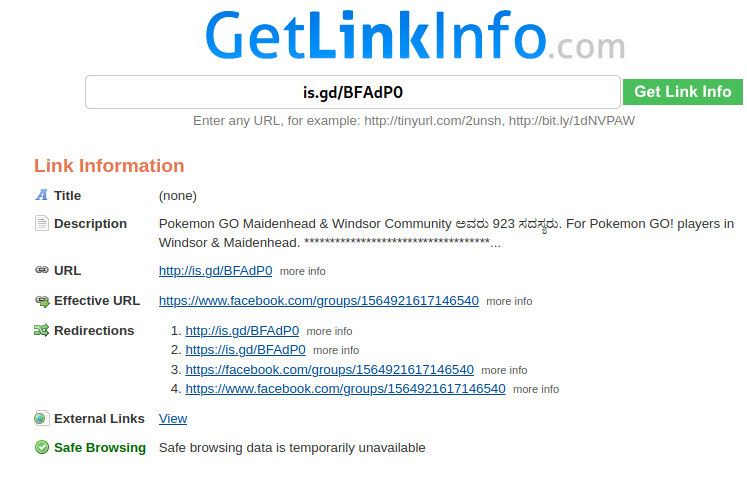
Now that we are aware that the URL lands on a legitimate website, we can navigate to the URL in the results above to view the Facebook page directly and bypass all of the redirects.

From here we can see the Facebook Group is targeted to players in a local area of England. Knowing this information we can make an educated guess that the user with the buddy above is likely in this area of the country quite often and/or likely lives there or nearby. It also allows an investigator to narrow down their list of potential targets by also looking through the users that are within this Facebook group.
Total Activity
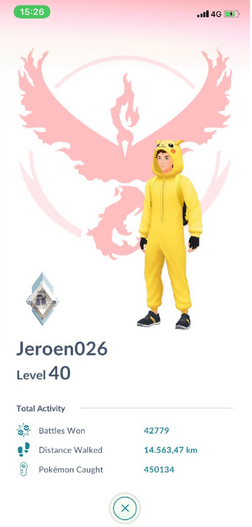
A user’s profile will also display their total in-game activity. Although this does not offer a great deal of actionable information it does assist in building pattern of life on the user regarding how often they play the game. Among the trainer level and username, this section will display the total battles won by the user, their total distance walked since starting the game, as well as the total number of Pokémon they have captured.
Our above example shows a user that has invested a great deal of time and walking into the game. We can see that they are likely more than a casual player based on their trainer level as well as their overall number of Pokémon caught and total distance walked. Finally, it seems that the user has participated in a large number of trainer battles. Coordinating a trainer battle might be a potential avenue for interacting with the user or requesting a meet-up.
Gifts
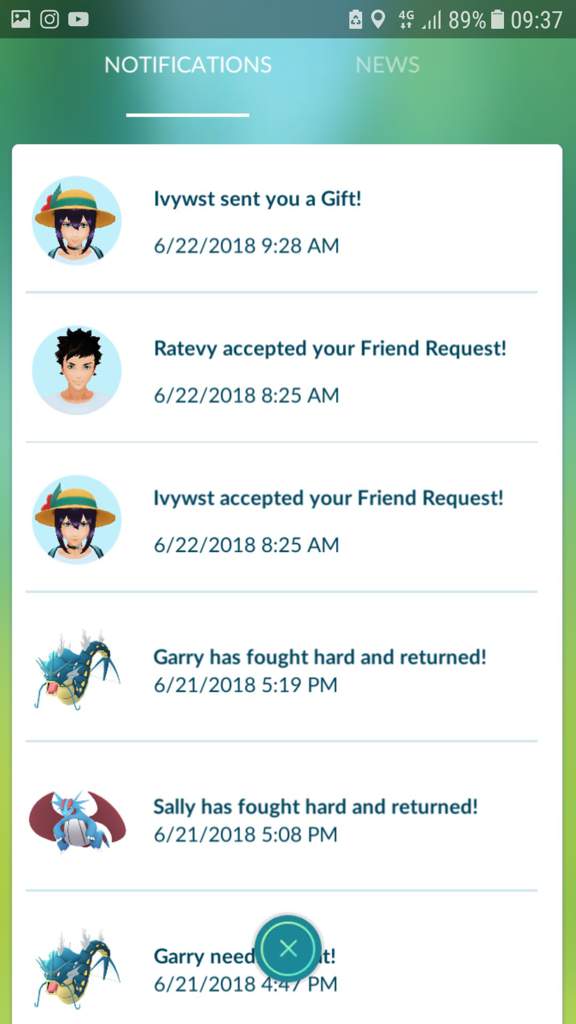
Players can send gifts to their in-game friends that will provide them with additional items and XP. This will appear as a gift box to the right of the friend’s username under the friends list. Clicking on that user will open the user’s profile and the gift screen will open as well. Similar to Pokéstops and gyms, these gifts contain point-of-interest information that corresponds to the location in which the user originally obtained the gift. Much like we did with the gym badges in Part I, we can use the timing of each gift received to map out a possible walking route from the sender by using the timestamps of when the gift(s) were sent via the in-game notifications screen such as in the above photo. Be advised that the timestamps are when the gifts were sent, not when they were obtained by the sender. Users may hold on to gifts and send them in any order they wish.
When clicking on a gift via the sender’s profile, a screen similar to the following will open:
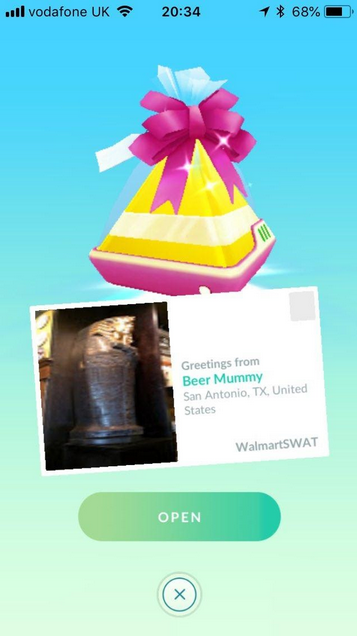
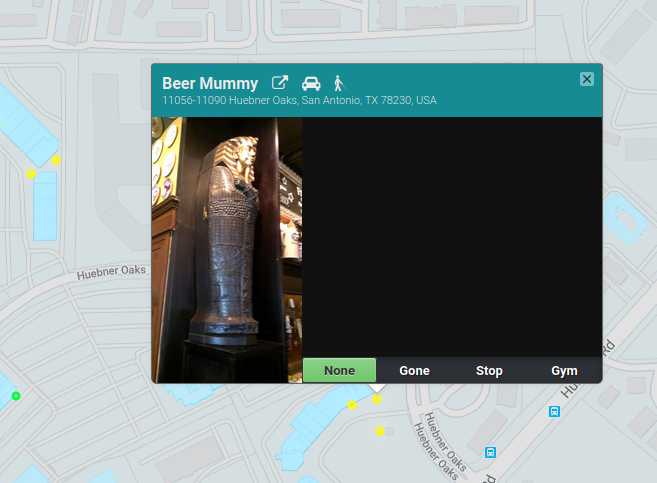
This screen will give you a great deal of information on where the user obtained the gift. The gift’s title will give some indication of what point-of-interest the gift was received from. As these titles are user-submitted, their accuracy may vary from one gift to the next. Directly below the title is the location of the gift. This will be useful for pegging a starting point on Pokélytics or OpenStreetMaps. Finally, there is a thumbnail photo of the point-of-interest submitted by users. This thumbnail can be reverse image searched, however depending on the point-of-interest and the quality of the photo thumbnail it may provide little to no results. Although the above screen provides a great deal of information, an investigator can obtain additional info by clicking on the postcard image. This will open a second screen which will look similar to the one below:
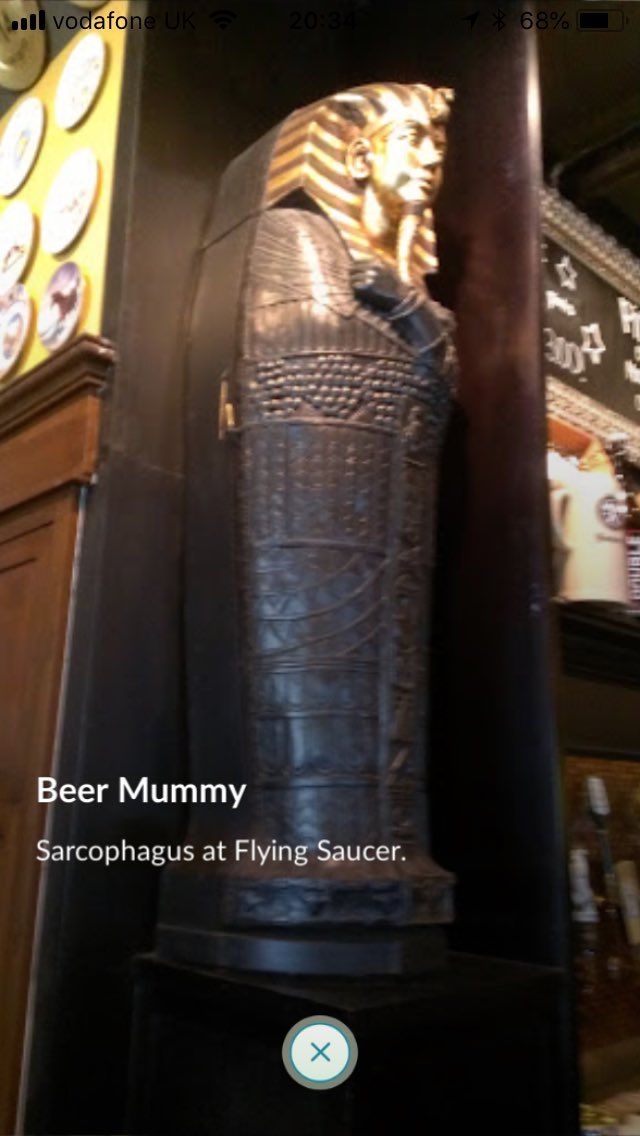
This new image includes the same title as the initial view, however it provides a much higher resolution photo of the point-of-interest than the original thumbnail. Additionally, there is a short description added below the title which may assist in further narrowing down our location.
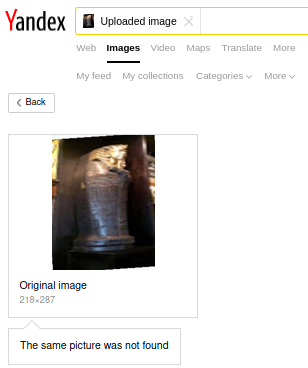
Looking at the initial gift screen above, we can crop the photo to only include the thumbnail of the point-of-interest and run it through a reverse image search. Both Yandex and Google failed to find the same image.
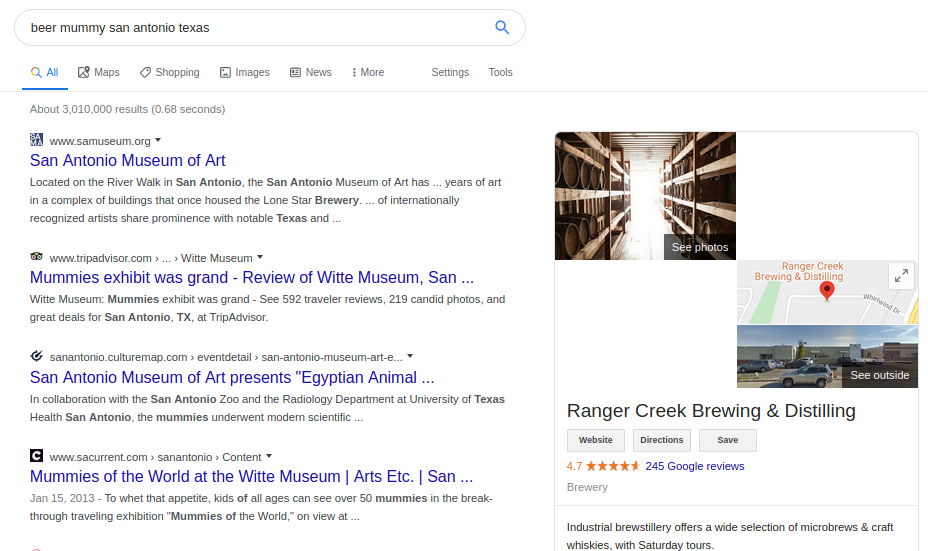
Next, I attempted to find the location by looking for “Beer Mummy” and “San Antonio Texas”. Unfortunately, there appear to be many results that did not appear to match up to our original photo.
Without much to go on for the initial view, let’s add in some of the information from the second view. First off, I ran the larger image through Yandex and Google once again. Unfortunately, same as with the thumbnail, none of the reverse image search tools were able to locate a match. However, Google has attempted to identify what is in the photo as an “antique”.
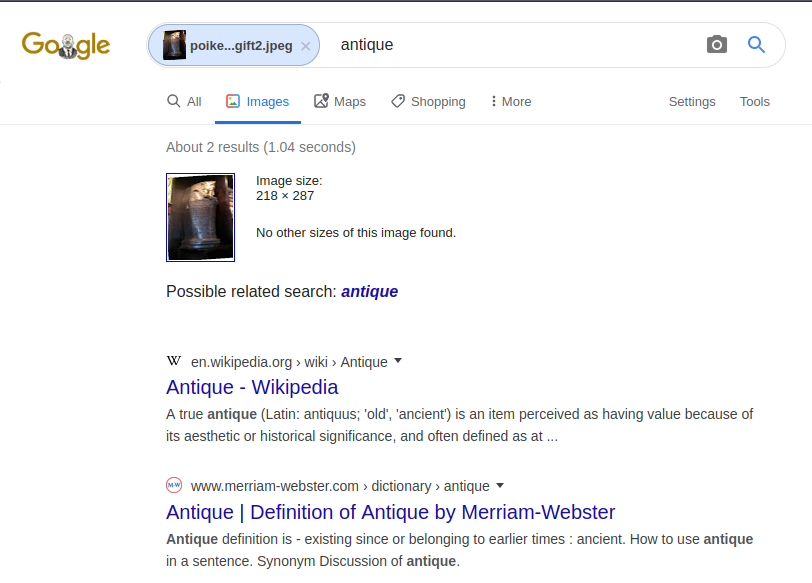
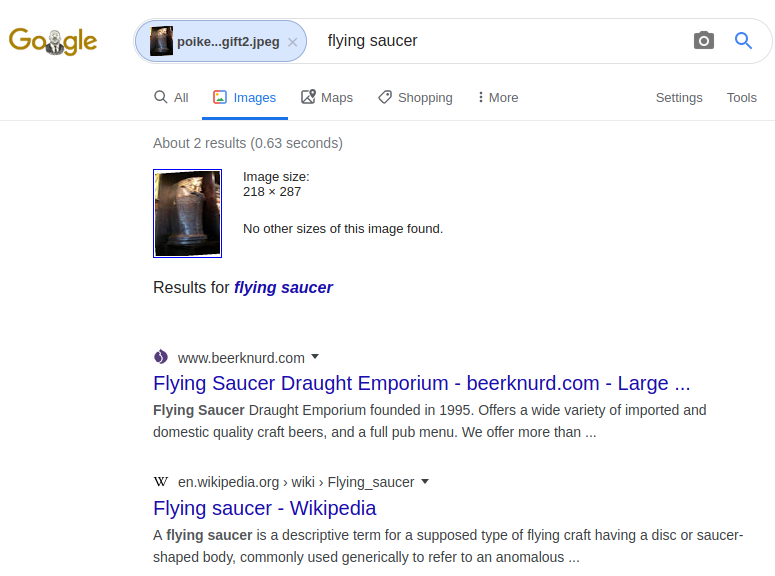
While this identification is not wrong, it doesn’t help much in narrowing down our results to find the location where this gift came from. Perhaps we can modify this keyword to include our additional information from the second screen to include “Flying Saucer”, where the photo was purportedly taken. Doing so gave us new results, the first of which mentions a “Flying Saucer Draught Emporium”.
We can cross-reference this possible location by an additional Google image search and can confirm that it is indeed the location we are looking for.
This trick does not work for everything but is always worth a shot. Had this not worked, the next step would be to attempt to locate the establishment via Google Dorking. Now that we believe we have the right location we can confirm it via Pokélytics, which shows the same point-of-interest title and photo as the one we started with.
Using this location information, we can plot it on a map with a note of when the user sent it if we wished to map out a possible route.
Conclusion
Between Parts I and II of this guide you should be well on your way to extracting as much information from a Pokémon Go target as possible. Be sure to check out my Github, which includes a mapping of Pokémon Go OSINT points of exploitation as well as some bookmarks and javascript tools to help aid you in your next investigation. Should you have any OSINT-related questions, whether related to this article or any of my others, please feel free to reach out to me on Twitter.